Prusament Upcycling - Laptop Riser
prusaprinters
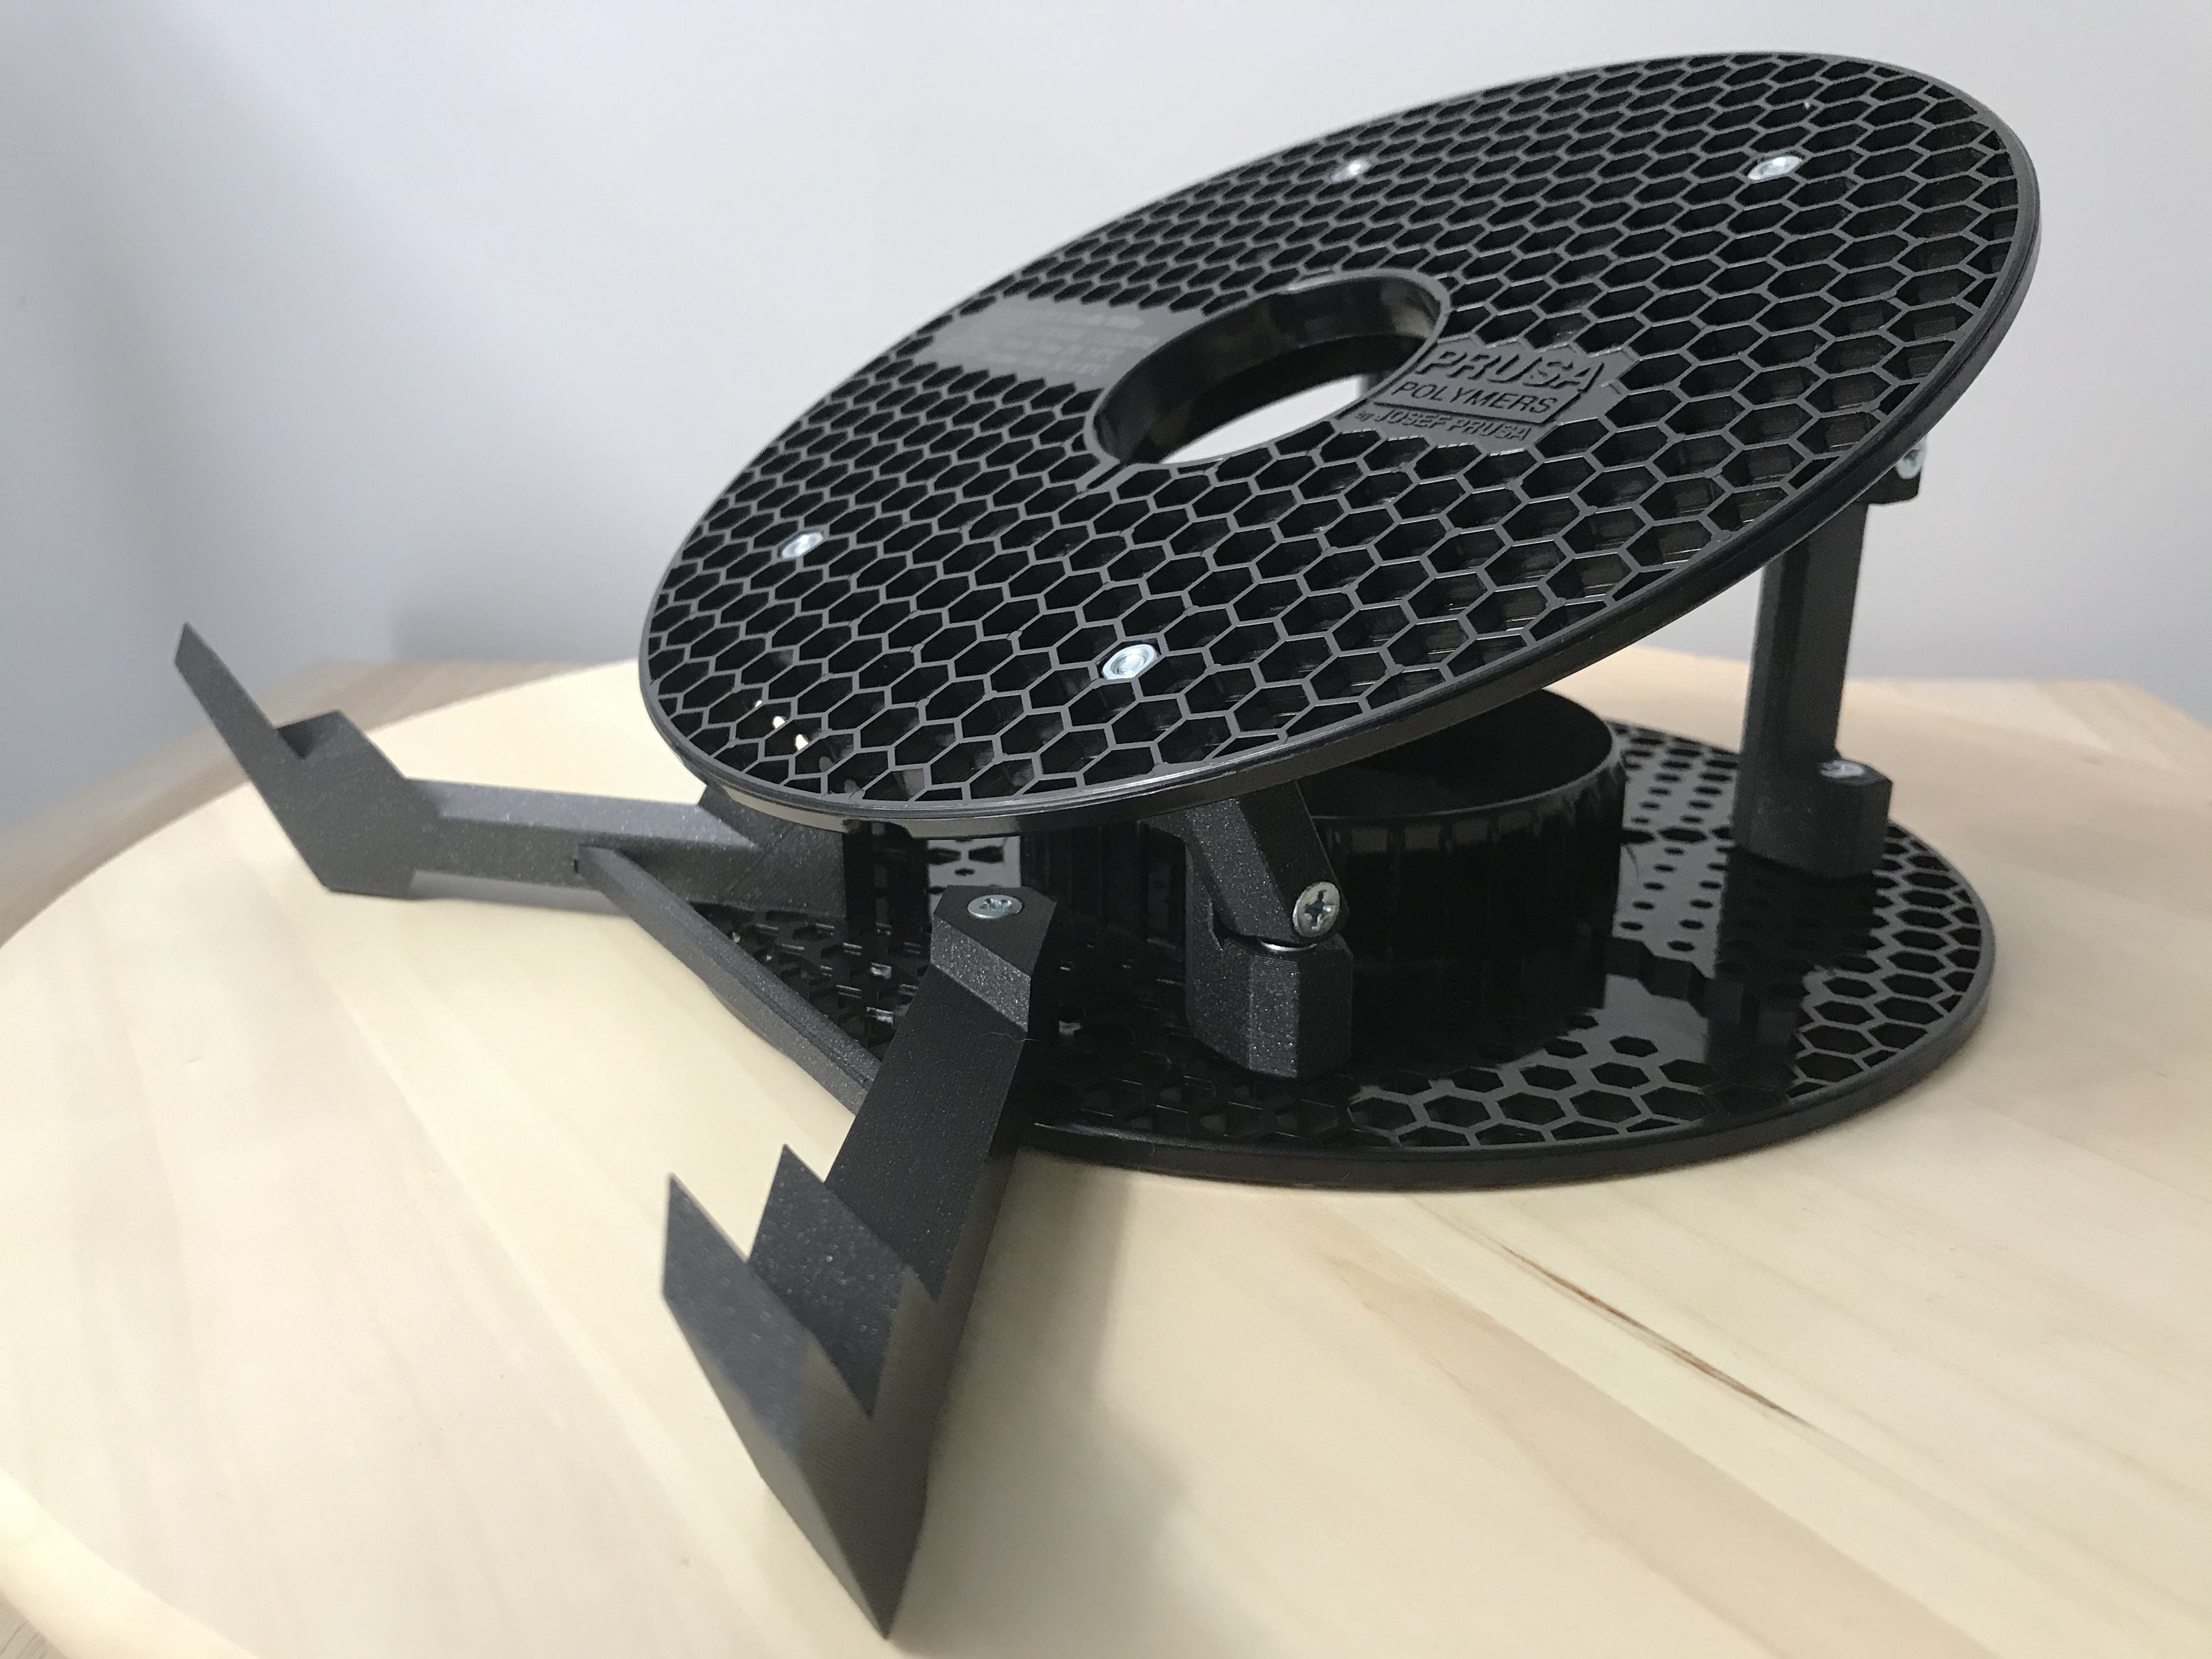
<p>As mentioned in the title, it's a Laptop Riser!</p><p>The hexagonal grid of the prusament spools makes very easy to attach some bolts and nuts to it. I was in need of a laptop riser that could release the neck pain of always looking down while working on it, so a few parts, nuts and bolts and got there pretty easy!</p><p>Here a short video of it: <a href="https://youtu.be/ptuQ-sLqS1o">https://youtu.be/ptuQ-sLqS1o</a></p><p>The print is designed to be printed with no supports, the parts are named A or B because some are mirror of the others.</p><p>You will need M4-20mm bolts and nuts (14 of each).</p><p>For assembly I attached some explanatory pictures of how should the nuts and pieces be placed. The pieces that have the hexagonal hole for the nut are the ones that should be attached to the bottom, as well as the holder itself.</p><p>The bolt holes are designed for countersunk bolt heads, altough you can get away with non countersunk bolts for all but the front two lower legs.</p><p>The short piece that connects both holders is not completelly necessary if your laptop weight is light, in my case after first test those pieces were going together due to the weight of the laptop, so that simple piece keeps them in the proper separation and doesnt need any glue.</p><p>The G-Code I included is printed with a bit low temperature because I was getting some stringing with my galaxy black prusament.</p><p>Hope you find it useful and like it.</p><h3>Print instructions</h3><p>It is so easy to print, no supports, 0.2 layer height and 15% infill is enough.</p>
With this file you will be able to print Prusament Upcycling - Laptop Riser with your 3D printer. Click on the button and save the file on your computer to work, edit or customize your design. You can also find more 3D designs for printers on Prusament Upcycling - Laptop Riser.