PrusaSlicer Rotation Indicator
prusaprinters
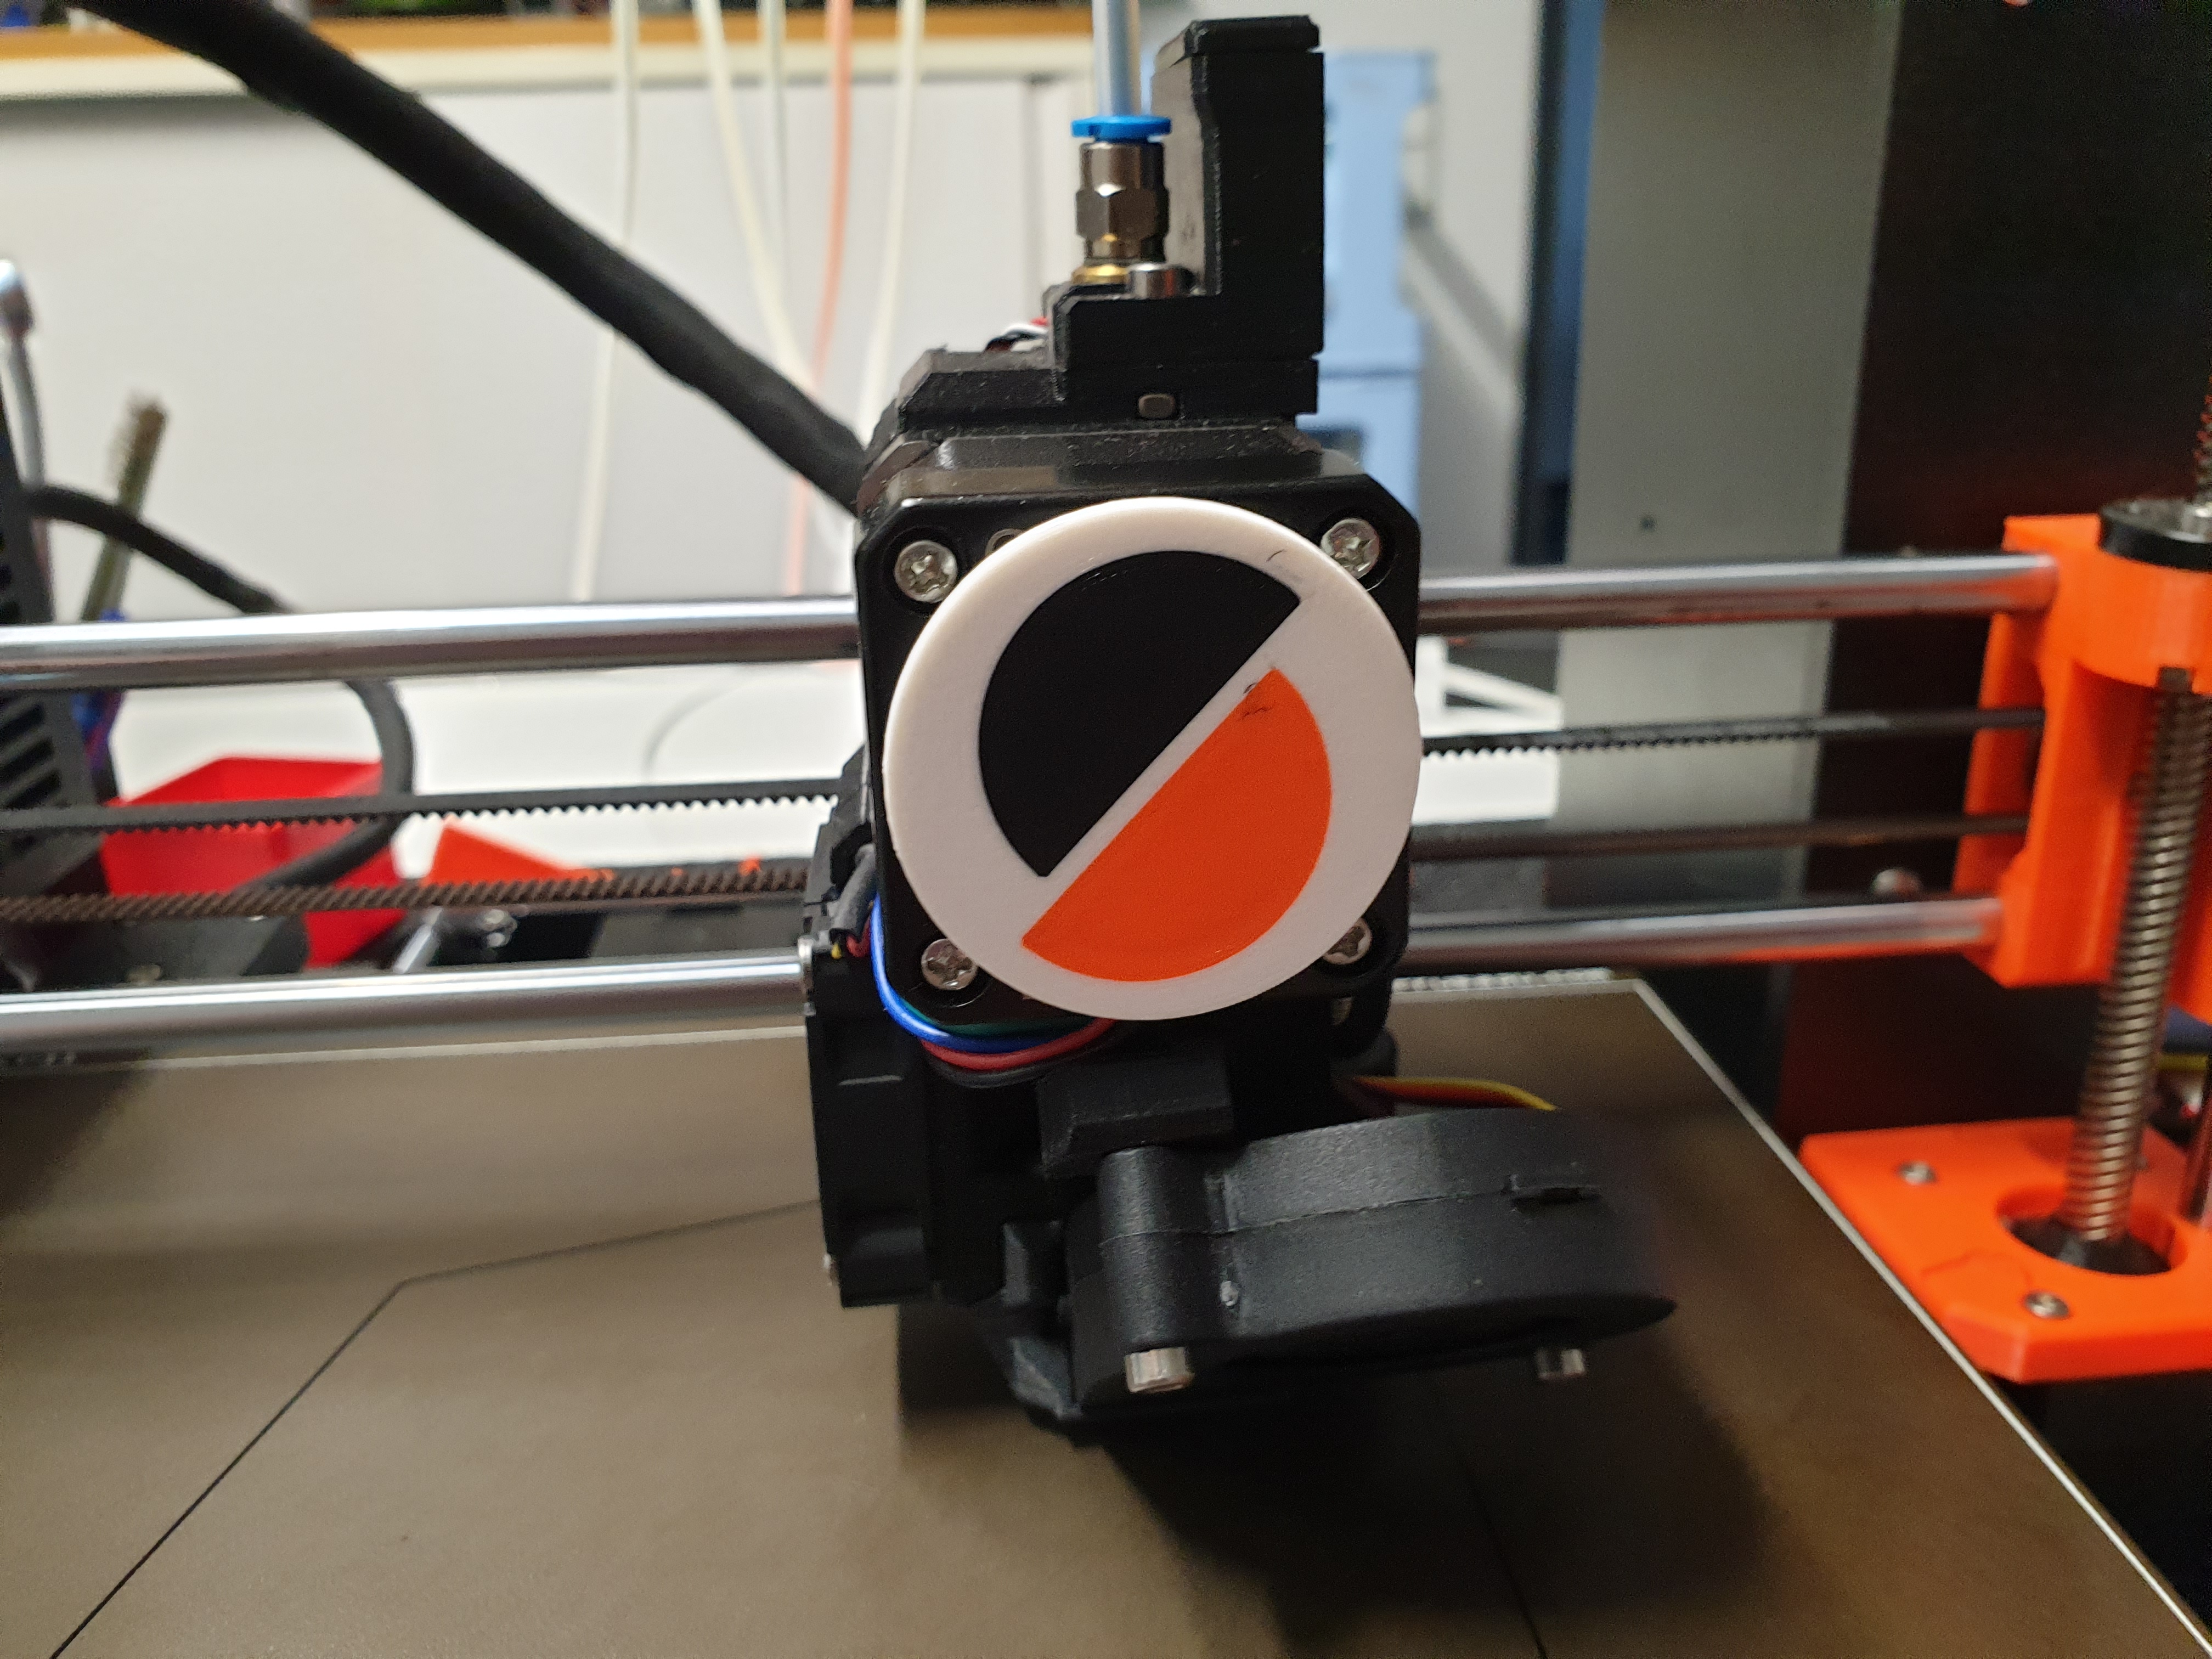
<p>I always thought the PrusaSlicer logo would make a nice extruder/stepper motor indicator. So I created one while experimenting with <a href="https://www.freecadweb.org/">FreeCAD</a>.</p><p>In case you don't know what these are, check out Mikolas Zuza's blog article on <a href="https://blog.prusaprinters.org/visualize-extruder-motor-movements_7392/">How to visualise extruder motor movements</a> on <a href="prusaprinters.org">prusaprinters.org</a>.</p><p>This is also a nice object to demonstrate that you don't have to do layer based color changes or need an MMU / Palette to print objects like signs with multiple colours.</p><p><i>NOTE: This is the first iteration of this object, please let me know if you have any questions or issues in the comments.</i></p><h3>Requirements</h3><p>While PLA as material should be fine, I'd suggest to use PETG since the motors can get quite warm.</p><p>You'll need either a 6x3mm or an 8x3mm round Neodymium magnet to complete this print. Magnets thicker than 3mm might work, but the indicator will stick out quite a bit from the motor.</p><p>For magnets with 8mm diameter you need some kind of super glue. 6mm magnets can be used without.</p><h3>How to print</h3><p>After loading the STL that fits your magnet, right click the object in PrusaSlicer and choose "<i>Split</i>" -> "<i>To Objects</i>".</p><p>It is important that you don't rearrange the objects after this. Since they are not parts but individual objects, they will be moved around the bed individually. You might be able to glue them together in this case, but unless you really, really want to do so I strongly suggest to not.</p><p>So you don't want your bed to look like this:</p><figure class="image"><img src="https://media.prusaprinters.org/media/prints/120235/rich_content/45ef0fad-b573-4a45-b79e-885823994e08/screenshot-2022-01-17-at-202922.png#%7B%22uuid%22%3A%22f61ad58e-2d8d-4ecf-ad6b-540189dd6241%22%2C%22w%22%3A3808%2C%22h%22%3A2254%7D"></figure><p>You can print this object with or without an MMU. The two coloured inlays are just 0.2mm layer high, so there is only three filament changes in total.</p><p>There are three methods to print an object like this with multiple colours. Please be advised that for some of the described settings you need to switch to "<i>Advanced</i>" or "<i>Expert</i>" mode in PrusaSlicer.</p><p>Suggested overall settings:</p><ul><li>0.2mm layer height</li><li>PETG as material, but PLA might be fine too</li></ul><h4>Method 1: Sequential printing</h4><p>If you don't want to mess with the settings too much, you can just print the three objects one after the other by hiding the other two for each slice. Right click on the "eye" symbol in the object list to do so.</p><p>This is possible, because the coloured inlays are only one 0.2mm layer high.</p><p>In this case you need to make sure to set "<i>Print Settings</i>" -> "<i>Skirt and brim</i>" -> "<i>Skirt</i>" -> "<i>Loops (minimum)</i>" (Advanced setting) to "<i>0</i>" or the "<i>Distance from brim/object</i>" big enough (> 30mm) to stop the skirt from being extruded over the already printed parts. Also remove each skirt and prime line before starting the next print.</p><p>Try to not have the bed cool down too much during filament changes. The parts might detach from the bed and will be shifted around during the following print.</p><h4>Method 2: Manual material changes / Virtual extruders</h4><p>This is a pretty cool method I've seen explained by <a href="https://forum.prusaprinters.org/forum/profile/951/">JoanTabb</a> in her reply in the <a href="https://forum.prusaprinters.org/forum/postid/188236/">"Manual" multicolour thread</a> on the <a href="https://forum.prusaprinters.org/">prusaprinters.org forum</a>. This explanation is heavily based on her post.</p><p>It basically makes you the Multi Material Unit. In theory you could do full multicolour prints this way, but unless you like to do thousands or so filament changes over a period of multiple days without getting any sleep, you might want to restrict this method to smaller models.</p><ol><li>In "<i>Printer settings</i>" -> "<i>General</i>" increase the number of "<i>Extruders</i>" (Expert setting) to "<i>3</i>".</li><li>In "<i>Printer settings</i>" -> "<i>Custom G-code</i>" edit the "<i>Tool change G-code</i>" so it contains only "<i>M600</i>". This is G-code that initiates a filament change procedure.</li><li>This should not be selected when you're coming from single extruder printer, but make sure that in "<i>Print Settings</i>" -> "<i>Multiple Extruders</i>" the "<i>Wipe Tower</i>" / "<i>Enable</i>" (Advanced setting) is not selected.</li><li>In "<i>Plater</i>" view select indicative colours for each Filament to represent your preferred color scheme. Make sure you select the right colours for the inlays - the original logo should be around on your desktop somewhere.</li><li>Assign each object a different extruder by right clicking on the "<i>default</i>" Extruder in the object list.</li><li>Slice the model and transfer the created G-code to your printer.</li><li>Print!</li></ol><p>The only thing to watch out for is to swap to the appropriately coloured filament each time the printer asks you to. This sounds easier than it is, but the PrusaSlicer preview can help to determine the right order.</p><p>During the print, the printer will request filament changes because of the "M600" G-code we added for tool changes. </p><p>It does so by moving the extruder to the right hand side and the Y axis to the back. The LCD module will beep and tell you to push the knob to remove the current filament. Follow the LCD prompts to unload, insert and load the next filament.</p><p>The printer will then extrude a worm cast of waste filament that should slowly change color.</p><p><strong>Resist the temptation to remove the waste now!</strong></p><p>If the filament is the right color, grip the worm cast with pliers or tweezers - or if brave, your fingers, <strong>but do not pull it off just yet</strong>. Hold it and choose "<i>yes</i>" to confirm that the filament has the correct color. The extruder will move back to the model while extruding a little more filament to re-prime the nozzle. If you did not remove the waste as I told you, it will remain attached to the worm cast that you are still holding and can <strong>now</strong> be pulled off the extruder before the printer resumes printing.</p><p>Repeat until the print is complete.</p><p><i>Tip: You can save the changed "Printer settings" as a new preset in case you want to experiment with this method a little more.</i></p><h4>Method 3: MMU, Palette or multiple extruder machines</h4><p>If you were brave enough to order an MMU2, you have probably already figured out how to do multicolour prints.</p><p>For easier handling you can use "<i>Split</i>" -> "<i>To Parts</i>" instead of "<i>To Objects</i>". In that case you can move the object around and still have all the parts at the correct position.</p><h3>Finishing</h3><p>A 6mm diameter magnet can be pressed into the slot in the back of the indicator. It should fit well enough so that the magnet doesn't pull out when you remove the indicator from the motor. If it does, a drop of glue will help.</p><p>For an 8x3mm magnet you need some kind of Super Glue to glue the magnet in place. There is an extra STL file for these bigger magnets. I strongly suggest to use pliers to put the magnet in place after you've applied the glue. Otherwise you might end up with a magnet glued to your fingers. </p><p>The magnet is then used to attach it to the steppermotor's shaft.</p><h3>Final remarks</h3><p>If you like this print, leave a like, comment or even better a picture in form of a make. It's always fun to see other people use something you've created and it is a nice acknowledgement for the work people put into their objects and descriptions.</p><p>I have uploaded the FreeCAD source and exported STEP files in case you want to modify it. Please be aware that I am just starting to play with FreeCAD, so this might not be used as example.</p>
With this file you will be able to print PrusaSlicer Rotation Indicator with your 3D printer. Click on the button and save the file on your computer to work, edit or customize your design. You can also find more 3D designs for printers on PrusaSlicer Rotation Indicator.