PS2 (Fat) Noctua Fan clip-on
prusaprinters
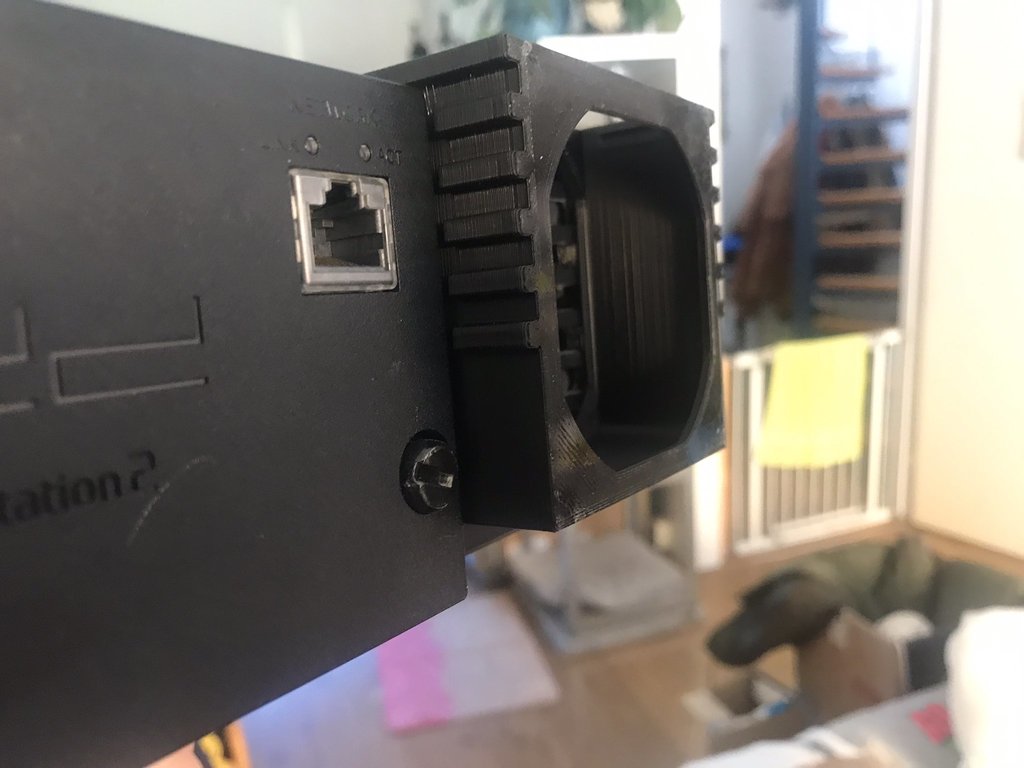
<h3> PS2 Noctua Fan housing (NF-A6x25)</h3> <h4>Information</h4> <p>I couldn't find any available, so decided to make my own.<br/> Idea had been to be as non-destructible as possible, so this one clips into the fan-grill on the back. Due to printed clips not being the most sturdy thing ever, I added 2 variants of the housing (both fit the same top lid), so you only need 1 of 2 to print!</p> <h3> PS2_Fan_Housing_pins.stl</h3> <p>This model uses pins that clamp onto the edges of the grill, when in place really difficult to get off (which is good), but they can also snap more easily (which is bad :P).</p> <h3> PS2_Fan_Housing_pressure.stl</h3> <p>This uses a little "block" to pressure fit into the space of the grill in order to stay in place.<br/> The trade-off being that it's more likely it will fall out (which is bad), but is non-destructive when it does, and can easily be put back (which is good).</p> <h4>Install</h4> <p>In order to fit this, you'll have to remove the original (and<em>very</em> noisy) fan.<br/> You'll have to fit the Noctua fan wires through the grill of the PS2 housing, and you can then solder directly to the original fan header.<br/> Optionally, and this is my preferred method, you can put some connection headers in between, for easy detachment - this makes future maintenance a lot easier!</p> <h4>Wiring</h4> <p>I used the pin header from the original fan, which is 2 wires, and the 12v PWM version from Noctua. Wiring was pretty straight forward:</p> <p><strong><em>Noctua fan</em></strong><br/> Cut green (Tacho sense wire) and make sure it can't short out anywhere.<br/> Solder (PWM signal) blue and yellow (power) together.</p> <p><strong><em>Original fan</em></strong><br/> Cut off the wires, leaving you with some headroom.<br/> Grey wire is power, and goes to yellow/blue on Noctua.<br/> Black wire is ground, and goes to black ground wire on Noctua.</p> <p><em>When soldering the wires together, and if you didn't fully disassemble and unplug the original fan, make sure to feed the noctua fan wires through the backplate before soldering things together!</em></p> <p>Enjoy!</p> <h3> Print Settings</h3> <p><strong>Printer:</strong></p> <p>Anet AM8 SKR1.3</p> <p><p class="detail-setting rafts"><strong>Rafts: </strong> <div><p>No</p></div><strong>Supports:</strong></p> <p>Yes</p> <p><p class="detail-setting resolution"><strong>Resolution: </strong> <div><p>0.2/0.3mm</p></div><strong>Infill:</strong></p> <p>25% Gyroid</p> <p><strong>Filament:</strong> 123-3d Jupiter PLA Black</p> </p></p> Category: Electronics
With this file you will be able to print PS2 (Fat) Noctua Fan clip-on with your 3D printer. Click on the button and save the file on your computer to work, edit or customize your design. You can also find more 3D designs for printers on PS2 (Fat) Noctua Fan clip-on.