PyBadge Thermal Camera - additional parts
thingiverse
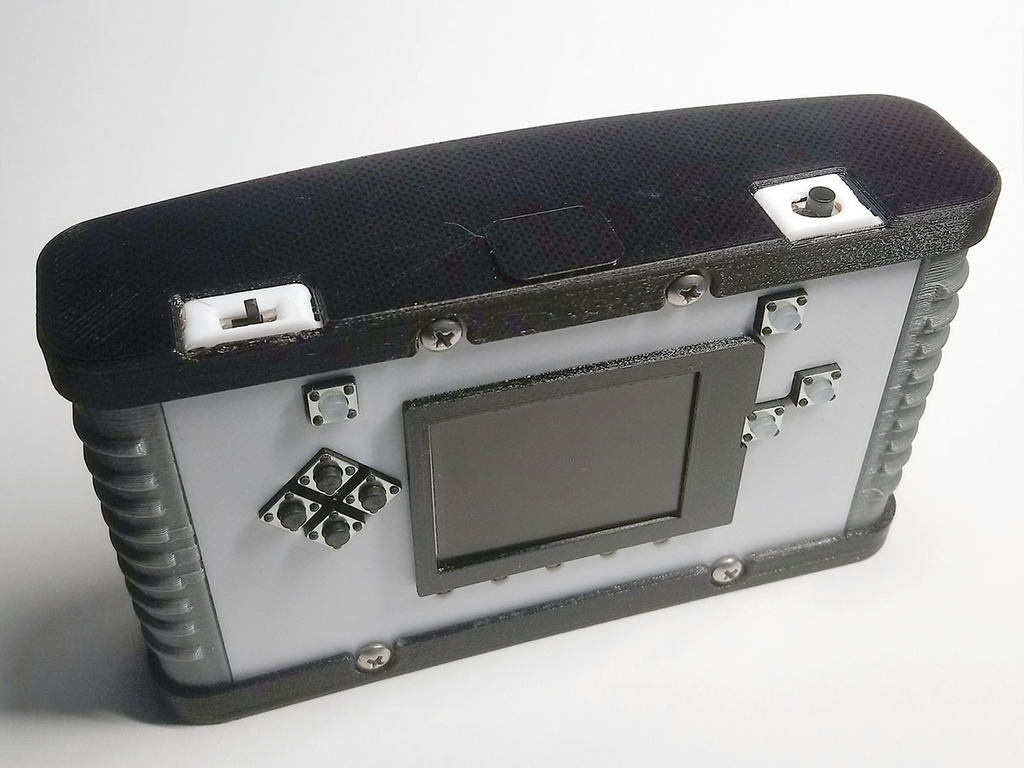
Hier einige zusätzliche Teile für die PyBadge Thermal Camera - Rahmen für Display - Halterung für die Kamera (4 Stück benötigt) - Adapter für Schiebeschalter - geändertes Stativgewinde - Rückwand angepasst (Öffnungen für die LEDs, statt einem großen Loch) - Abdeckung für Öffnung USB Kabel ZIP-Download: https://www.thingiverse.com/thing:5252236/zip Stativgewinde: es wird die Adaptermutter nicht benötigt Adapter für Schiebeschalter: Ich habe einen kleineren Schalter benutzt. Mit diesem Adapter kann man den kleineren Schalter im vorhandenen Gehäuse befestigen. Die Größe der kleinen Teile sind von den eigenen Druckeinstellungen abhängig. Hier benötigt man eventuell Probedrucke um die Skalierung für den eigenen Drucker anzupassen. Um den Reset Button zu montieren, habe ich die Halterung seitlich an der markierten Stelle aufgetrennt, den Schalter eingesetzt und die Trennstelle wieder verklebt. Der Original Adafruit Link: https://learn.adafruit.com/pybadge-thermal-camera-case/3d-printing Zur Verdrahtung: In der originalen Anleitung wird der Ein/Aus Schalter zwischen EN und GND angeschlossen. Adafruit PyBadge wird damit deaktiviert, aber die Kamera ist immer aktiv. Deshalb habe ich den 3. Kontakt des Schalters mit GND der Kamera verbunden, um die Kamera abzuschalten. Der GND von der Kamera zum Board muss aufgetrennt werden. Auf diese Art wird die Kamera durch den Schalter aktiviert. Schalter Kontakte: 1 - EN Board 2 - GND Board 3 - GND Kamera ---------- Translator: ----------- Here are some additional parts for the PyBadge Thermal Camera - Frame for display - Mount for the camera (4 pieces needed) - Adapter for slide switch - modified tripod thread - Rear panel adapted (openings for the LEDs, instead of a large hole) - Cover for opening USB cable ZIP-Download: https://www.thingiverse.com/thing:5252236/zip Tripod thread: the adapter nut is not needed Adapter for slide switch: I used a smaller switch. With this adapter you can attach the smaller switch in the existing housing. The size of the small parts depends on your own print settings. Here you may need test prints to adjust the scaling for your own printer. To mount the reset button, I separated the bracket on the side of the marked place, inserted the switch and glued the separator again. The Original Adafruit Link: https://learn.adafruit.com/pybadge-thermal-camera-case/3d-printing For wiring: In the original manual, the on/off switch is connected between EN and GND. This disables Adafruit PyBadge, but the camera is always active. That's why I connected the 3rd contact of the switch to GND of the camera to turn off the camera. The GND from the camera to the board must be separated. In this way, the camera is activated by the switch. Contacts switch: 1 - EN Board 2 - GND Board 3 - GND Camera
With this file you will be able to print PyBadge Thermal Camera - additional parts with your 3D printer. Click on the button and save the file on your computer to work, edit or customize your design. You can also find more 3D designs for printers on PyBadge Thermal Camera - additional parts.