Pythagorean Theorem Proof
thingiverse
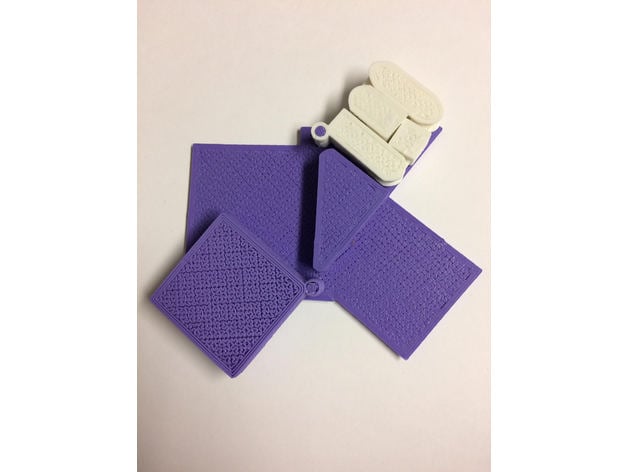
This is a demonstration of the Pythagorean Theorem's proof. The 3x3 and 4x4 boxes can be rearranged on this model to show that their areas will match the area of the 5x5 box. This allows visual learners to manipulate the theorem, making it easier for them not only to memorize the formula but also to understand its meaning. (B.B., C.F., and R.H., MAT 363 Fall '16) Citation: Our design project was inspired by mshscott's similar model. Print Settings Printer Brand: SeeMeCNC Printer: Rostock MAX Rafts: No Supports: No Notes: When printing this, it seems to be more precise in its appearance as the scale increases. The current settings will print an accurate file, but the spacing of the pieces when moved to form the 5x5 box will be visually appealing as you increase the model's size. Post-Printing Once all three files have been printed, attach the 4x4 box to its proper pole on the base piece. The same thing must be done for the 3x3 hinged piece. It is essential to remember that this model was created to make it challenging to dismantle once put together, so double-check that your pieces will swivel in the correct directions before pushing them all the way down onto your pegs as they will be very difficult to remove without breaking the pegs placed on. How I Designed This This model was created in 3 separate parts: the 4x4 box, the 3x3 box, and the base piece. 4x4 Box: To create the 4x4 box, we had to make a 4x4 cube. We then made a cylinder which we hollowed out and attached to the cube for the peg from the base piece to pass through. 3X3 Box: This piece was modeled from the file supplied in the link above. We started by making small cubes of the proper sizes, according to the example used, and then we had to build the hinges in them. To build the hinges between the pieces, we had to create small cylinders and ensure that the spacing was correct so that they wouldn't meld together. We then curved the edges so that the pieces would be able to rotate without colliding with one another. The Base: For this piece, we created a 4x4, 3x3, and 5x5 cube with a very small height as the platforms. We then had to rearrange them so that the corners matched up. This took a significant amount of time as the angles were hard to get properly aligned. Once this was done, we made a cube to fit in the middle and wire-cut it into a triangle. We then raised that piece up so that it would be at the same height as our moveable pieces. We then created fairly flat triangular bases on the corners of the inner triangle in the same way to attach our pegs to. We placed cylinders on those bases, and our whole base of the model was then complete. Custom Section We encountered some issues when creating this with the angles of the squares of the base, the sizing of the pegs/peg-holes, and when creating the hinge. We struggled particularly with the hinge because it continually melded together in the center and was thus unable to move.
With this file you will be able to print Pythagorean Theorem Proof with your 3D printer. Click on the button and save the file on your computer to work, edit or customize your design. You can also find more 3D designs for printers on Pythagorean Theorem Proof.