Qidi Tech 1 LED Dual Fan Duct
thingiverse
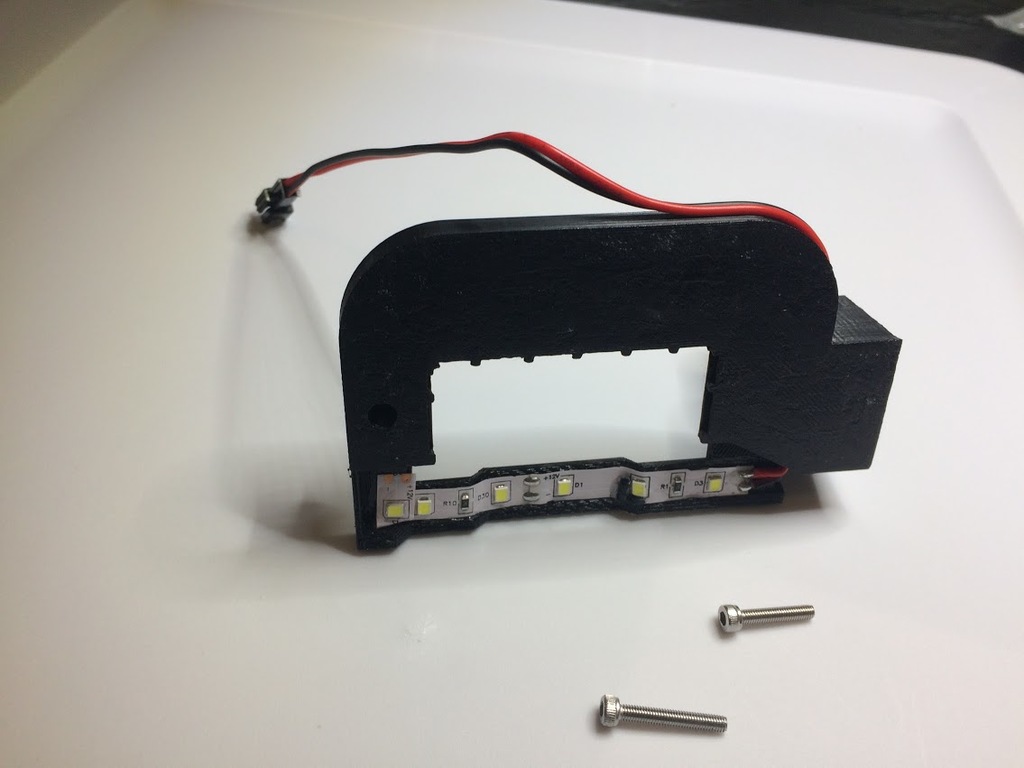
Update January 10, 2019: Per request, I have lowered the bottom of the original duct by 2.5mm and created a new model called Lowered LED Dual Duct. I am unable to test this out and have no idea if it will fit the X-Pro as desired. Update December 21, 2018: Per request, I have extended the opening by 5mm and created a new model called Extended Dual Duct. I am unable to test this out and have no idea if it will fit the X-Pro as desired. September 12, 2017: This design is a cooling duct/LED Light for the QIDI Tech 1 printer with dual extruders. Originally, I created the Tech 1 Extruder Light but the design was flawed and too fragile. It didn't support dual duct cooling. I liked ChrisX35's Dual Extruder Fan Duct, but couldn't see a good way to attach LEDs to it. Using ideas from both designs, I created a new one with dual duct and LED lighting. The duct requires one m3x16 and one m3x20 socket head cap screws. One screw attaches to the cooling fan plate and the other replaces the screw attaching the carriage to the extruder block. The LED strip is mounted and folded at the corner to get the 90deg turn. Super glue is applied after mounting with adhesive backing. Glue is applied along the edges of the strip and an accelerator is sprayed to set it quickly. You can press down on areas not flush with the base. It only takes a couple of seconds for the glue to set after spraying the accelerator. Similarly, you can route LED supply wires to the edge using super glue with the accelerator. The duct must be printed with supports from the base, no internal supports are required except for horizontal holes. Supports under the fan mounting rectangle are needed. I used 45-degree angled supports with a support infill percentage of 40%, extra inflation distance of .4mm and 1 support base layer. I used polycarbonate filament. I made a version with ABS but saw some effects of high temperatures, so I changed to polycarbonate, printed at 240C. A 12v supply feeds power to my enclosure fan. I should have been more careful with the placement of the LED strip. One ended up where it was visible, so I glued small pieces of filament next to it to block bright light from normal viewing angles. This could be done for all LEDs if edge viewing is a problem. This model was made with Fusion 360 and sliced with Simplify3D. 0.2mm layer height, 4 top and 3 bottom solid layers with three perimeter shells. 0.4mm extrusion width Materials Required: 1-m3x16 hex socket head cap screw 1-m3x20 hex socket head cap screw 12V DC White LED ribbon; I used https://www.amazon.com/gp/product/B00WQFP3AO/ 12V power supply Wire and connectors Super Glue Super glue accelerator; I used https://www.amazon.com/gp/product/B0166FFCCS/ Polycarbonate filament; I used https://www.amazon.com/gp/product/B071D312JN/
With this file you will be able to print Qidi Tech 1 LED Dual Fan Duct with your 3D printer. Click on the button and save the file on your computer to work, edit or customize your design. You can also find more 3D designs for printers on Qidi Tech 1 LED Dual Fan Duct.