QIDI X-Max - Automatic Ribbon Cable Holder
prusaprinters
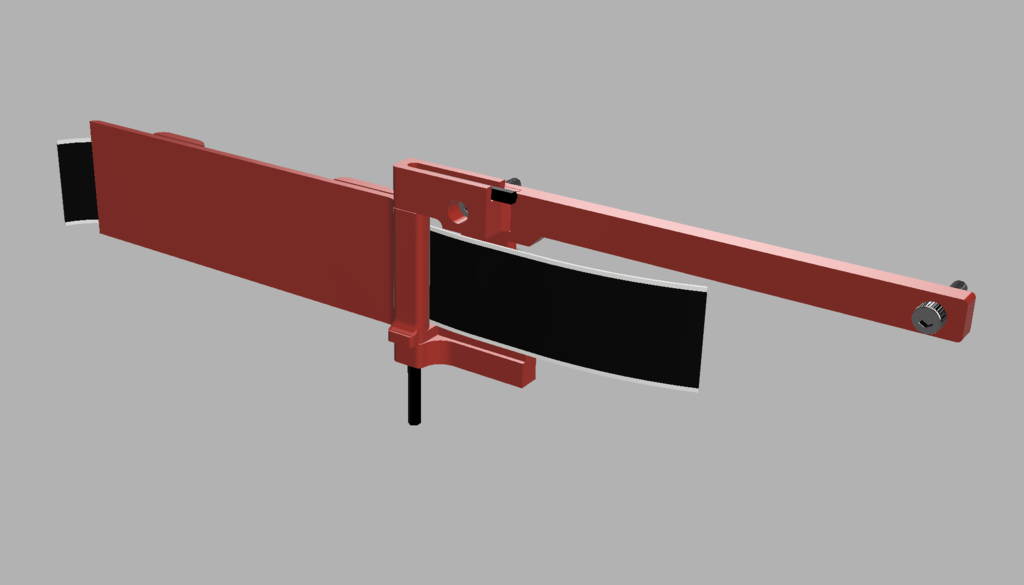
<p><strong>Update Dec 1, 2021</strong></p><p>I've added step files for easy editing in case you want to make it fit your specific printer, Qidi tend to change their printers without notice from time to time.</p><p><strong>Description</strong></p><p>This is an automatic ribbon cable holder for QIDI X-Max, it retracts the cable automatically, meaning there is always tension on it (when needed) so the cable doesn't dip down causing stress on both the ribbon cable and its connector (both are known to break, especially the connector).</p><p>It works with stock X-Max printers and with my Hercules and Icarus mods of course. For security, the hinge locks at 90 degrees so it cannot be overextended.</p><p><i>Notice</i>: It doesn't fit all X-Max printers, some printers don't have the mounting holes but you could drill these yourself (see mounting instructions below).</p><p><strong>Which version to use?</strong></p><p>There are two versions. One is made for an M2.5 allen key (hex key) and one is for an M3 bolt, they are the actual hinge material in this mod. Use either one, both are fine. If you're using the M3 version make sure the bolt is at least 40 mm long, preferably 45 mm. You could use a nut with loctite but don't tighten it.</p><p><strong>BOM - Bill of Materials</strong></p><p>1 x Rubber Band with a suitable length (I used an elastic hair band my daugther donated)<br><a href="https://s.click.aliexpress.com/e/_AUubZY">2 x M3 Hex Head Cap Allen Bolt (16 mm)</a><br>1 x M2.5 allen / hex key <i>OR</i> <a href="https://s.click.aliexpress.com/e/_AUubZY">1 x M3 Hex Head Cap Allen Bolt (45 mm)</a></p><p><strong>What to print</strong></p><p>Print the following parts:</p><p>hinge-1.0.stl<br>wall-attachment-1.0.stl<br>top-part-allen-key-1.0.stl<i>OR</i> top-part-m3-1.0.stl</p><h3>Print Settings</h3><p><strong>Printer:</strong></p><p>Qidi X-Max</p><p><strong>Rafts: </strong></p><p>No</p><p><strong>Supports:</strong></p><p>Yes</p><p><strong>Resolution: </strong></p><p>0.2 mm</p><p><strong>Infill:</strong></p><p>25%</p><p><strong>Filament: </strong>eSUN ABS+ Grey </p><p><strong>Notes: </strong></p><p>Print the parts in the direction I have set them.</p><p>The hinge should be printed standing up and the wall attachment on its side with supports below it where needed. The top part can be printed without supports if you like.</p><h3>Post-Printing</h3><p>To install remove the two screws from inside the printer, they're 100 mm apart from where the ribbon cable enters into the printer, near the rear / top of the chamber. Just take a look at the video and you'll see where they are.</p><p>Then use the rubber band / elastic band like pictured. Insert the ribbon cable in the slot and drop in the M3 bolt or allen / hex key. It is installed in reverse you could say, see the picture just below.</p><p>Next, turn it around so it's facing the correct direction. Screw the two 16 mm bolts to the printer case (where you removed the two screws earlier) to hold it in place. The original screws are too short. You can probably use other screws/bolts but I use the cap head hex bolts in the BOM.</p><figure class="media"><oembed url="https://www.youtube.com/watch?v=fOZrvSOU1_g"></oembed></figure><p>Some more videos and pics are here:</p><p><a href="https://imgur.com/a/ehQjY52"><strong>https://imgur.com/a/ehQjY52</strong></a></p>
With this file you will be able to print QIDI X-Max - Automatic Ribbon Cable Holder with your 3D printer. Click on the button and save the file on your computer to work, edit or customize your design. You can also find more 3D designs for printers on QIDI X-Max - Automatic Ribbon Cable Holder.