QIDI X-MAX Carriage upgrade
prusaprinters
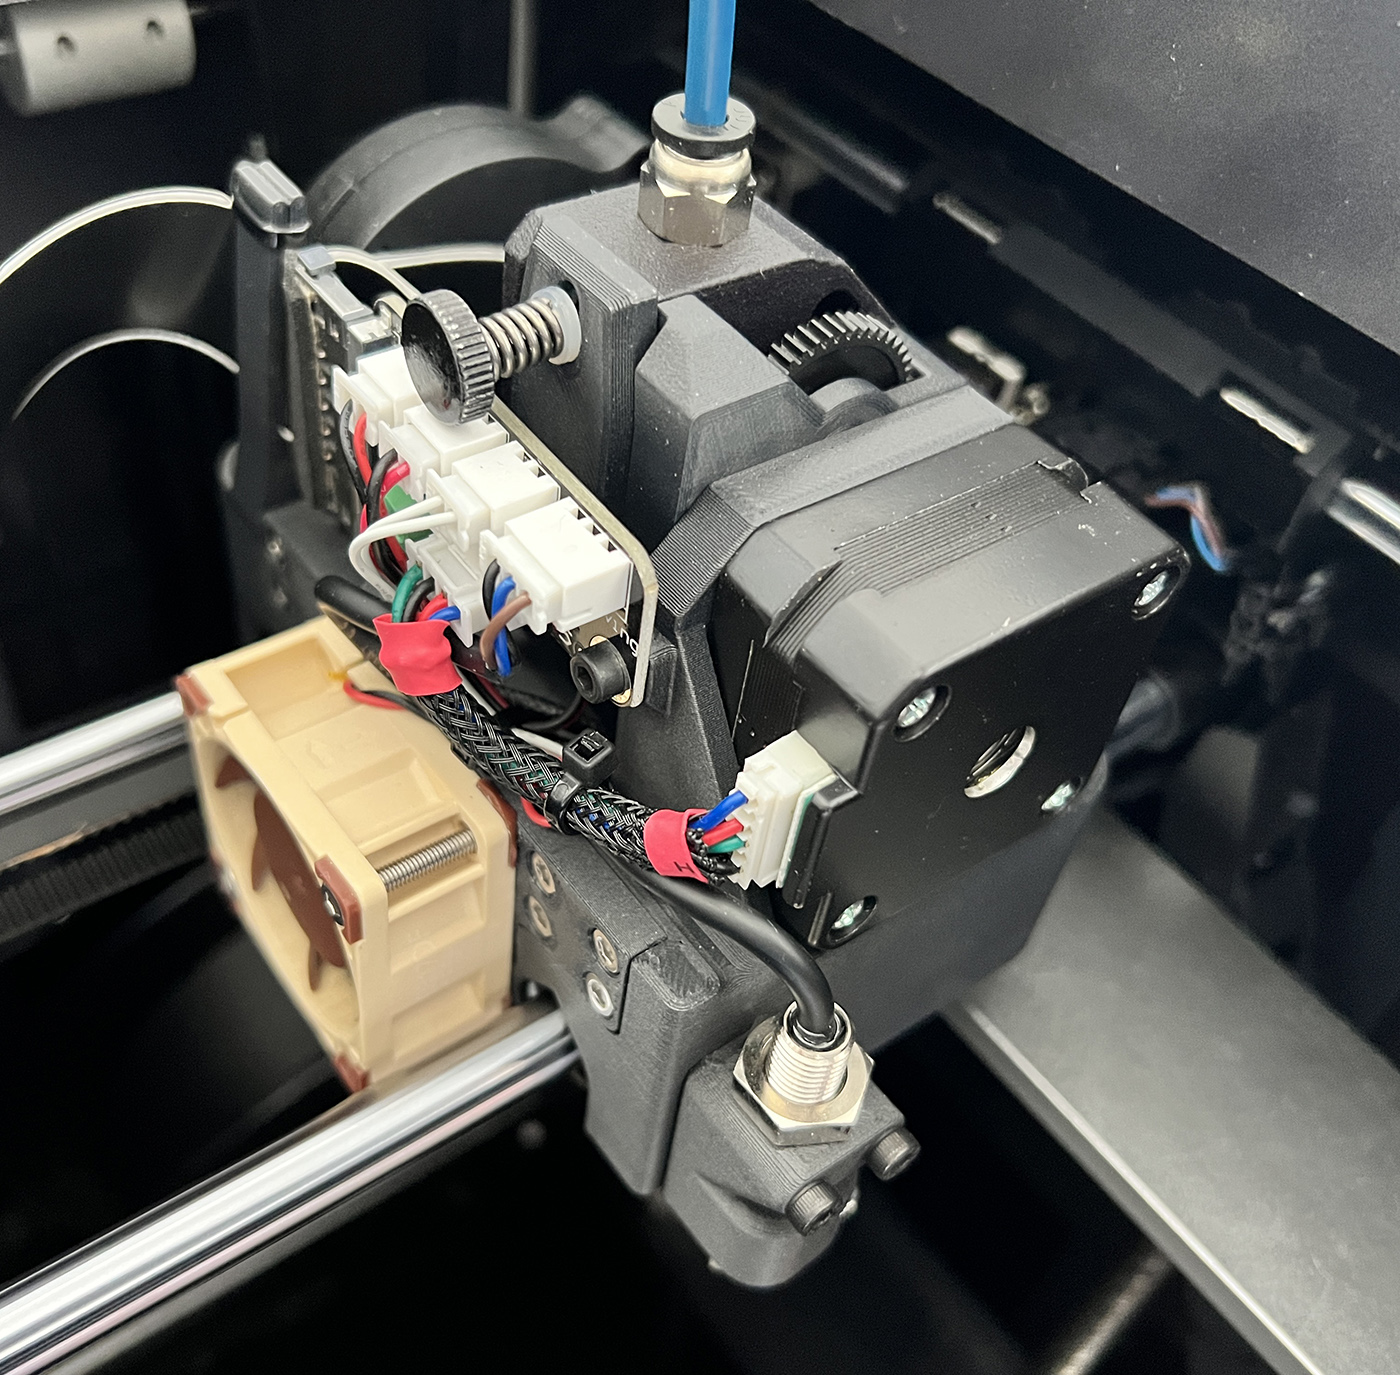
<h5><strong>IMPORTANT: </strong>This design is based on <a href="https://www.printables.com/model/59209-hercules-qidi-x-max-carriage-for-bmg-dragon-e3d-v6">Hercules - QIDI X-Max Carriage</a> done by member <a href="https://www.printables.com/social/48305-humebeam/about">humebeam</a>. Not sure if this counts as an actual remix since most of the original design has changed and the complete carriage remodeled. <i>All the firmware instructions from above mentioned link still apply, while the BOM has changed slightly.</i></h5><p> </p><p>First thing i wanted to tackle is the printability. While i do not have anything against printing with supports, i tend to avoid them whenever possible. This meant some parts have to be printed as separate objects, this is actually a good thing as well as you can simply replace parts of the carriage without the need to reprint the whole thing, like ribbon cable anchor/holder, cooling funnel etc…</p><p>Next thing was to change the mount for the Dragon hotend. To do this, i have re-modeled the BMG extruder back plate so the Dragon screws on to it directly, no more twisting and turning of the hotend when changing the nozzle. This part is printed and fits the original (or Triangelab) BMG extruder.</p><p> </p><h5><strong>Features:</strong></h5><ul><li>ALL parts printed without any supports</li><li>Modular design means parts can be changed/added/removed without re-printing the whole thing</li><li>Strong mount for the Dragon hotend - one hand nozzle change</li><li>Greatly improved hotend cooling thanks to the turbine air funnel. This prevents air back pressure and allows use of silent fans without fear of clogging the hotend.</li><li>Zip tie holes for securing all cables</li><li>Inductive probe mount - suitable for OMRON, Panasonic or P.I.N.D.A. probes</li><li>Greatly improved part cooling thanks to advanced fluid simulations done on the part cooling duct.</li><li>ADXL345 mounting point for Adafruit ADXL345 - Automatic Input Shaper tuning with Klipper conversion</li></ul><p> </p><h5>BOM:</h5><p>This is basically the same as from the HumeBeam's article. I like to use high quality parts like BMG/Slice Engineering/Phaetus… but Triangelab is the next best thing and perfectly suitable. </p><figure class="table" style="width:100%;"><table><thead><tr><th>Part</th><th>No.</th><th>Link</th></tr></thead><tbody><tr><td>BMG Extruder</td><td>1</td><td><a href="https://www.3djake.at/bondtech/extruder-bmg-rechts?sai=3001">3DJake</a></td></tr><tr><td>Phaetus Dragon Hotend (Triangelab OK) Both SF and HF are ok!</td><td>1</td><td> </td></tr><tr><td>T-K500 Thermocouple (3 x 15 mm)</td><td>1</td><td> </td></tr><tr><td>40x10 or 40x20 Fan for hotend cooling, pretty much any will do.</td><td>1</td><td> </td></tr><tr><td>M3 brass heatset inserts</td><td>14</td><td> </td></tr><tr><td>Nema17 pancake stepper</td><td>1</td><td> </td></tr><tr><td> </td><td> </td><td> </td></tr></tbody></table></figure><p> </p><h5><strong>Printing:</strong></h5><ul><li>Material: <strong>PC or PCCF is highly recommended</strong> due to very high temperature resistance. ASA/ABS may be ok but i would not recommend it. Fire retardant filament is <i>NOT necessary</i></li><li>ALL Parts are printed without any supports!</li><li>Perimeters: 4, solid layers: 5 for both top and bottom, Infill: 40%</li><li>All STL's already have correct orientation for print, just import in the slicer of choice.</li></ul><p> </p><h5><strong>Support and help:</strong></h5><ul><li><i>You can find me on Discord:</i> <strong>elcrni - layerguru.com#0940</strong></li><li>Or by DM here</li></ul><p> </p><p><i><strong>A complete set of printed parts in PCCF, including heatset inserts and M3 screws, can be purchased directly from me at a cost of EUR 69.00 plus shipping: </strong></i><br><i><strong>EU: 13.00 EUR</strong></i><br><i><strong>Rest of the world: 19.00 EUR</strong></i></p><p> </p><figure class="image"><img src="https://media.printables.com/media/prints/229503/rich_content/813af65f-6efc-492d-87ce-243035bbb12e/2.jpg#%7B%22uuid%22%3A%22641094d2-e402-4d35-bf6c-08867283a1c7%22%2C%22w%22%3A1600%2C%22h%22%3A1600%7D"></figure><p> </p><figure class="image"><img src="https://media.printables.com/media/prints/229503/rich_content/890df939-bc7e-4287-8d94-92f1bb784ed4/3.jpg#%7B%22uuid%22%3A%22a5d71d5c-fcb6-4d77-8d13-d7cc01b8d7aa%22%2C%22w%22%3A1600%2C%22h%22%3A1600%7D"></figure><p>Dragon hotend is secured by 4 screws making nozzle change very easy and convenient.</p><p> </p><figure class="image"><img src="https://media.printables.com/media/prints/229503/rich_content/fcc77428-5f7a-4e10-8858-0f042289eeff/5.jpg#%7B%22uuid%22%3A%22f6268850-e18f-4397-b45c-718d1ccc696b%22%2C%22w%22%3A1600%2C%22h%22%3A1600%7D"></figure><p>Proper orientation of the heat block.</p><p> </p><figure class="image"><img src="https://media.printables.com/media/prints/229503/rich_content/8ae8d2fa-6311-4009-9930-f9ca4642e762/x-max_carriage_current-v2.png#%7B%22uuid%22%3A%2225f48b9d-28fc-4bb1-8f98-f21e859bb922%22%2C%22w%22%3A1511%2C%22h%22%3A1258%7D"></figure><p>Assembly diagram</p><p> </p><figure class="image"><img src="https://media.printables.com/media/prints/229503/rich_content/93a7bd3e-dce4-4160-ae28-c64cda92c796/1.jpg#%7B%22uuid%22%3A%22c0e2e74c-4ab9-41b1-81be-e14185e22602%22%2C%22w%22%3A1600%2C%22h%22%3A1600%7D"></figure><p>Print plate parts orientation. All STL parts are already properly oriented</p><p> </p><figure class="image"><img src="https://media.printables.com/media/prints/229503/rich_content/5712579a-ad8f-425a-8259-c67ebcde30d0/6.jpg#%7B%22uuid%22%3A%220d6e818d-da23-4b07-94a1-c33844b19469%22%2C%22w%22%3A1400%2C%22h%22%3A1375%7D"></figure><p> </p><h4><strong>----------------------------- Klipper Conversion -------------------------------</strong></h4><p>Klipper conversion process will be written up in detail and a link to the article will be placed here. After conversion, my X-MAX is ultra quiet (thanks to TMC2209 drivers), prints up to 170-200mm/s with great print quality, uses inductive probe as endstop and auto Z-offset, has a camera feed and web interface (Mainsail).</p><p> </p><p>Some photos of the printer and print quality after conversion.</p><figure class="image"><img src="https://media.printables.com/media/prints/229503/rich_content/cdfc4b5a-6c9e-4500-8c49-64306c33abf1/dragon.jpg#%7B%22uuid%22%3A%22300fe5c6-5382-41a1-9de9-8be2395025e7%22%2C%22w%22%3A1800%2C%22h%22%3A1438%7D"></figure><figure class="image"><img src="https://media.printables.com/media/prints/229503/rich_content/c3ec1c4d-1482-4805-8812-7f11467c225b/klicky_002.jpg#%7B%22uuid%22%3A%222d9e60b9-602f-4444-a156-ad8219174674%22%2C%22w%22%3A1600%2C%22h%22%3A1730%7D"></figure><figure class="image"><img src="https://media.printables.com/media/prints/229503/rich_content/4cf23601-b99d-4b79-9d58-69a1d6c31e02/klicky_003.jpg#%7B%22uuid%22%3A%2256b68c88-94ff-4649-b42e-3460d310237a%22%2C%22w%22%3A1600%2C%22h%22%3A1693%7D"></figure><figure class="image"><img src="https://media.printables.com/media/prints/229503/rich_content/b41e5b90-6993-4552-b681-19bd60470712/lgxlite_001.jpg#%7B%22uuid%22%3A%22ab228ce5-2e54-471a-9c01-e8c4b6d92ab6%22%2C%22w%22%3A1200%2C%22h%22%3A1323%7D"></figure><figure class="image"><img src="https://media.printables.com/media/prints/229503/rich_content/06e2ea04-9b22-41ea-b24f-2b149d4d0b09/nm_001.jpg#%7B%22uuid%22%3A%2276b36648-d244-4274-958d-a9ecb2cd7190%22%2C%22w%22%3A1600%2C%22h%22%3A861%7D"></figure><figure class="image"><img src="https://media.printables.com/media/prints/229503/rich_content/f7718f37-feeb-4a40-886e-28ff05dd8813/rapido.jpg#%7B%22uuid%22%3A%22b9b9c2a1-d9b8-4b59-8b0c-80a21504653e%22%2C%22w%22%3A1600%2C%22h%22%3A1206%7D"></figure><figure class="image"><img src="https://media.printables.com/media/prints/229503/rich_content/633f1ba9-1d45-4d73-8e2e-e00d057fd9f0/screenshot-2022-03-23-212136.png#%7B%22uuid%22%3A%2278d967e9-e84d-4e35-95cb-7562bef8e936%22%2C%22w%22%3A1872%2C%22h%22%3A1876%7D"></figure><figure class="image"><img src="https://media.printables.com/media/prints/229503/rich_content/ec52e28f-667c-4453-9418-9cb55df8c13b/7.jpg#%7B%22uuid%22%3A%22bffe7d8a-768a-4b63-9271-1a0c5949f94f%22%2C%22w%22%3A1400%2C%22h%22%3A1050%7D"></figure><figure class="image"><img src="https://media.printables.com/media/prints/229503/rich_content/7f4c6a8a-344c-47cd-a681-e1e383e173a9/8.jpg#%7B%22uuid%22%3A%22dd1117f5-8258-4e60-a319-1b6d16d0e44f%22%2C%22w%22%3A1400%2C%22h%22%3A820%7D"></figure>
With this file you will be able to print QIDI X-MAX Carriage upgrade with your 3D printer. Click on the button and save the file on your computer to work, edit or customize your design. You can also find more 3D designs for printers on QIDI X-MAX Carriage upgrade.