Qidi X-Plus Improved Gantry
prusaprinters
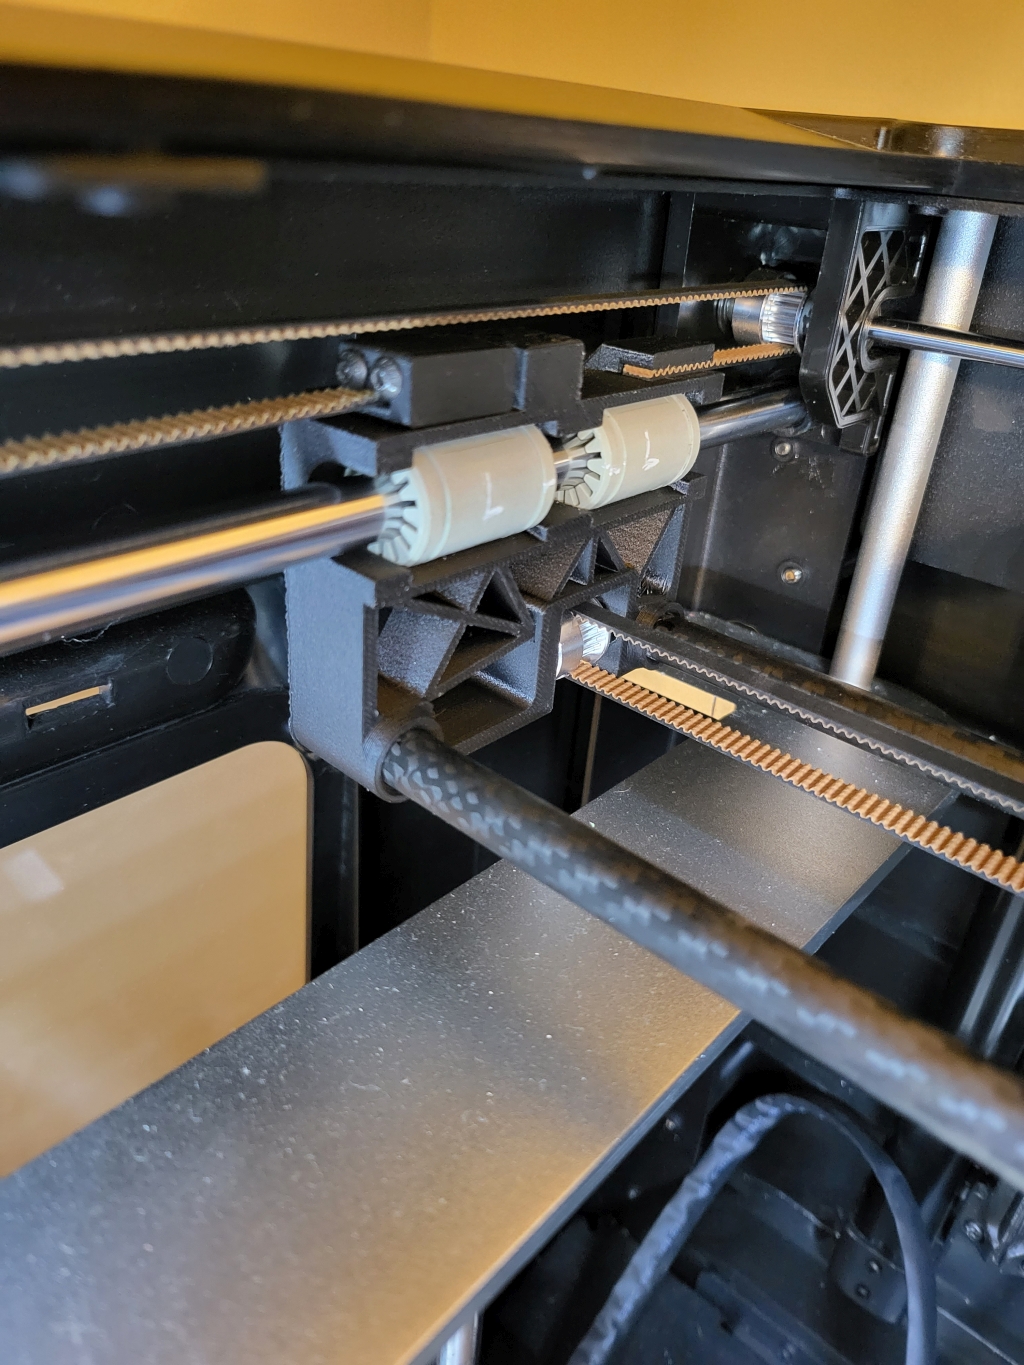
<p>First off this was quite an adventure testing my resolve a few times. See I did it similar to humebeams design but different. The biggest difference is I have a X-Plus vs the X-Max and while many things are the same there are some differences I found over this adventure. the next difference is I was using the stock carriage for now cause I can't decide which replacement I want to use yet. The other big deviation is I used 420mm long x 10mm carbon fiber rods from Amazon with a 2mm wall thickness because I'm to lazy and impatient to order from China. The length being 420mm was a concern at first as the stock rods ae 432mm on the X axis. This was my first hurdle and I attacked this by moving the bottom seat of the rod holders in towards the center by 6mm on each side. To help the smaller “left” gantry I added some small extensions that wouldn't interfere.</p><p> </p><p>I tried printing these at first in ABS and would account for the shrinkage but just found that to unpredictable print to print (last I checked I think I was up to 17 or 18 prints of both sides). So next I moved onto ASA which was better I admit but still not as strong as I'd like. Then I broke out the Priline carbon fiber poly carbonate which still prints the nicest of anything I've ever printed. At this point I've sanded the ends down on the rods then built them back up and sanded them down so many times I was getting over it. Now they were sanded slight undersized and I put them in my TPU printed soft jaws bench vise and tapped all 4 ends with a ¼-20 tap. It tapped somewhat like aluminum if your familiar. I had to use ¼ because there was not enough inside diameter to adequately tap 6mm.</p><p> </p><p>With tapped holes in place I went about putting a large enough pocket in the rear to hold some ¼-20 x 3/4" socket head cap screws I had. This allowed the rods to be rotated to a matched direction where the gantry slid the easiest. I did the same thing on all the bearings too as you see my labels and hash marks lining them up where each pair slid smoothest. </p><p> </p><p>This is where I now spent probably more time than I needed making tweaks. I would have issues with the right gantry cracking or snapping the top rear wing off inserting the bearings so I reinforced the bearing caps. I enlarged the slots for the 3mm nuts to fit in easier. Thickened the area around where the rods insert. I opened the U opening on the right unit so that the larger 2GT pully hand better range (the position of the belts on the stock carriage seems to be a little different that humebeams designs by a few mm. The big one that got me near the end was clipping off the upper corner above where the drag chain zip ties on. I'm assuming the X-Max has more clearance in front of the build plate because without removing 11mm there I lost 10mm of Y travel as the gantry literally bottomed out on that front corner. I opened the space where the belt slides in as well on all 3 parts since I lost multiple samples from trying to stuff the belt in there and the little tab would snap off. That gap was increased by .15mm so now the belt inserts with less worry and still holds snug. There are a bunch of other little tweaks hear and there.</p><p> </p><p>I hope this helps someone but if not it was still an adventure. Let me know if something needs some work or you might want to see an update.</p><p> </p>
With this file you will be able to print Qidi X-Plus Improved Gantry with your 3D printer. Click on the button and save the file on your computer to work, edit or customize your design. You can also find more 3D designs for printers on Qidi X-Plus Improved Gantry.