QNAP TS-563 PCI Bracket for AMD R7 250 Video Card PCIe
prusaprinters
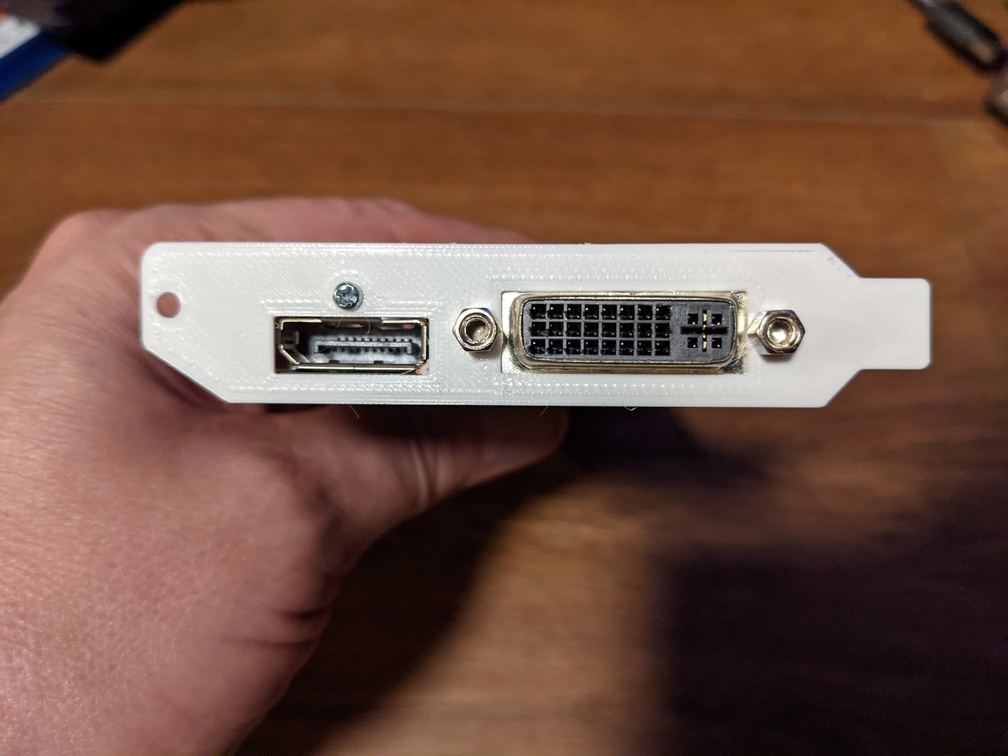
<p>I've included 3mf and stl. I've included a Fusion 360 export, should you need to edit the model.</p> <p>A year or so ago, I was having problems with my QNAP TS-563. I needed to get things back up and running so when my troubleshooting was failing, and the device was out of warranty, I decided to replace it with another QNAP (a TS-453Be). I've since decided it is working fine.</p> <p>I wanted to try to install another OS on it (I wanted to play with OpenMediaVault). I'd read other QNAP users have success installing a different operating system on it. To do so, you need to be able to put a keyboard in the front USB port and USB install media on a rear USB port. Then boot, press DEL to change the boot order in the BIOS. But the TS-563 has no video output.</p> <p>I took a chance and ordered a half-height PCIe video card from ebay, specifically an AMD R7 250 ($30 shipped) - this seemed like the best bang for the buck. I found a page suggesting this card might work on the QNAP (even in HD Station), should I want to go back to QTS. I knew the space inside the TS-563 where the video card would be TIGHT. I was tickled to find that the card fit - just barely. I was expecting to have to use a PCIe extension during install and remove the video card after, but that wasn't necessary.</p> <p>Clearly the card's PCIe bracket wouldn't work and I didn't hold out any hopes that I would be able to buy the correct bracket with DVI and DisplayPort holes and screw holes in the correct positions. This would be true of ANY PCIe video card I bought, I think. So I took the two brackets, laid them on my flatbed scanner and scanned them.</p> <p>I dropped this scan into a new Affinity Designer document that I created at 96dpi (this DPI is critical for importing SVG into Fusion 360). I made two copies, so I had side-by-side images of both brackets. Cropped the images down. I then drew holes over the video card's bracket holes so I knew where the holes needed to be and how big. Then I traced the QNAP bracket (roughly). And laid the holes (in the corresponding positions) onto the QNAP-shaped bracket. I then exported an SVG of the newly traced (rough) bracket design.</p> <p>Bringing this 96dpi SVG into Fusion 360 (critical for maintaining 1:1 size within Fusion 360), I was able to easily sketch the new bracket. Oddly, the circles in the imported SVG were the wrong size, but in the correct positions. Easy enough to work with.</p> <p>I extruded the design to 1mm, added some fillets, and printed it in PETG. Worked the first try (instead of requiring the expected two redesigns).</p> <p>For those still following along, I installed the video card with the new PCIe bracket into the QNAP. You can see the clearance with the Power connector is VERY CLOSE, but it fits! I changed the boot order in the BIOS (press DEL at bootup to enter the BIOS). I installed Open Media Vault to a SSD in the first of the five bays. I changed the boot order to boot from that SSD. OMV is now up and has four bays to work with. So far, OMV seems to run very smoothly on this hardware.</p> <p><strong>UPDATE:</strong> A redditor suggested the metal bracket provides a ground to the chassis. I replicated this, I believe, by soldering (removable) ground wire between the DisplayPort and DVI port shieldings and the chassis. See my picture. It might be beneficial to do the same if you are going to use any plastic PCI backplate, such as this one</p> <h3>Print Settings</h3> <p><strong>Printer Brand:</strong></p> <p>Prusa</p> <p><strong>Printer:</strong></p> <p>i3 MK3</p> <p><strong>Rafts:</strong></p> <p>No</p> <p><strong>Supports:</strong></p> <p>No</p> <p><strong>Resolution:</strong></p> <p>0.1mm</p> <p><strong>Infill:</strong></p> <p>99%</p> <p><strong>Filament:</strong> Hatchbox PETG</p> <p>White</p> <p><strong>Notes:</strong></p> <p>Since it might receive a fair amount of heat from insider the NAS case, I decided for PETG instead of PLA.</p> <p>I printed at 0.1mm layer height because some of the holes are pretty small and close to other holes.</p> <h3>Post-Printing</h3> <p>No post-printing necessary. Let it cool (critical since it's so thin) and use the existing screws to attach the new backplate to the video card.</p> <p>The one exception is the top screw that affixes the bracket to the NAS case. For this I used an M3-0.5x8mm screw and nut. 8mm is a bit longer than necessary, but it works. I could have made this hole smaller and tried to tap into it with the original screw, but really it's too thin for this.</p> Category: Computer
With this file you will be able to print QNAP TS-563 PCI Bracket for AMD R7 250 Video Card PCIe with your 3D printer. Click on the button and save the file on your computer to work, edit or customize your design. You can also find more 3D designs for printers on QNAP TS-563 PCI Bracket for AMD R7 250 Video Card PCIe.