QU-BD One Up and Two Up Z-Bearing Alignment Spacer Upgrade
thingiverse
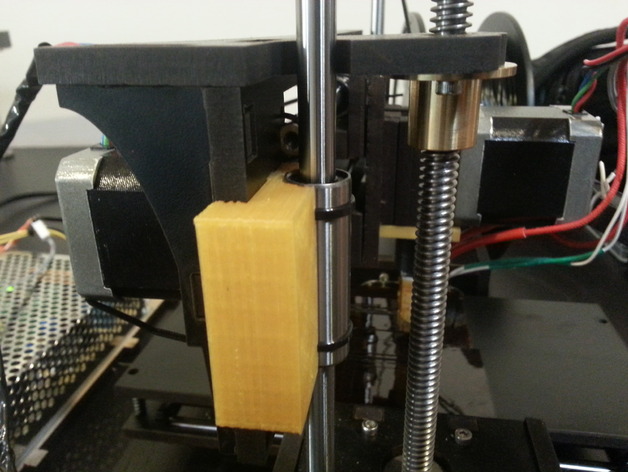
This spacer will upgrade the QU-BD One Up and Two Up printer so that the distance between the threaded Z-screw and the smooth Z-rod are at the correct distance from each other, and better constrain the linear bearings to reduce the sagging of the gantry. Installing this upgrade will reduce or eliminate the Z-banding caused by the binding of the vertical motion of the gantry due to binding of the Z-screw and the nut. By stiffening the alignment of the linear bearings to the gantry, this upgrade also improves the alignment of the gantry to the Z-rods. This reduces the vertical skew on printed parts. Designed for the One Up, as I don't have a Two Up to test - I have now uploaded a Two Up version which is experimental and unverified, but I believe it should work. If someone can give it a try, that'll be great! Be sure to read the instructions! Please like and/or collect this thing if you plan to add this to your printer, and please post your make! Thanks! Interesting in buying a set? Read on... A number of people have commented on not being able to print their own spacer, as they don't have a working 3D printer. Unlike the sometimes missing base plate for the extruder, you can actually assemble your printer without this part and start using it. It's what I did -- the Z screw is a little bit bent because of this, but not by very much. HOWEVER, if you still would rather have that part from the start, I'll be happy to print them for you - please visit http://toybuilderlabs.com/qu-bd-one-up-z-bearing-alignment-spacer-special/ for details. Instructions Print two pieces for the One Up, or three pieces for the Two Up. Clean the prints and smooth out any high spots. Carefully check for fit, especially if there's a lot of Z-wobble on an non-upgraded printer. Mount the spacer onto the main gantry piece (see picture for reference), and then install bearings. Careful when tightening the zip tie! I cracked my MDF in one location from being too aggressive. I now suggest using two zip-ties per installation. Instead of looping the strap back into the latch of the same zip-tie, go through the latch of the second zip, making sure to get sufficient tension. I've found using a plier to pull the strap, and using a screw driver to press down the latch works well. If you had Z-wobbles before, compare the prints after installing the spacer -- on my setup, it has cut down the Z wobble by quite a lot. Please "Like", "Collect", or "I made this" if you like and used the design! Thanks! Please check out more QU-BD One Up related updates at http://toybuilderlabs.com/blog
With this file you will be able to print QU-BD One Up and Two Up Z-Bearing Alignment Spacer Upgrade with your 3D printer. Click on the button and save the file on your computer to work, edit or customize your design. You can also find more 3D designs for printers on QU-BD One Up and Two Up Z-Bearing Alignment Spacer Upgrade.