Quad Lock Bike Wireless Phone Charger V2
thingiverse
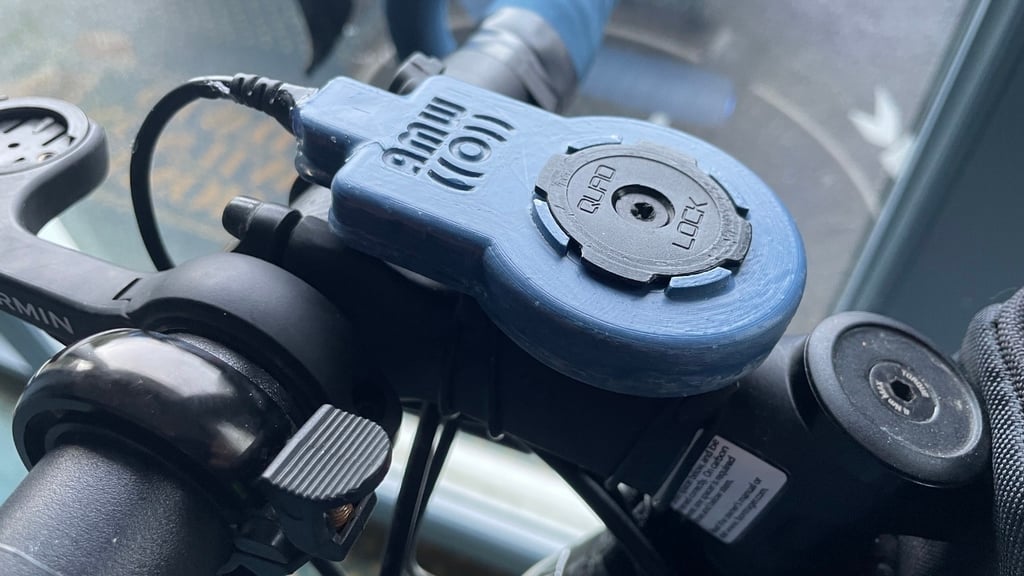
#A wireless phone charger upgrade for the Quad Lock Pro Bike Phone Mount ======================================================= ###V2 Update This is an update to my original design from 2019. The first one worked great with my iPhone X (and still working today) but when I upgraded to the iPhone 12, it would not work. It seems newer iPhones need to be closer to the charge coil :-( Updated design now works with newer iPhones and should work with any Qi phone with Quadlock case. It also has an extended area that covers the USB connector allowing it to be more easily sealed. ###The problem with long distance cycling Having done a lot of long distance cycling, my phone battery often gives up early. In dry weather, I can charge it on the move with a simple USB cable/charger. When the weather turns for the worst, the charge connector can quickly get wet/contaminated leading to intermittent charging. There is nothing worse than seeing a "battery low warning" when your legs are already about to give up! ### Instructions This module replaces the blue part of a Quad Lock Bike Mount Pro which can be bought for around £25: https://www.amazon.co.uk/Quad-Lock-Bike-Mount-Only/dp/B008O0USLO). It allows an iPhone or other phone supporting Qi Wireless charging to be continuously charged simply by attaching it to the mount. No need to plug anything in and the legendary secure locking action is maintained with the charger able to be pushed down to unlock the phone. The Qi Wireless Charger PCBA can be purchased from Amazon for ~£7: https://www.amazon.co.uk/gp/product/B07DC3JL89 The Quad Lock's plastic shaft is just the right size to fit insider the coil (18mm) but the black magnetic shield will need to be opened out to enable this. I used masking tape to hold it together and then nibbled away with small handheld cutters to avoid cracking the brittle ferrous material. Clean the PCBA and coil thoroughly with isopropyl alcohol and then apply multiple layers of nail varnish to seal, protecting them moisture/contamination/humidity. The coil and charger PCBA should fit snugly inside the housing. Fit a USB cable and then use a glue gun to fill all remaining space and to glue the two halves together. Once cooled, remove any excess with a sharp knife. Apply a number of layers of clear nail varnish to fully seal the enclosure, particularly in the central hole where the shaft will pass through. This updated design requires the QuadLock top black part to be modified so that it is 18mm the same as the shaft. I used a junior hacksaw to undercut the ring and then cut down to fully remove. See photo for original (right) and modified (left) This does take away some of its strength but it still feels very secure once fitted. ###To install it on the mount: Remove the metal screw from the middle of the Quad Lock mount and take off the top black part, blue part and spring. The spring will need to be cut to about half its original length due to the thicker charger - remove small amounts until it feels right. Replace the top black part and use an M5 ***nylon*** screw and nut (inside the body - peel away the rubber to access) to hold the parts together securely. *** IMPORTANT *** Make sure you replace the original metal screw with one made from plastic (e.g. https://www.amazon.co.uk/gp/product/B01HY2ZCBI) Due to the inductive method of charging, a metal screw (ferrous or not) will rapidly heat-up and focus the field in the centre and could lead to damage to your phone! I damaged the NFC on my own phone before realising so be warned!! ###Design The parts were designed using FreeCAD 0.20.1 The full design file is attached should you wish to remix the design - have fun!
With this file you will be able to print Quad Lock Bike Wireless Phone Charger V2 with your 3D printer. Click on the button and save the file on your computer to work, edit or customize your design. You can also find more 3D designs for printers on Quad Lock Bike Wireless Phone Charger V2.