Quad Watch Winder Remix with no Soldering
thingiverse
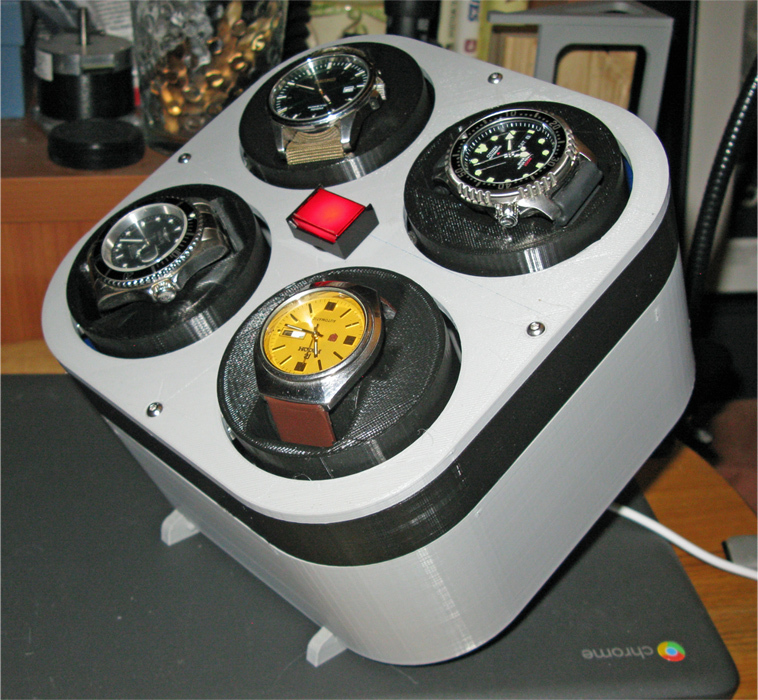
Just small changes... First, I combined the base STLs into an optional single unit since I'm not a fan of gluing parts together. The single-unit base can be attached to the main box using nuts and screws if you wish. I modified the "plug" making it an adjustable two-piece unit using a 1-1/4" long 1/4" bolt, the original plug was way too small for any of my watches. The adjustable plug can be used with the original holder but the watch would no longer sit flush doing so, to address that I lengthened the holder. After lengthening the holder I didn't like the way the holders extended above the top cover so I made an extension/spacer for the box. Unfortunately, this part does need to be glued on, if you haven't printed the box yet you could combine the two parts before printing. I also changed the electronics and code. I have to say that Karlosek's electronics design and code are superior to what I came up with, however, I'd also have to say that in my opinion, the original build might be a little beyond the abilities of the casual builder. My remix is much easier to build for folks uncomfortable with soldering or programming. Rather than using a breadboarded Atmel chip, I used a KEYESTUDIO Mega Plus 2560 R3 Board. https://www.amazon.com/gp/product/B08V4RCRS2 By using jumper wires there is no soldering required. It's a bit of a snug fit and requires the jumper pins to be bent at a 90-degree angle, I used some extra Arduino headers I had on hand to make this easier. I chose the Mega Plus because it can provide 1.5A of 5V Vout which means the winder doesn't require a USB breakout board to power the steppers and of course being a MEGA clone it has more than enough GPIO pins. The Mega Plus also has more than enough 5V and GND pins to power the steppers. While I applaud the ingenious code Karlosek wrote using the ClickButton.h library I had no interest in even attempting to make it work on the Mega Plus. My code is quite simple relative to Karlosek's code ( my code only has 13 lines in the main loop ) and as such doesn't allow you to change any settings on the fly. However, since the Mega Plus can be programmed using the USB cable that supplies the power you can change settings such as run loop numbers or pause time without removing the Mega Plus from the winder, the code I provide is set up for 5 minutes of runtime followed by a 25-minute pause. ( You'll note the pin assignments in the code don't match the wiring diagram I drew up, during assembly I had a pin break off in one of the GPIO headers and had to use a different set of pins for one of the steppers since I had like 30 spare GPIOs to choose from this was not a serious problem :-) Feel free to write code as complicated as you'd like, if you come up with something really cool please share it. Note: I wired my switch as a simple reset I can use to restart the winder should I want to demonstrate it to anyone. ( I used a rectangular switch I had laying around. ) I did not show the wiring needed to power the switch LED in my wiring diagram as it's just 5V and GND. Lastly, since the Mega Plus covers the original inlet I had to drill a second access hole and I drilled two holes to mount the Mega Plus using M3 screws/nuts. Here is a link to a video of the winder running... https://www.youtube.com/watch?v=hl4QJrQyFqo&pp=sAQA
With this file you will be able to print Quad Watch Winder Remix with no Soldering with your 3D printer. Click on the button and save the file on your computer to work, edit or customize your design. You can also find more 3D designs for printers on Quad Watch Winder Remix with no Soldering.