Quadcopter / Drone / RC Helicopter Automatic Deploying & Retracting Payload Hook
thingiverse
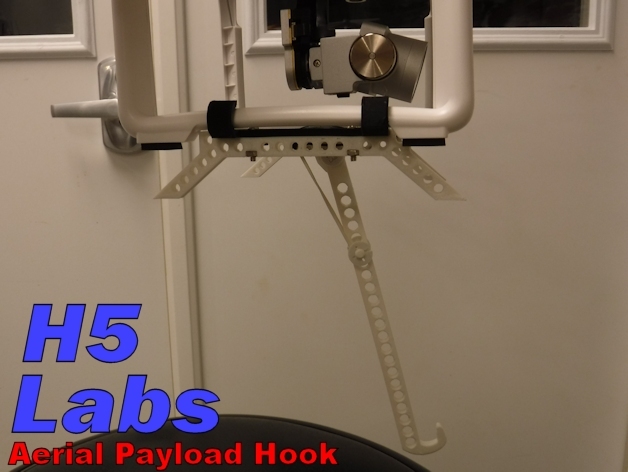
Here at H5 labs, we're enthusiastic about cool projects such as 3D printers, quad-copters, robots, and lasers - you know, the typical geek stuff. We enjoyed our DJI Phantom 3 drone, but wanted to do more than just take nice pictures with it. So, we came up with a payload hook system so that we can deliver small items to "remote" areas - all without needing any extra radio channels.\nWe started thinking about a hook hanging from the bottom of the aircraft, but quickly realized it would be a problem for take-offs and landings; not to mention the difficulty in "dropping" the load at the drop-off site. A lot of thought went into designing our payload hook to make it automatically deploy on take-off (yet, automatically retract, should we need to immediately land) and be able to automatically swing out of the way when dropping off the payload to help minimize any maneuvering required to release it and to make it possible to land again without interference.\nThe design we came up with is pretty straightforward, light weight, and met our desired goals (yes, we have tested it successfully). We have used it on a DJI Phantom 3, but it should also work well with other aerial vehicles OR if you use a different attachment system. Please post your unique build in the "I made one" section - we would love to see it!\nPlease refer to our print settings recommendations.\nPrinter Brand: MakerGear Printer: M2 Rafts: No Supports: Yes
With this file you will be able to print Quadcopter / Drone / RC Helicopter Automatic Deploying & Retracting Payload Hook with your 3D printer. Click on the button and save the file on your computer to work, edit or customize your design. You can also find more 3D designs for printers on Quadcopter / Drone / RC Helicopter Automatic Deploying & Retracting Payload Hook.