Queen Bee Marking tool
thingiverse
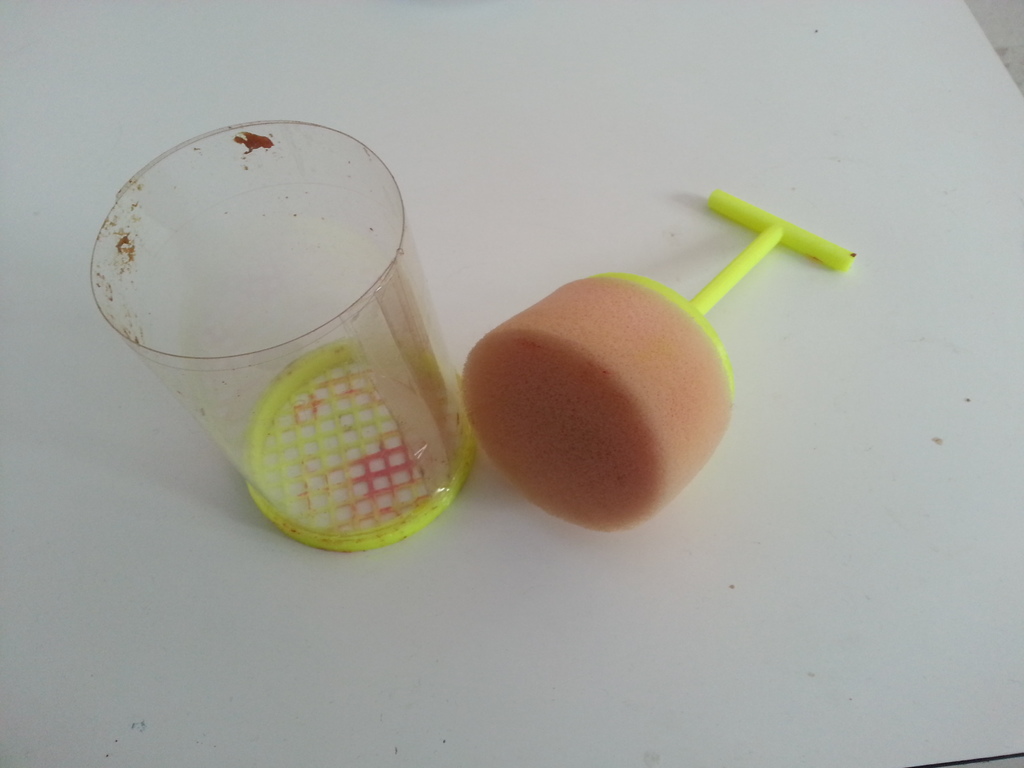
Queen Bee Marking tool; After printing push the shaft onto the plunger disk. Use a bit of glue if required to strengthen the connection. You will also need a sponge or some foam cut to circular shape of the plunger disk and stick to the plunger. After printing the grid take a rectangle of transparent flexible plastic. I used the top of a clear chocolate box and glue into the slots in the grid base and secure the sides of the clear plastic with some tape. marking grid has holes of approx. 4mm Then just catch the queen bee, press down the plunger and mark.
With this file you will be able to print Queen Bee Marking tool with your 3D printer. Click on the button and save the file on your computer to work, edit or customize your design. You can also find more 3D designs for printers on Queen Bee Marking tool.