Queen of Hearts
myminifactory
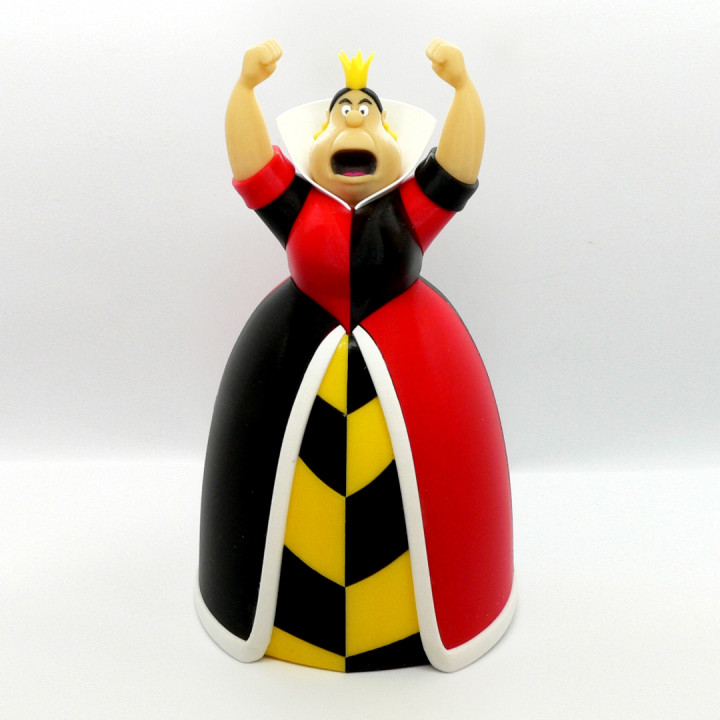
The Queen of Hearts is a character from the 1865 book Alice's Adventures in Wonderland by Lewis Carroll. She is a foul-tempered monarch whom Carroll himself describes as "a blind fury", and who is quick to give death sentences at the slightest offense. One of her most famous lines is the oft-repeated "Off with his/her head!" No supports are required. If you have the proper filament colors, no painting is needed. The assembled model is 280mm tall and is in proportion to most of my other Wonderland models. Picture with Alice is shown for comparison. Enjoy, and keep your head on! ................................................................................... Print InstructionsSupports: NoResolution: .2mmInfill: 10% Notes:** Refer to the notes below for helpful printing and assembly instructions. .................................................................................... Building the modelColors (there are no multiple printed pieces) Skin: (Paramount3D PLA - Universal Beige)arm_rightarm_lefthead..Yellow: (Paramount3D PLA - Simpson Yellow)dress_yellow_left (contains two separate pieces)dress_yellow_right (contains three separate pieces)crownearring _leftearring_right..Red: (Hatchbox PLA - True Red)cuff_reddress_top_red_rightdress_top_red_leftdress-bottom_red_rightdress_bottom_red_left..Black: (Paramount3D PLA - Black)cuff_blackdress_top_black_rightdress_top_black_leftdress-bottom_black_rightdress_bottom_black_lefteyebrow_lefteyebrow_righteye_blacks (contains two pieces)hairdress_black_left (contains three separate pieces)dress_black_right (contains two separate pieces)..Grey: (Paramount3D PLA - Graphite Grey)mouth..White: (Paramount3D PLA - White)eye_white_righteye_white_leftcowldress_bottom_white..Pink: (Paramount3D - Harajuku Pink)tongue.. ................................................................................... Printing and assembly tips Printing tips1-No supports are required 2-Use your judgement for brims or rafts. Personally, I used a raft for the eyebrows and eye_blacks. These are small pieces and not only do they print easier with a raft, they are far easier to handle and don't get lost if you leave them on the raft until you need them. 3-The dress bottom pieces are large and print time is longer than most of my models. I decided to hollow out part of the dress to reduce print time considerably, but it is still a long print. 4-The parts should fit nicely when printed cleanly or with a slight first layer squish. For this model, in particular, be sure to clean off any first layer squish. Most first layers are hidden inside the model when assembled, so even if the cleanup is 'ugly' it should be hidden. ..Assembly tips: 1-I used E6000 sticky craft glue glue to put this model together. The sticky glue allows more time to position the parts than a fast drying superglue. 2-The model fits together quite well, but care should be taken with gluing the dress bottom. The 'point' of the waist should have the large red and black pieces flush to the front with the white edges. The bottom of the large red and black pieces will be recessed. I needed some tape to keep it all in place while adjusting and drying. 3-The black/yellow parts in the front of the dress are all individual. If you mix them up, it could turn into a small puzzle while fitting them. To help position those pieces, remember that the flat side that was on the bed always aligns to the seam straight down the middle. 4-Refer to the assembly diagram in the pictures section as well as the uploaded pictures for putting the model together. The model is meant to be glued. Do not hesitate to ask questions, feedback is essential to making better models.
With this file you will be able to print Queen of Hearts with your 3D printer. Click on the button and save the file on your computer to work, edit or customize your design. You can also find more 3D designs for printers on Queen of Hearts.