Quest / Quest 2 magnetic prescription lens adapter
thingiverse
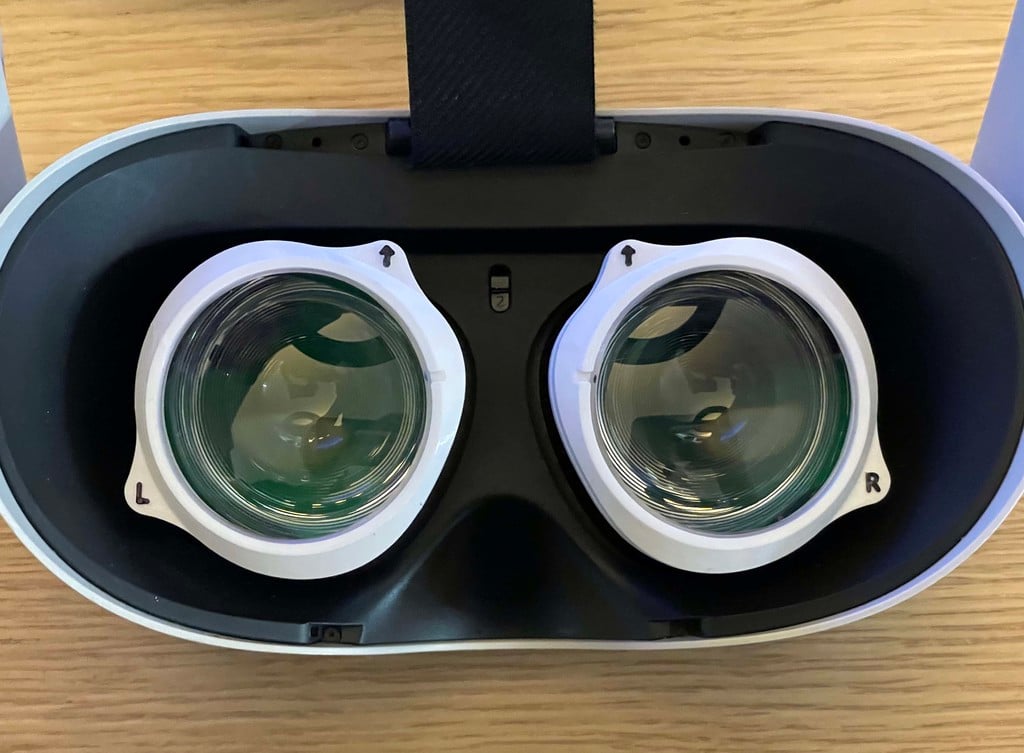
These are prescription lens adapters for your Quest or Quest 2. They are modular and magnetic so that they can be easily removed or swapped if you have multiple users using your Quest 2. ### Download files First you need to download the base mounts that will be fitted directly onto your Quest. * **[Left base mount (base-left.stl)](https://www.thingiverse.com/download:11569529)** * **[Right base mount (base-right.stl)](https://www.thingiverse.com/download:11569526)** Since everyone is different and lens thicknesses vary, there are a few profiles you can use. You will want to have the lenses as close to your eyes while it of course being comfortable. You also need to consider the thickness of your lenses and that they aren't scratching the Quest lenses. In general, if you aren't sure, go with the medium profile adapters. I use them myself and without the glasses spacer. #### Low profile adapters * **[[LOW PROFILE] Left lens adapter (v3-lens-holder-left-low-profile.stl)](https://www.thingiverse.com/download:11902943)** * **[[LOW PROFILE] Right lens adapter (v3-lens-holder-right-low-profile.stl)](https://www.thingiverse.com/download:11902945)** #### Medium profile adapters * **[[MEDIUM PROFILE] Left lens adapter (v3-lens-holder-left-medium-profile.stl)](https://www.thingiverse.com/download:11902942)** * **[[MEDIUM PROFILE] Right lens adapter (v3-lens-holder-right-medium-profile.stl)](https://www.thingiverse.com/download:11902946)** #### High profile adapters * **[[HIGH PROFILE] Left lens adapter (v3-lens-holder-left-high-profile.stl)](https://www.thingiverse.com/download:11902944)** * **[[HIGH PROFILE] Right lens adapter (v3-lens-holder-right-high-profile.stl)](https://www.thingiverse.com/download:11902941)** ### Ordering glasses As with most solutions I'm using [these glasses](https://www.zennioptical.com/p/metal-alloy-full-rim-frame-with-spring-hinges/5500?skuId=550021). It is recommended that you add Anti-Reflective Coating. **Note! You should enter an IPD of 65mm instead of the one in your prescription.** *The IPD will determine where the optical center of the lenses will be positioned. With the Zenni glasses you have 69 mm between the center of the lenses. So by ordering the glasses with an IPD of 65mm the optical center will end up 2mm closer to the nose on both sides. This will make the optical center of the lenses match up with the optical center of the Quest 2.* ### Magnets I'm using 5x2mm magnets that I bought off [Amazon](https://www.amazon.com/WOBATOY-Personalized-Multi-Use-Whiteboard-Refrigerators/dp/B075PMRBWJ) ### Assembly 1. Put the magnets in the bases and the adapters. Use a tiny drop of super glue if you want to make sure that they won't pop out when swapping lenses often. Make sure that the orientation of magnets between the bases and the adapters are correct so that they aren't repelling each other. 2. Before removing the lenses, mark the lenses where the bridge connects with the lens. (See image 3). This is important as the rotation affects those with astigmatism. 3. Remove one lens at a time so that you don't confuse them with each other! 4. Align the markings of the lenses with the notch in the lens adapter and press it in. (It will require some force to get it in.) 5. Put the bases in the Quest 2. They should snap in place with a little bit of pressure. 6. Place the magnetic adapters on the bases and you are good to go. ### Why did I design this? I wanted a comfortable and modular solution and I couldn't find one on Thingiverse. Either they were modular but were hurting my nose, or they were comfortable but not modular. So I made this so I could have both. And by modular I mean that I need to be able to easily swap the lenses because I have multiple users using my Quest 2. I also found that most other solutions were hard to fit in the headset and very difficult to remove. So I've also designed these to be easy to fit and remove. ### License This is released under Creative Common Non-Commercial. Which means that you can print for personal use but you cannot sell 3d prints from this design. ### Changelog #### 2022-07-17 v3 * Moved the R and L onto the pad where the magnet is fitted. * Reduced overhang * Added multiple adapters with different thickness #### 2022-03-20 v2 * Marked the lens holders with R and L respectively. * Added an arrow to make it a bit more clear which orientation the lenses should have when putting them in.
With this file you will be able to print Quest / Quest 2 magnetic prescription lens adapter with your 3D printer. Click on the button and save the file on your computer to work, edit or customize your design. You can also find more 3D designs for printers on Quest / Quest 2 magnetic prescription lens adapter.