Quick Clamp
prusaprinters
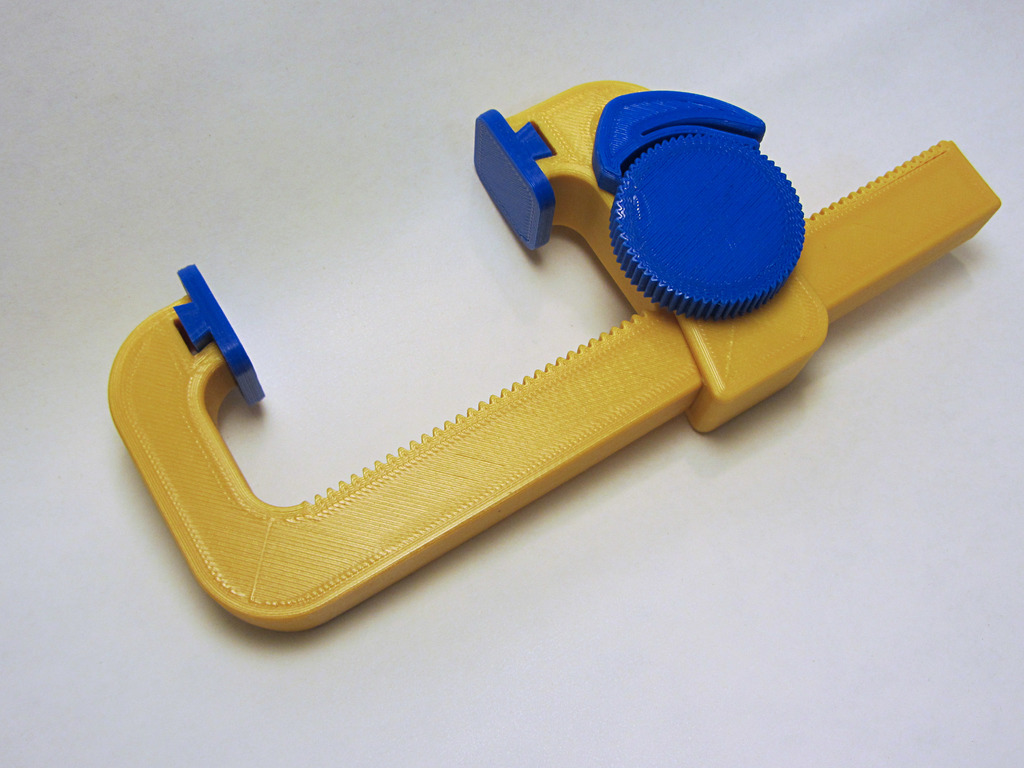
<p>This 110mm light-duty clamp uses a quick-adjusting rack & pinion to open and close the clamp, and a spring-release ratchet to hold the clamp shut. It prints with minimal supports and requires no additional fasteners.</p> <p> <figure class="media"> <oembed url="https://youtu.be/42zKMKU1Nug"></oembed> </figure> </p> <h3>Print Settings</h3> <p><strong>Printer:</strong></p> <p>UDIO</p> <p class="detail-setting rafts"><strong>Rafts: </strong> <div><p>Doesn't Matter</p></div> <p><strong>Supports:</strong></p> <p>Yes</p> <p class="detail-setting resolution"><strong>Resolution: </strong> <div><p>0.2mm</p></div> <p><strong>Infill:</strong></p> <p>30% (triangular)</p> <p><br/> <p class="detail-setting notes"><strong>Notes: </strong></p> </p><div><p>Print with 4 perimeter lines (0.4mm wide) for greater strength and stiffness. Print two of the pad parts and one each of the body, jaw, gear and pawl.</p></div> Post-Printing ============= <p>After printing, sand down any blobs or lumps on any of the mating surfaces. Using a little Vaseline or light grease on the moving parts will make it operate more smoothly. To assemble, first insert the pawl into the hole in the side of the moving jaw. Then insert the gear into the key-hole shaped slot in the jaw and slide it up towards the pawl. Then slide the moving jaw onto the body. Finally, slide the pads into the dovetail slots on the jaws. Rotate the knob CCW to clamp, press the release lever and rotate the knob CW to unclamp.</p> </p></p> Category: Hand Tools
With this file you will be able to print Quick Clamp with your 3D printer. Click on the button and save the file on your computer to work, edit or customize your design. You can also find more 3D designs for printers on Quick Clamp.