QUICK first layer calibration for Revo Six (or any 0.25, 0.4, 0.6, 0.8mm) nozzles
prusaprinters
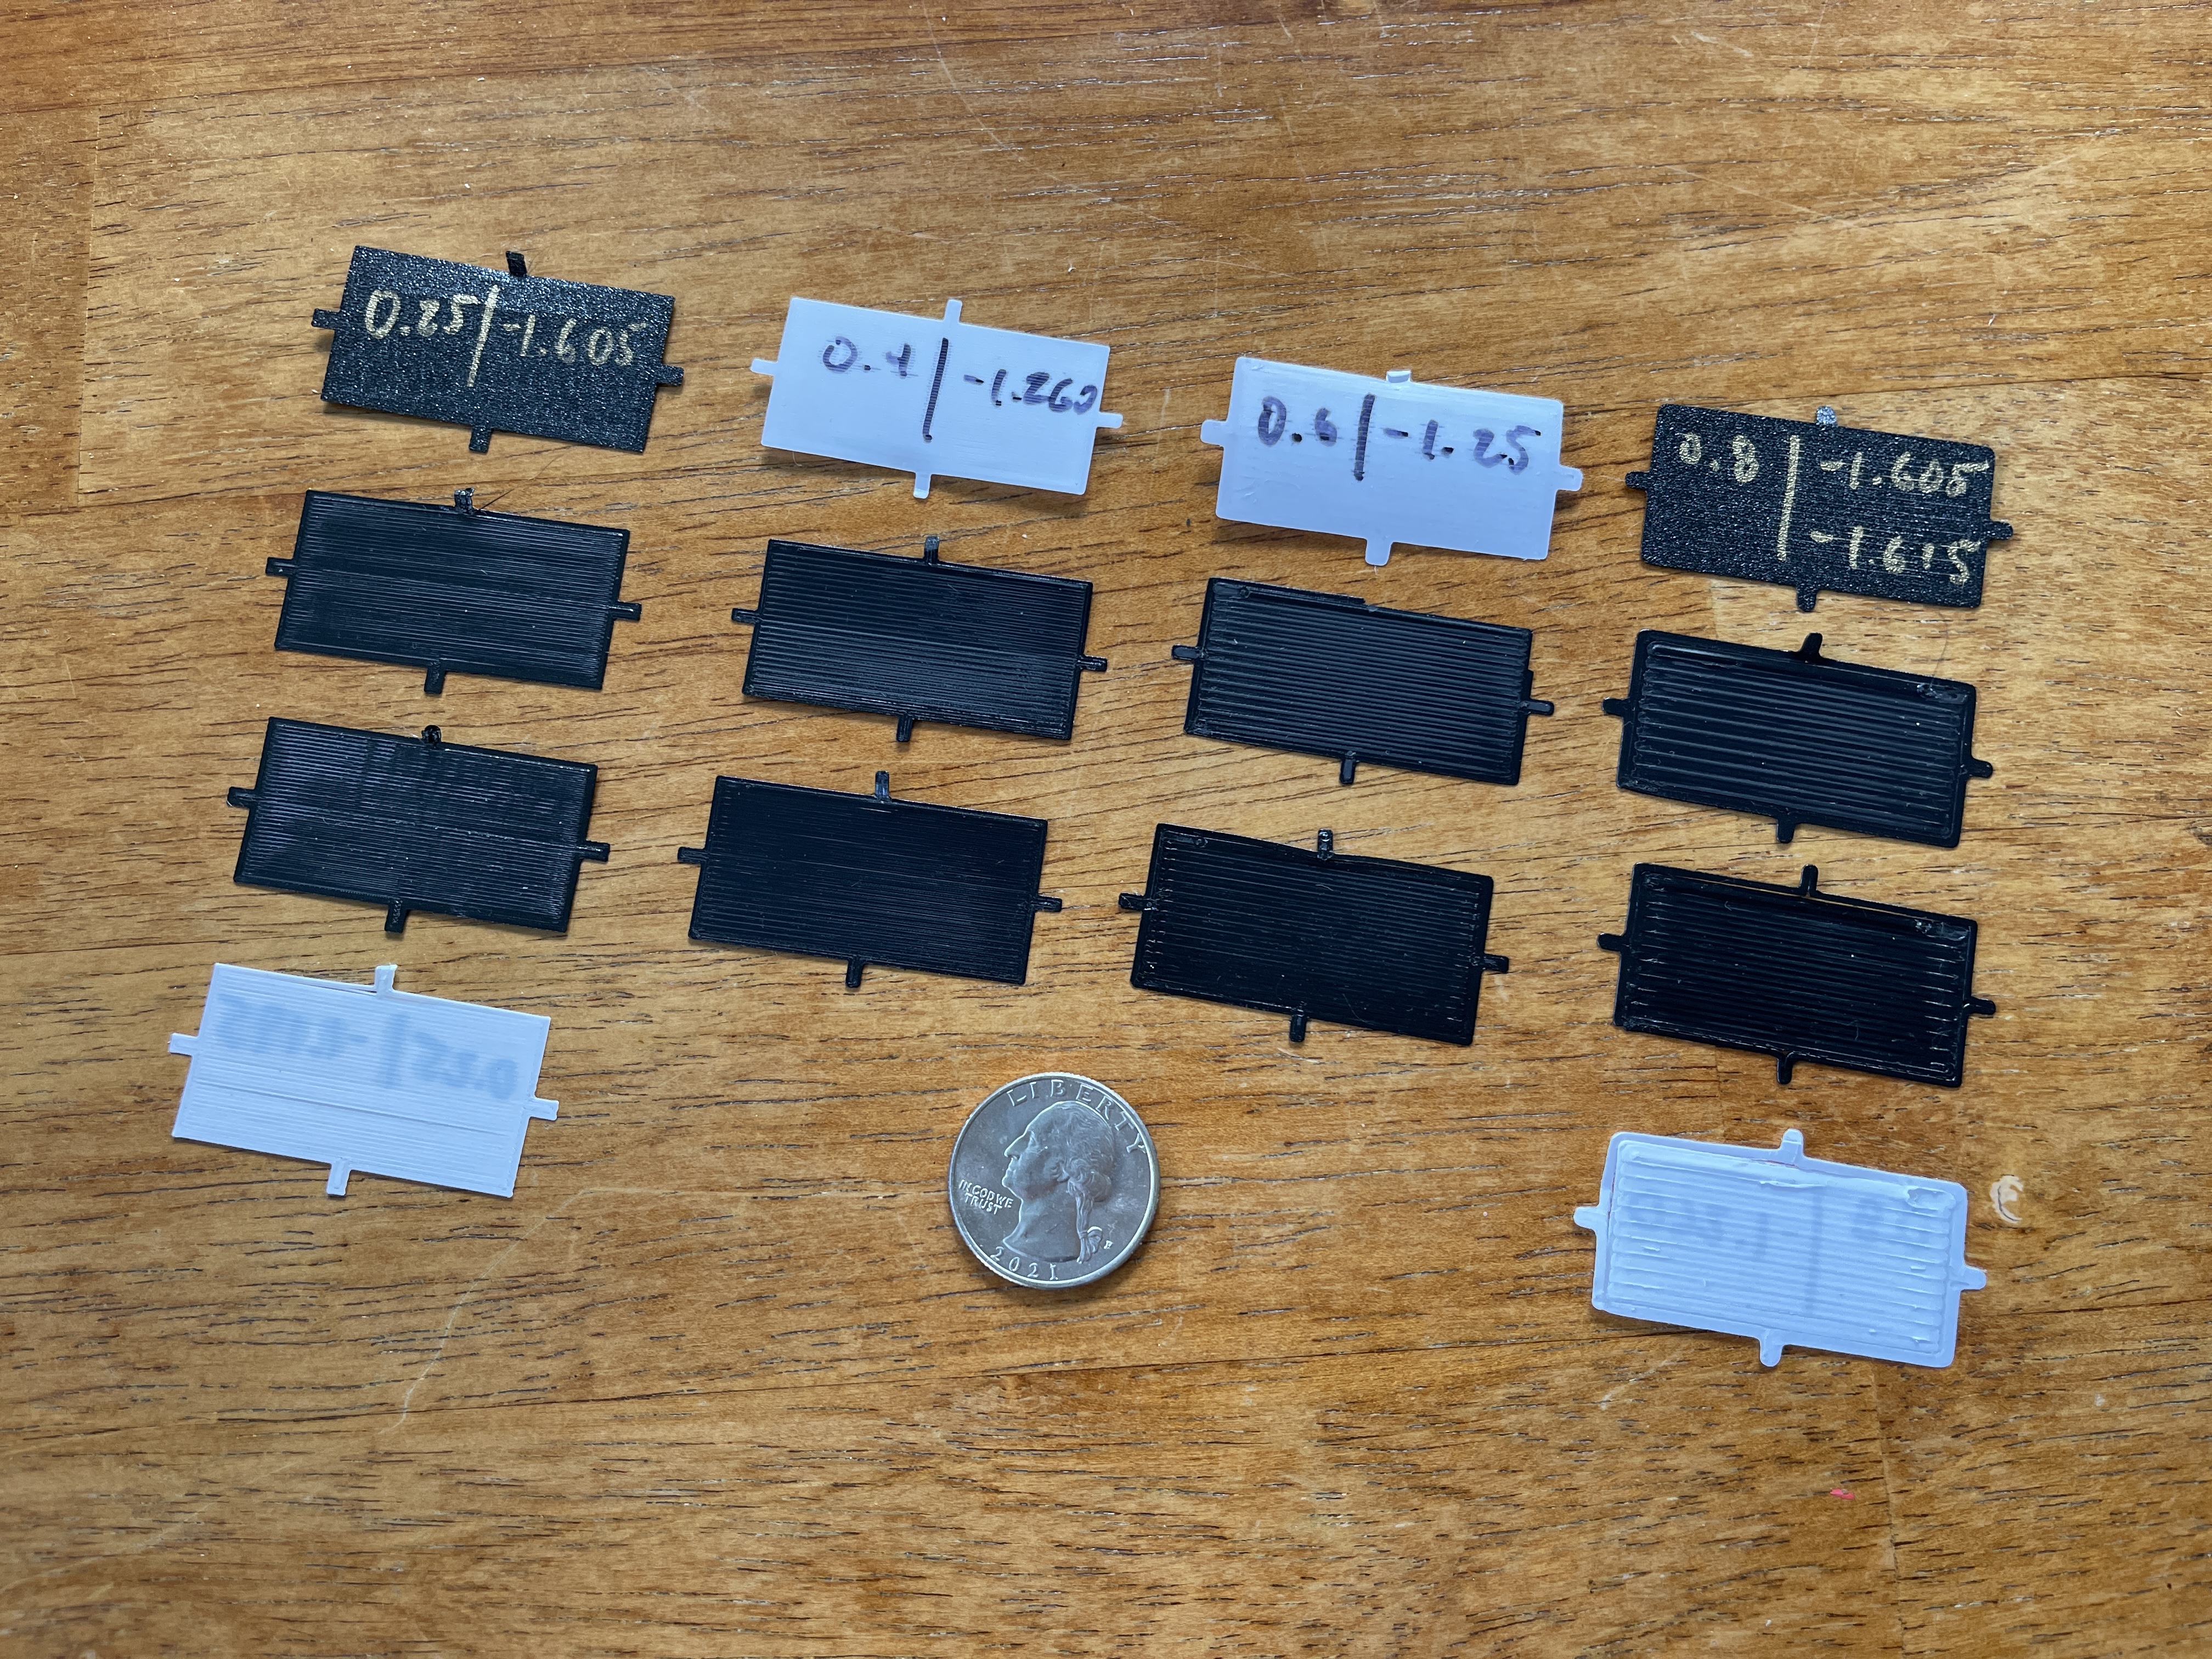
<p>If you are willing to take more time and really dial in your Z heights, please check out my new <a href="https://www.printables.com/model/259125-detailed-first-layer-calibration-for-revo-six-or-a">DETAILED first layer calibration for Revo Six (or any 0.25, 0.4, 0.6, 0.8mm) nozzles</a>. If you simply want a fast way to set or confirm your Z heights, use these QUICK files.</p><p> </p><p>I recently upgraded my MK3S+ to the Revo Six hotend and have loved the ease of switching nozzles sizes. Unfortunately, the Prusa's onboard First Layer Calibration is only tuned for the stock 0.4mm nozzle. I couldn't find any first-layer models that followed Prusa's <a href="https://help.prusa3d.com/article/different-nozzle-types_2193?#first-layer-calibration-of-other-nozzles">First Layer Calibration of other nozzles</a> recommendations so I made my own, remixing concepts from <a href="https://www.printables.com/model/20306-first-layer-calibration">GKMAKEIT</a> and <a href="https://www.printables.com/model/107539-first-layer-calibration-prusa-i3-mk3s">ArtyL</a>. These files should work with any brand of nozzle.</p><p> </p><p><strong>Step-by-step guide to calibration (from ArtyL that I modified):</strong></p><ol><li>Change your Prusa to <a href="https://help.prusa3d.com/article/mesh-bed-leveling_112163">7x7 mesh leveling</a>, if available.</li><li>For PLA, <a href="https://help.prusa3d.com/materials">a SMOOTH steel sheet is recommended</a>. For PETG, <a href="https://help.prusa3d.com/materials">a TEXTURED sheet is recommended</a>.</li><li>Clean your build plate. I only use 99% isopropyl alcohol and a lint-free paper towel.</li><li>Tell your printer which <a href="https://help.prusa3d.com/article/hw-setup-mk2-5-s-mk3-s-_1943">nozzle size</a> and <a href="https://help.prusa3d.com/article/steel-sheet-profiles_1955">steel sheet profile</a> you are using.</li><li>Run the print Gcode and <a href="https://help.prusa3d.com/article/live-adjust-z_112427">start with a Z-offset</a> that is at least above the bed.</li><li>As the printer extrudes the skirt, <a href="https://help.prusa3d.com/article/live-adjust-z_112427">get the Live-Z down</a> so at least the material is sticking to the bed. While printing perimeter, just get a decent line.</li><li>Print at least half of the patch with a single Z-offset setting, then adjust down or up accordingly. I start with 0.01mm adjustments and then hone in with 0.005mm tweaks.</li><li>Once the print is over, let it cool. Then use your fingernail to lift one of the small vertical tabs and gently remove the patch. It may split slightly, but it's OK.</li><li><strong>Is the patch rough like sandpaper or wavy? Raise your Z height. Does it have pronounced ridges or does light shine through holes? Lower your Z. You want a mostly smooth surface with faint ridges and no holes. See the photo reference.</strong></li><li>I suggest writing the nozzle size and Z height(s) on the back side with a Sharpie for reference.</li></ol><p>Video guide from GKMAKEIT: <a href="https://rumble.com/vb9fxr-3d-printer-first-layer-calibration-process.html">https://rumble.com/vb9fxr-3d-printer-first-layer-calibration-process.html</a></p><p> </p><p><strong>Design methodology:</strong></p><ul><li>each STL follows Prusa's recommended layer height for the respective nozzle:<ul><li>0.25mm nozzle = 0.15mm height</li><li>0.4 nozzle = 0.2mm</li><li>0.6 nozzle = 0.3mm</li><li>0.8 nozzle = 0.4mm</li></ul></li><li>PrusaSlicer's “Generic PETG” and “Generic PLA” filament profiles applied</li><li>Gcode starts printing from the front and works backwards</li><li>the "<a href="https://help.prusa3d.com/article/infill_42#_ga=2.52172841.1431138178.1660267231-1109348451.1648703249">fill angle</a>" is set to 0 (zero)</li><li>each test only takes 1-3 minutes to print</li><li>each model is designed so the extruder only needs to travel in a single, straight path after the perimeter is laid down</li><li>the heights and widths are customized so each path can be at or close to the default extrusion width</li><li>small horizontal tabs indicate when to switch Live Z if you wish to test two heights per patch</li><li>small vertical tabs aid in print removal</li></ul>
With this file you will be able to print QUICK first layer calibration for Revo Six (or any 0.25, 0.4, 0.6, 0.8mm) nozzles with your 3D printer. Click on the button and save the file on your computer to work, edit or customize your design. You can also find more 3D designs for printers on QUICK first layer calibration for Revo Six (or any 0.25, 0.4, 0.6, 0.8mm) nozzles.