Quick fit extruder latch
thingiverse
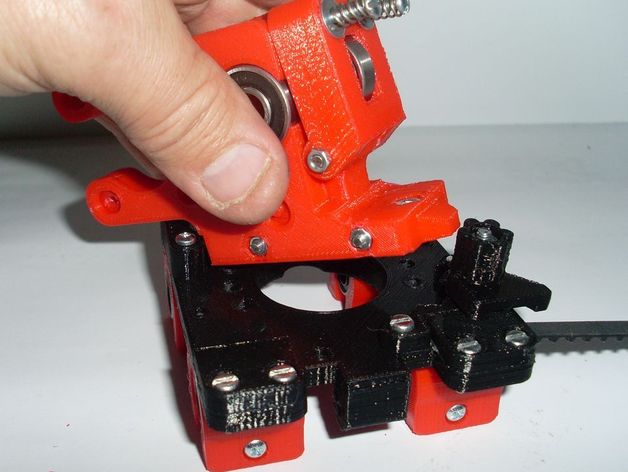
The final part of my Dove-tail carriage's Quick Fit Extruder includes a latch and fixed end. This extruder, designed for use with a modified Greg's extruder, can be easily removed by loosening the 4mm thumb screw and rotating the top of the latch. To assemble, print out all parts from one file using settings of 0.25mm layer height, 0.35mm nozzle, 25% fill on a 45-degree angle, 2 perimeters, and 3 base layers. Clear the 3mm and 4mm holes with a drill, then fit the latch base to the carriage using a 4mm machine screw and two M3-12mm machine screws and nuts. Secure the fixed end with two M3-18mm machine screws and nuts. Test fit the extruder base before tightening the M3 screws in the latch and fixed parts. Place the top portion of the latch over the M4 machine screw, add a nut to the thumb screw, and run it down the M4 screw in the latch base. To remove the extruder, simply loosen the thumb screw and rotate the top of the latch without removing the nut.
With this file you will be able to print Quick fit extruder latch with your 3D printer. Click on the button and save the file on your computer to work, edit or customize your design. You can also find more 3D designs for printers on Quick fit extruder latch.