Quietbox electric parts Ender 3
prusaprinters
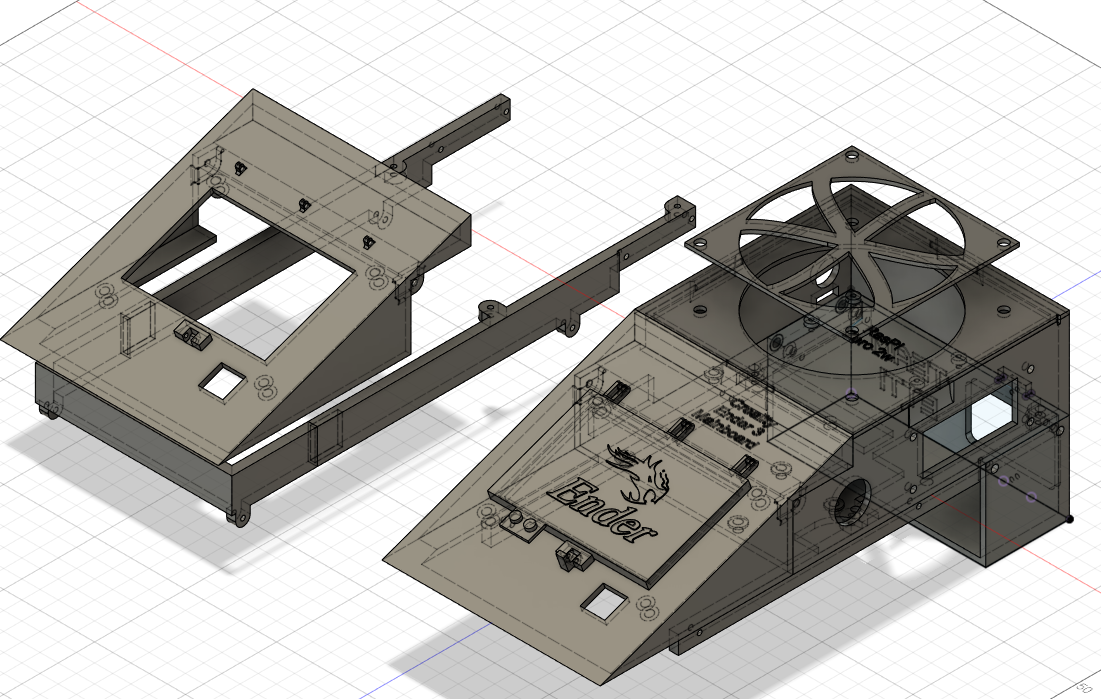
<p>This is designed by Maju (https://www.prusaprinters.org/social/204294-maju/about) and me. It was my first try to design things with Fusion360…</p><p>I hope you enjoy it…</p><p> </p><p>The printed parts are screwed to the power supply. The cover must be removed for this. The printed supports are attached to the top of the power supply with these screws.<br>There are 2 versions of the supports to be able to use both power supplies that are available in the Ender 3.<br>Version V1: Ender 3 V1 (2018)<br>Version V2: Ender 3 Pro and Ender 3 Max<br>There are also 2 display stands. On the displaycover are two nobs where you can connect a Lego brick or a Minifigure ( also compatible bricks and figures)</p><p>A fan with a diameter of 90 mm is installed on the cover. Depending on the fan, 4 M3 or M4 screws are required for this.</p><p>In the housing there are mounting points for the Ender main board and a RasPi Zero 2w. In these points Ruthex inserts can be placed (but are not necessary).</p><p>On right side is a rectangle hole here is it possible to install a breadboard circuit board, to manage the wires to the outside. I´ve used wire ribbon cables and 2.54mm JST-XH connectors for the connetions between the circut board and the printer hardware parts.</p><p> <br>In the power supply extender there is space for a DC/DC 24/12V converter to be able to supply the Raspi directly via the power supply.</p>
With this file you will be able to print Quietbox electric parts Ender 3 with your 3D printer. Click on the button and save the file on your computer to work, edit or customize your design. You can also find more 3D designs for printers on Quietbox electric parts Ender 3.