Racelogic Lap Timer (Nextion 3.2")
thingiverse
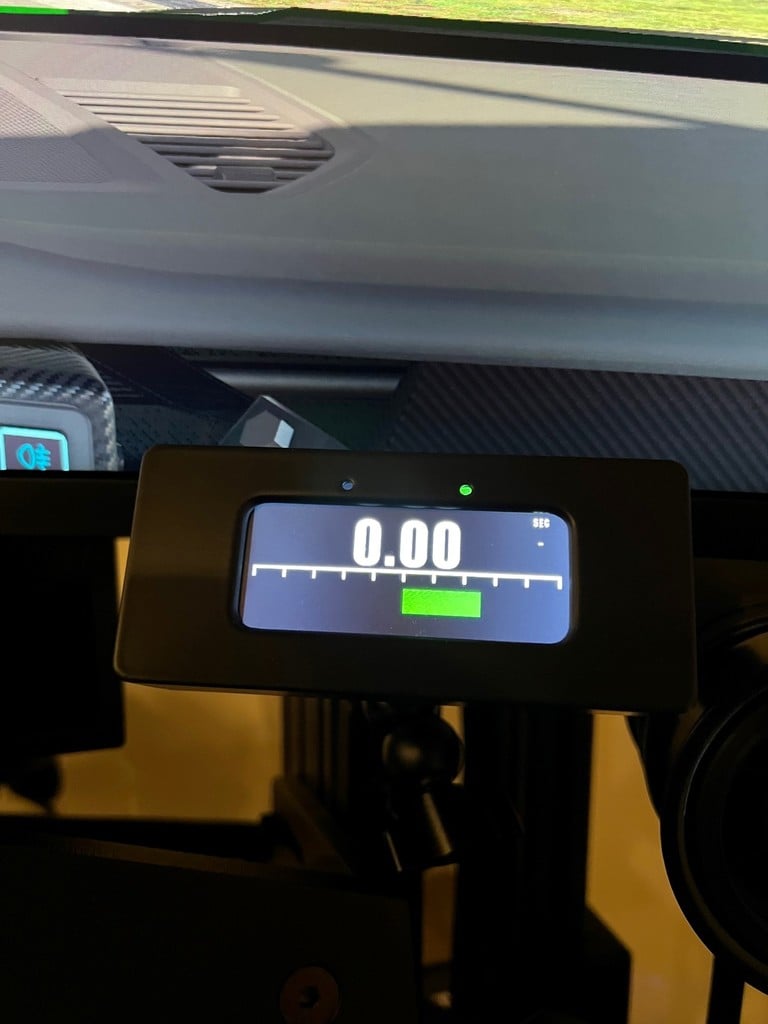
This is another DIY Racelogic Laptimer. I used the Nextion 3.2 " Basic Display. For best srcewing options, i used the Ruthex M3 threaded inserts for fixing the Nextion Display with M3 screws (take the shorter threaded inserts for the display) and the normal ones for the rest. The lid of the box needs a 1/4" threaded insert, because i used a camera mount, which is usually coming with 1/4 " screws. With this mount you have the maximum of flexibility by positioning the Laptimer. For mounting at the rig, choose one of my mounts (as well with a 1/4" threaded insert). The Arduino is fixed on the back side of the Nextion display with a piece of velcro tape, so it can be removed anytime. Wiring is very easy: Nextion > Pro Micro 5V (red) > VCC TX (yellow) > RX RX (blue) > TX GND (black) > GND For software installation, first install SimHub. 1.) Upload Nextion Micro Bridge sketch to arduino (it is in the simhub directory under 'Nextion Micro Bridge') 2.) Upload Nextion template, in the Nextion files provided, double click the .tft file to open the Nextion uploader. (Sometimes it needs more than one attempt.. and note that you MUST close SimHub before!) 3.) Setup Nextion within SimHub, select one of the template files from the drop down menu. You can set it up in the Mapping Editor to show whatever you like on the screen. Enjoy..
With this file you will be able to print Racelogic Lap Timer (Nextion 3.2") with your 3D printer. Click on the button and save the file on your computer to work, edit or customize your design. You can also find more 3D designs for printers on Racelogic Lap Timer (Nextion 3.2").