Rackmount Raspberry Pi 3/4 Case
thingiverse
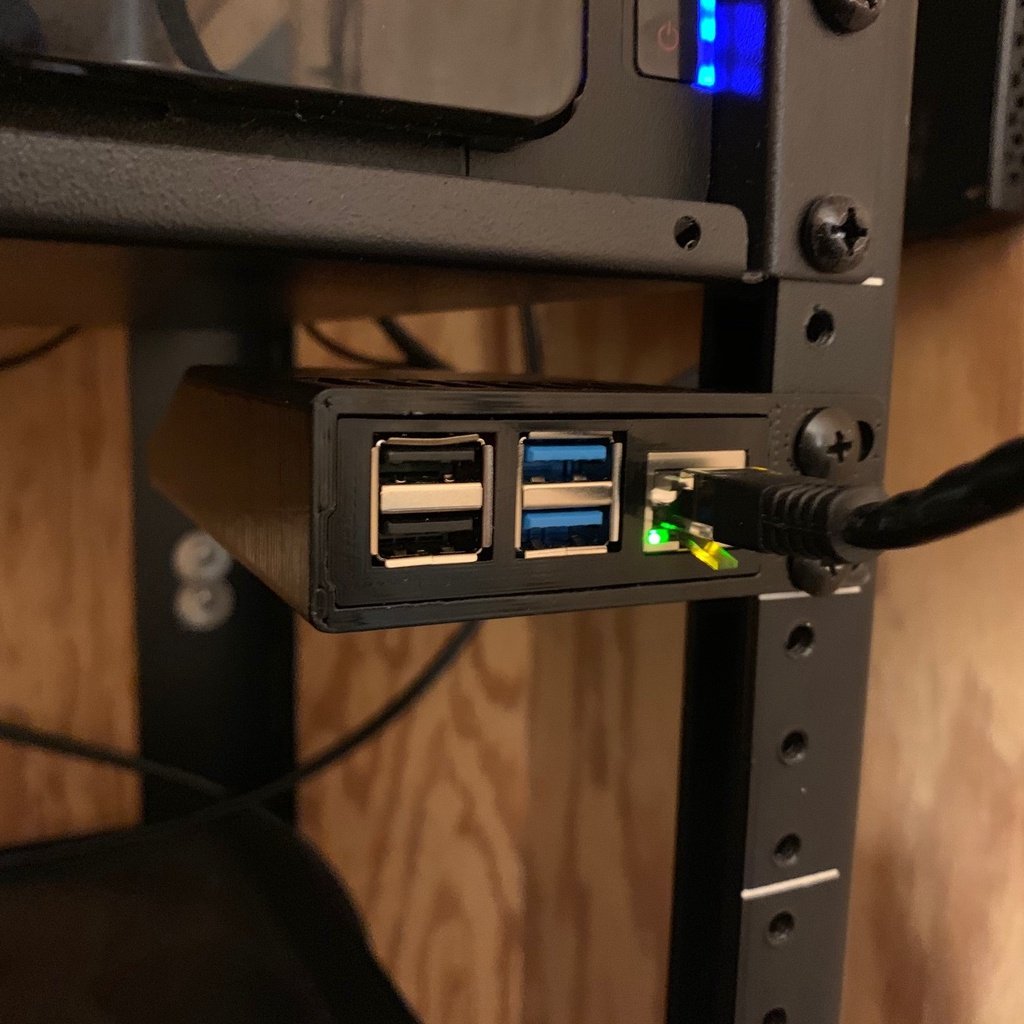
After reviewing available rackmount Raspberry Pi cases, I decided to make my own. This custom case won't suit everyone, but it meets all my requirements perfectly. It doesn't expose any ports except the front USB and Ethernet as designed for a headless server, with a rear port for feeding a quality 5v power supply cable directly to the GPIO. I'm using an overclocked Raspberry Pi 4 running at 2ghz, and my posted temperature graph is genuine, although I haven't yet reached that level of load on the Pi. To ensure optimal performance, I've also installed heat sinks with thermal epoxy. For printing, I chose a vertical design, as shown in the photo I posted, but it should print just fine horizontally. Two case models are available: one with mounts on the left and another with them on the right. There are also two front cover options – one for the Raspberry Pi 4 and another for older models that reversed their layout. The front cover features a lip flush with the Ethernet port, allowing a touch of hot glue to securely hold it in place. The fan cover can be secured with just a touch of hot glue but will stay put without it if desired. I used a 40mm x 10mm Noctua 5v fan, and any other 40mmx10mm fan should work well too; the Noctua is highly recommended for its performance. For the fan and power supply, use 2.54mm female pin connectors, then cover each in heat shrink tubing to ensure a secure fit inside the case. To facilitate installation, you'll need to bend the wiring 90 degrees to accommodate it. You will require four 12mm M3 screws for attaching the fan and two #4 x 1/4" sheet metal screws for attaching the Raspberry Pi. Only the two screw holes nearest the Ethernet and USB ports on the Pi are used, which can be accessed through the top vents but require starting the screws before inserting the Pi into the case. Use a small screwdriver to tighten them down through the vents. To assemble the case, follow this order: (1) Install the fan, (2) push the power supply wire through the rear port, (3) attach the fan and power wire pins before inserting the Pi, (4) start the two #4 screws into the Pi, (5) carefully insert the Pi into the case, (6) tighten the screws with a small screwdriver through the ports, (7) insert the front cover or apply glue first if desired.
With this file you will be able to print Rackmount Raspberry Pi 3/4 Case with your 3D printer. Click on the button and save the file on your computer to work, edit or customize your design. You can also find more 3D designs for printers on Rackmount Raspberry Pi 3/4 Case.