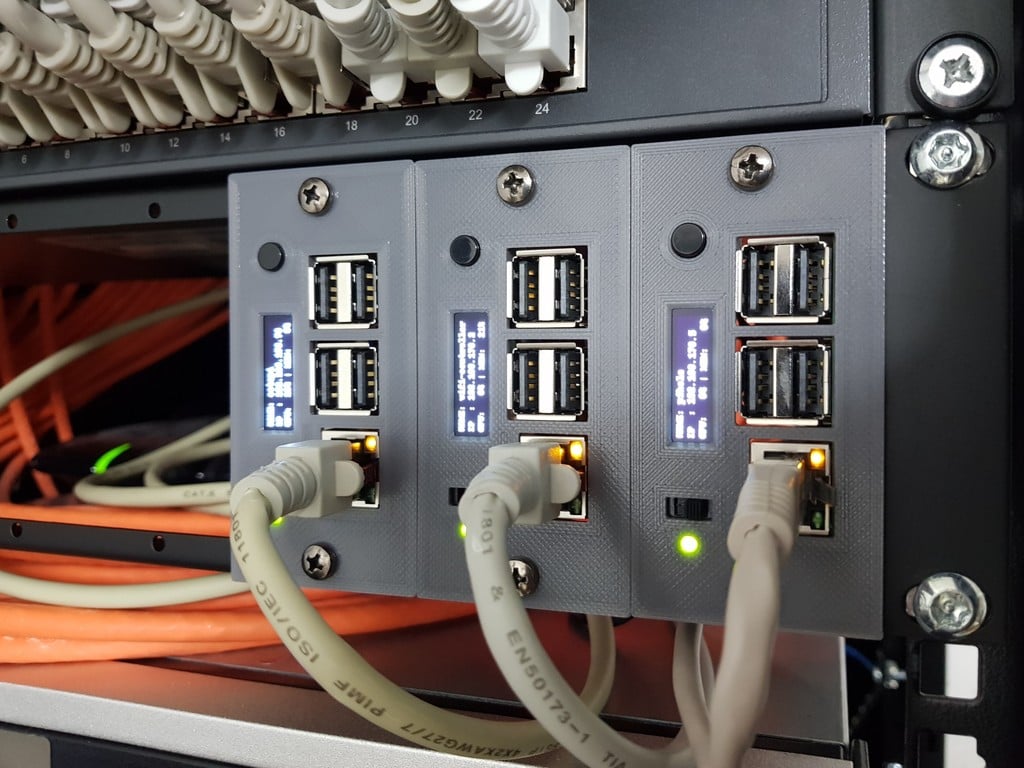
RackPi Raspberry Pi (2B / 3B / 3B+ / 4B) Rack Shield 19" 2U with OLED & Power Switch
thingiverse
The project you're describing is a DIY dashboard for a Raspberry Pi, featuring an OLED display, a push button, and some LED indicators. Here's a step-by-step guide to help you build this project: ### Components Required * 1x Pin header male (2 pins) * Some hot glue * A miniature slide switch * Jumper wire * A PCB * An OLED display module * A push button switch * A push button cap * A low-current LED (3 mm) ### Steps to Build the Project 1. **Prepare the PCB**: Use hot glue to attach the pin header male to one end of the PCB. 2. **Connect the Components**: * Connect the OLED module's SCL and SDA pins to the PCB's corresponding pins using jumper wire. * Connect the push button switch's pins to the PCB's corresponding pins using jumper wire. * Connect the low-current LED's anode to the PCB's corresponding pin using jumper wire. Also, connect a resistor (1K) in series with the cathode of the LED to limit the current. 3. **Add the Miniature Slide Switch**: * Use hot glue to attach the miniature slide switch to one end of the PCB. * Connect the push button cap to the miniature slide switch's pins using jumper wire. 4. **Prepare the OLED Display Module**: Rotate the OLED display module by 180° so that it matches the orientation of the PCB. 5. **Install the Software**: * Follow this guide to install the necessary software for the OLED display: <https://learn.adafruit.com/adafruit-pioled-128x32-mini-oled-for-raspberry-pi/usage> * Edit the `SSD1306.py` file to make the necessary changes for rotating the OLED display by 180°. 6. **Run the Software**: * Copy the attached `disp.py` file to your Raspberry Pi and make it executable. * Run the script using the following command: `python disp.py` * To run the script in the background, use the following command: `nohup python disp.py &` 7. **Automate the Script at Bootup**: * Add the following line above 'exit 0' in the `/etc/rc.local` file to make the script start automatically at bootup: `python /home/pi/disp.py &` The DIY dashboard is now complete, and you can use it to display information on your Raspberry Pi.
With this file you will be able to print RackPi Raspberry Pi (2B / 3B / 3B+ / 4B) Rack Shield 19" 2U with OLED & Power Switch with your 3D printer. Click on the button and save the file on your computer to work, edit or customize your design. You can also find more 3D designs for printers on RackPi Raspberry Pi (2B / 3B / 3B+ / 4B) Rack Shield 19" 2U with OLED & Power Switch.