Rad Pad USB Controller
thingiverse
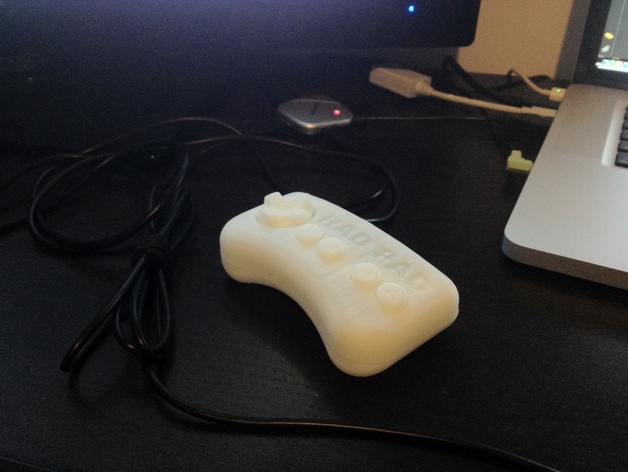
I've always hated the incredibly uncomfortable controller of the 1985 Nintendo Entertainment System, so I thought it was time to fix that. Starting with a USB NES controller, I measured and modeled the PCB and silicon membranes and then designed a more ergonomic controller around it. The end result is a controller with much more comfortable buttons and D-pad to play NES games the right way (albeit on the computer since it's USB). If you like this model and are interested in hiring me to design something for you, please check out www.cohesiveproductdevelopment.com Instructions First, you'll have to get a USB NES controller. Mine was a "Tomee" brand controller (I put the stock photo on the sidebar), but I believe all NES USB controllers with plastic Start/Select buttons are just rebrands of the same controller. Also, make sure that the one you buy has only a cord coming out of the controller and not a captive strain relief as the board is a little different (I think the strain relief version was an older type). Hopefully, most of the 3rd party NES USB controllers are the same, but let me know via comments if you buy one that has different internals. Mine also had a QC sticker on the back of the controller covering one of the screws, if that helps. All you will need from the USB controller is the PCB, screws, and silicon membranes, the rest is included as STL files on this page. Don't worry if you test it and the D-Pad is a little jittery, the stock case doesn't line up with the PCB very well, so as long as it is recognized by your computer, it should be fine for this project. I have a PP3DP UP! Plus, and as such have automatically generated support. If your printer doesn't have some sort of removable support option, you may have to go in and add some yourself. Otherwise, just print in whatever orientation that leaves the most complicated side facing "up" (as in, the inside of the controller will print upwards) and I recommend increasing the minimum support area value when printing the buttons as the hole on the bottom definitely cannot be filled. Be careful when removing support from the D-Pad as the "bumps" on the bottom can greatly affect the performance of the controller if they are malformed. Other than that, just use the photos and 3D PDF to figure out how things go together, it's not too hard to assemble. If you like this and want to post it elsewhere, just make sure to link back to this page.
With this file you will be able to print Rad Pad USB Controller with your 3D printer. Click on the button and save the file on your computer to work, edit or customize your design. You can also find more 3D designs for printers on Rad Pad USB Controller.