Radial engine model
prusaprinters
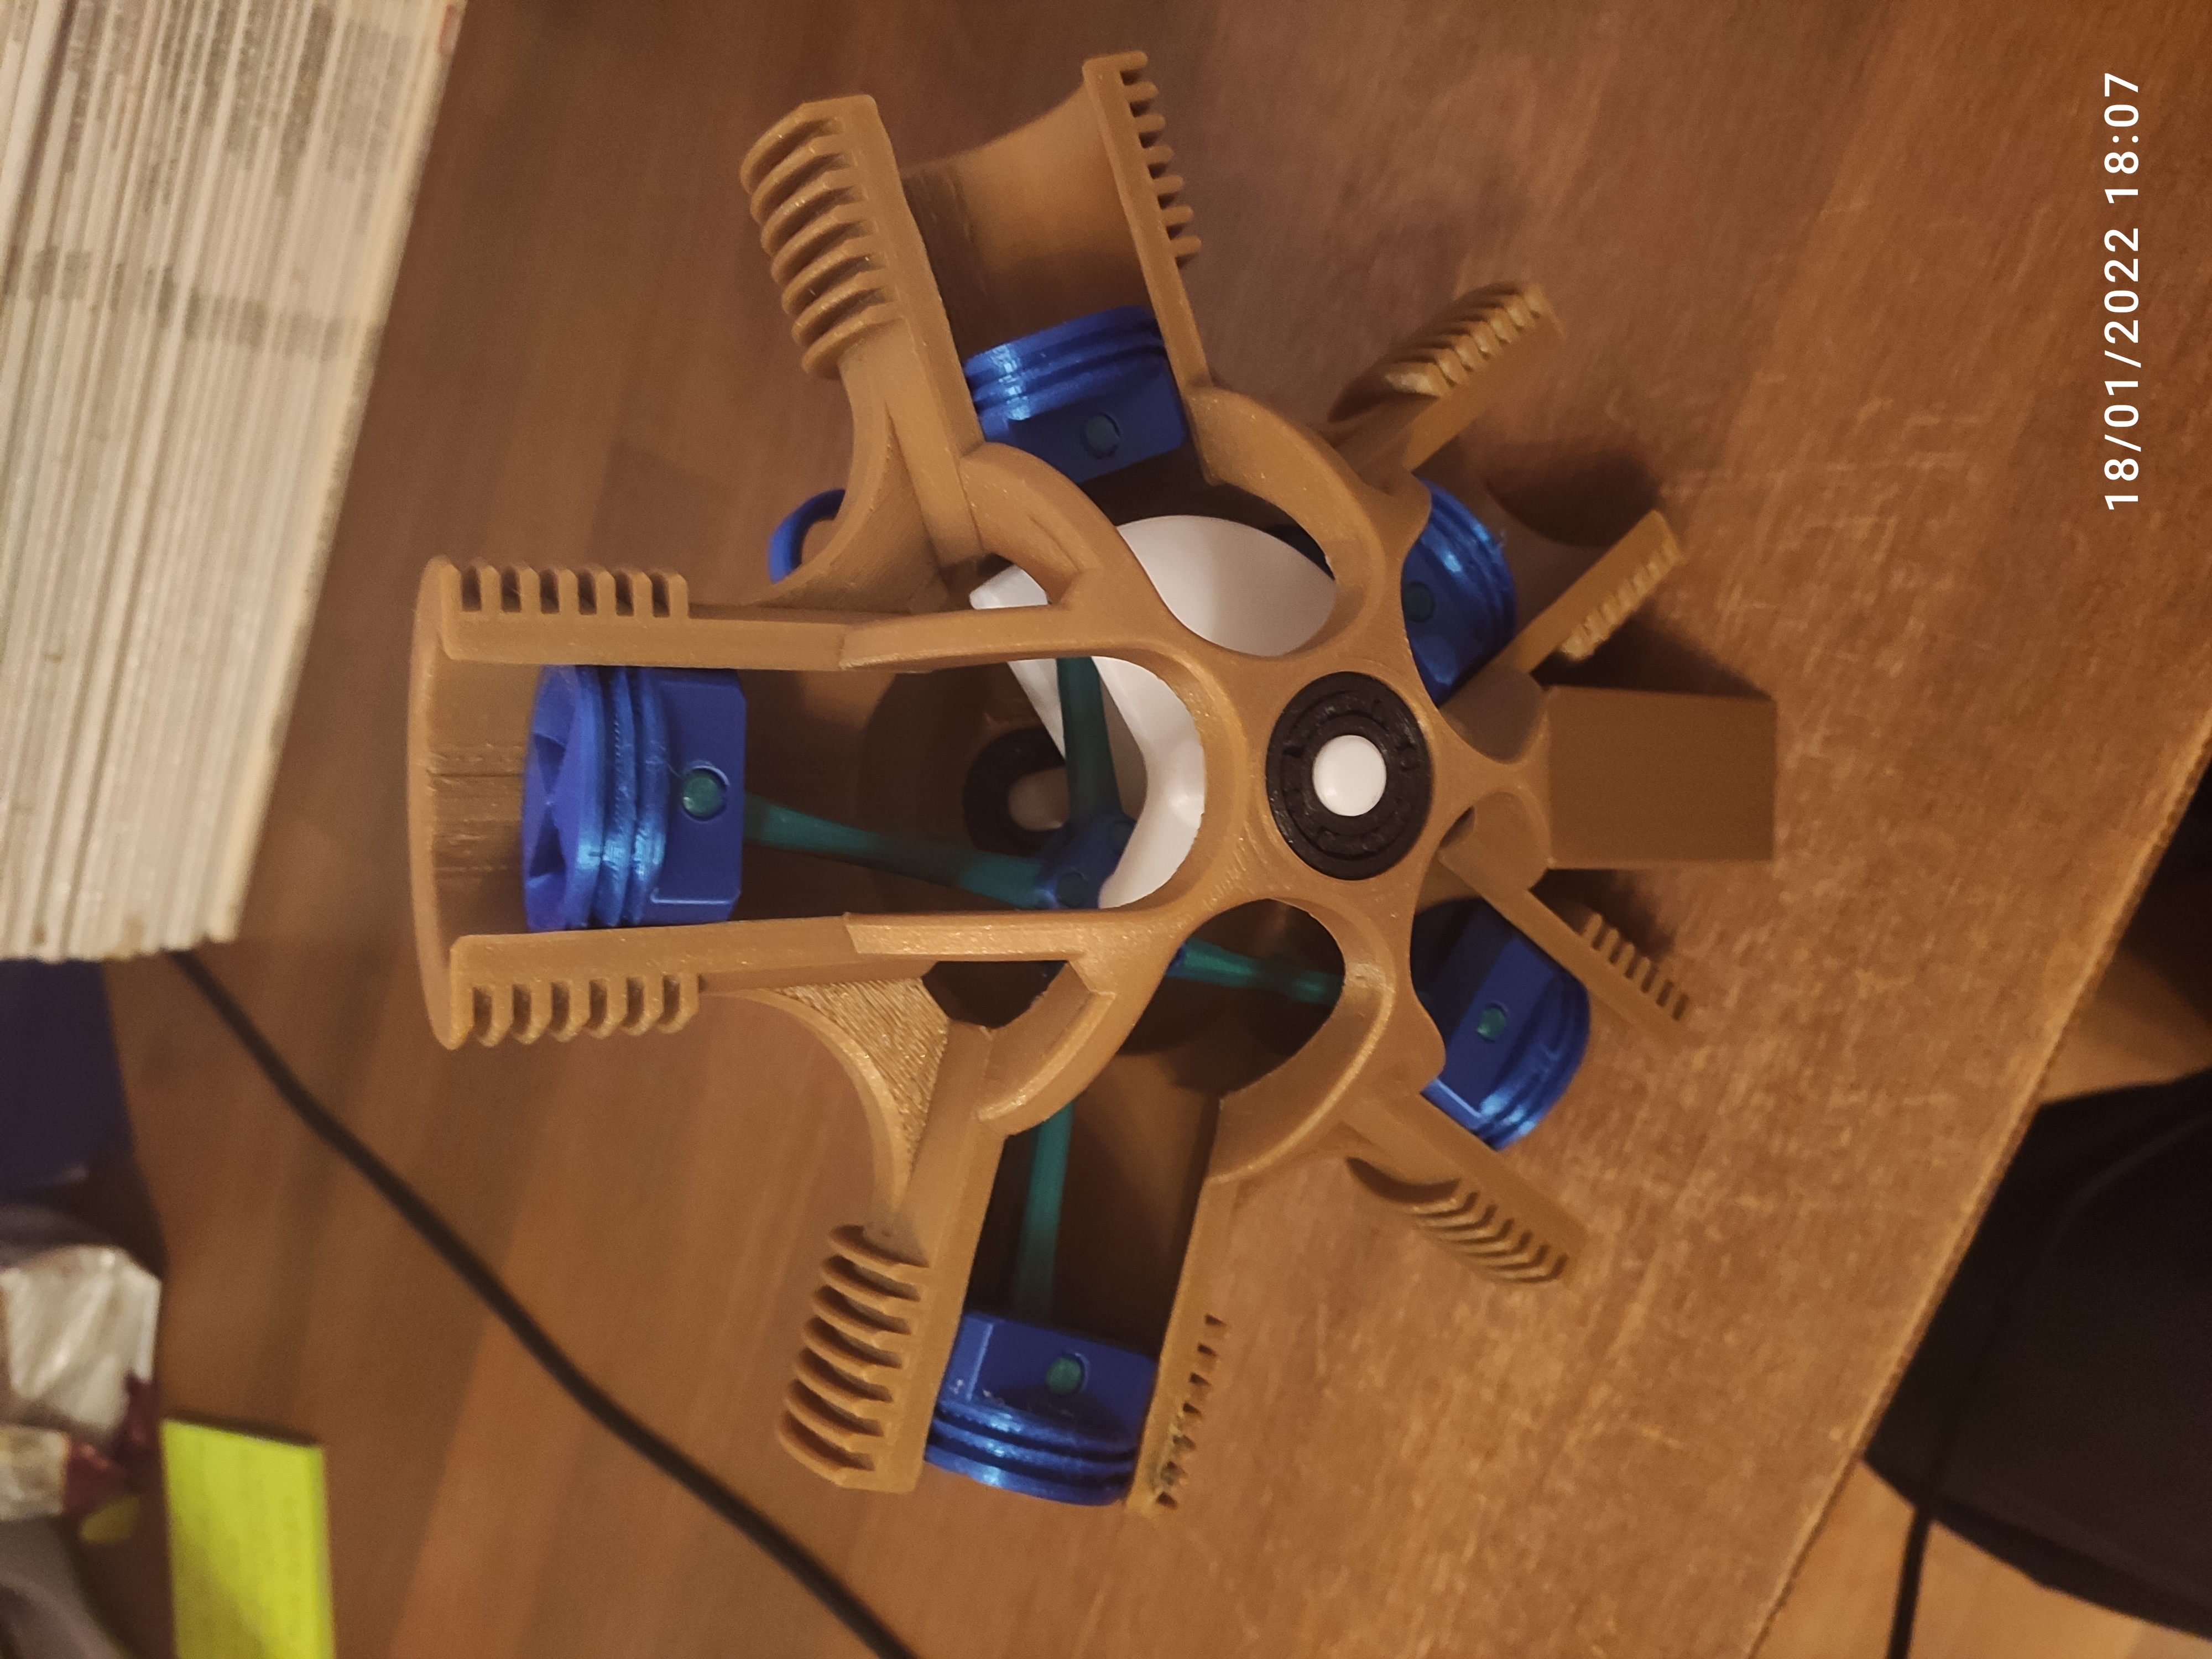
<p>Model of a 5 cylinder radial engine with a frontal cutout to see all the cool moving parts. The tolerances between the piston and the cylinder wall are very tight, be sure to have some WD40 or other lubrication at hand. Also included is a small stand to display the model at an angle. Hopefully the pictures provided make the assembly instructions much clearer to understand.</p><p>Additional requirements for assembly: superglue and 2 bearings with a 10mm internal diameter, 26mm outer diameter (6000), STL files on thingiverse: <a href="https://www.thingiverse.com/thing:4821342">https://www.thingiverse.com/thing:4821342</a> </p><ol><li>fit the printed bearings onto each end of the currently seperate pieces of the crankshaft</li><li>fit both “con rod stars” on the eccentric part of the crankshaft pieces</li><li>with both “con rod stars” facing each other, push the two halves of the crankshaft into eath other, make sure that the crankshaft rotates around one axis, so that it actually becomes a proper crankshaft, and glue both pieces together. </li><li> insert the crankshaft and one of the bearings into “main housing”, make sure that the crankshaft end with the polygon /triangle shaft ("rear crankshaft") is actually facing backwards. The triangle should be sticking out the back of the housing. Be careful while printing this part, the cooling fins on the housing like to warp off the print bed!</li><li>connect each piston to one “con rod” using the provided “piston connecting pin”, again a tight fit and beware of damaging the prints!</li><li>before inserting the cylinders and con rods: make sure that all of the supports on the “main housing” are removed entirely, left over supports will hinder the movement of the cylinders</li><li>rotate the crankshaft upwards, so that it is facing one of the cylinders, then insert a cylinder with a con rod attached and, using a “crank connecting pin”, attach the piston and con rod to the “con rod star” and the crankshaft in the middle of the engine. If necessary, lubricate the sides of the cylinder wall to make the engine rotate more smoothly. Repeat this process 5 times, after that all the cylinders shold be able to move up and down, but the whole thing is still a little shakey, this will be fixed in the next step.</li><li>fit the “frontal housing” to the whole assembly. The fit between the remaining bearing and the frontal housing should be tight, and the, for lack of a better word, legs, of the frontal housing should line up with small holes on the main housing. This will properly hold the crankshaft in place and allow smooth rotation of the crankshaft. After proper alignment and some test spins of the crankshaft, glue the front housing onto the back housing. BE CAREFUL: there is no going back after this step, disassembly of the parts is no longer possible after this point, make sure everything works before you do this.</li><li>fit the “handle” on the triangular part of the crankshaft sticking out the back, this allows you to easily rotate the crankshaft, the fit should be tight.</li><li>optional: print out the stand and set the engine model on it</li></ol>
With this file you will be able to print Radial engine model with your 3D printer. Click on the button and save the file on your computer to work, edit or customize your design. You can also find more 3D designs for printers on Radial engine model.