RailCore II Part Cooling Duct use w/ 713Maker's Ultralight Y plate and E3D V6
thingiverse
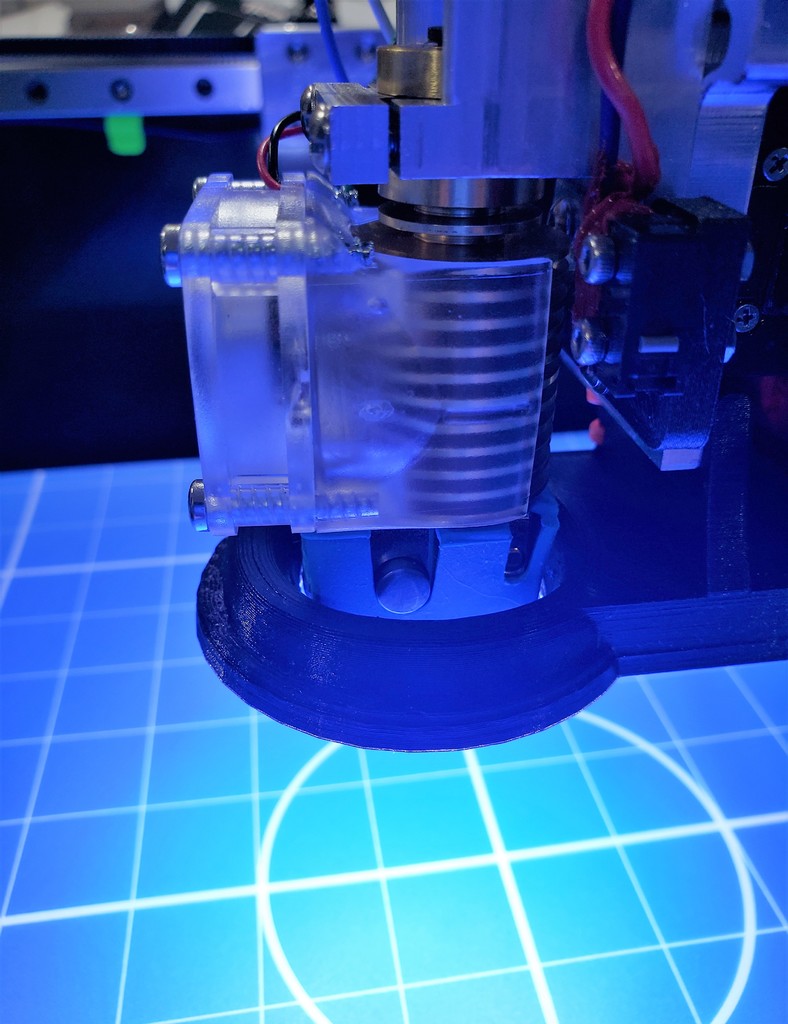
***DISCLAIMER: This is still work in progress. Might need to make adjustments, but don't see why it wouldn't work. From my testing I believe it will only need about 50% power or less, but I will update after I have a chance to make some prints.*** I switched to 713Maker's wicked awesome 'Railcore II ZL series ultralight Y plate' for my Railcore II 300ZL 3D printer and at the time their wasn't many part cooling ducts for this 'Y' plate. I also wanted a LED light to shine down on the print. I did some searching and found this awesome design by Snipsey,FT5 Bondtech+E3D V6 Part Cooling Fan V2. I used this as reference to design one that would fit my needs. I have two designs here: **Model 9J 4020 Blower without the 50mm COB LED Ring light.** **Model 9L 4020 Blower with accommodation for a 50mm COB LED Ring light.** BOM: [COB LED](https://www.ebay.com/itm/40MM-120MM-COB-Angel-Eyes-Halo-12V-SMD-Car-LED-Light-Ring-DRL-Headlight-Lamp/272904899570?ssPageName=STRK%3AMEBIDX%3AIT&var=572088687418&_trksid=p2057872.m2749.l2649) [713Maker Ultralight Y plate](https://713maker.com/railcore/railcore-ii-zl-series-ultralight-y-plate) [4020 Blower](https://www.amazon.com/GDSTIME-40mm-Brushless-Blower-Cooling/dp/B00ZWG1NE4/ref=sr_1_12_sspa?ie=UTF8&qid=1547899955&sr=8-12-spons&keywords=4020+blower&psc=1) 3 M3 Nuts (need to be heated and pressed in place in the cooling duct). 3 M3 flat washers (optional) 3 M3 x 16mm button head bolts (for securing the 4020 blower to the cooling duct). 2 M3 x 10mm button head bolts (for securing the cooling duct to the 'ultralight Y plate'). Assembly Notes: 1. I used a heat gun to warm up the 3 M3 nuts so they will stay in place. 2. If making Model 9I, Insert the 50mm COB LED in the Part Cooling Duct and secure it with small amount of hot glue or whatever you like to use. (see photo) 3. Now fasten the Part Cooling Duct to the Ultralight Y plate using 2 M3 x 10mm bolts 4. Now you can bolt on the 4020 blower using the 3 M3 x 16mm bolts with or without the flat washers. 5. Connect the Blower and LED (if using model 9I) to the proper controls.
With this file you will be able to print RailCore II Part Cooling Duct use w/ 713Maker's Ultralight Y plate and E3D V6 with your 3D printer. Click on the button and save the file on your computer to work, edit or customize your design. You can also find more 3D designs for printers on RailCore II Part Cooling Duct use w/ 713Maker's Ultralight Y plate and E3D V6.