Raise3D - N2 Plus - Filament Run-Out Sensor - Holder
thingiverse
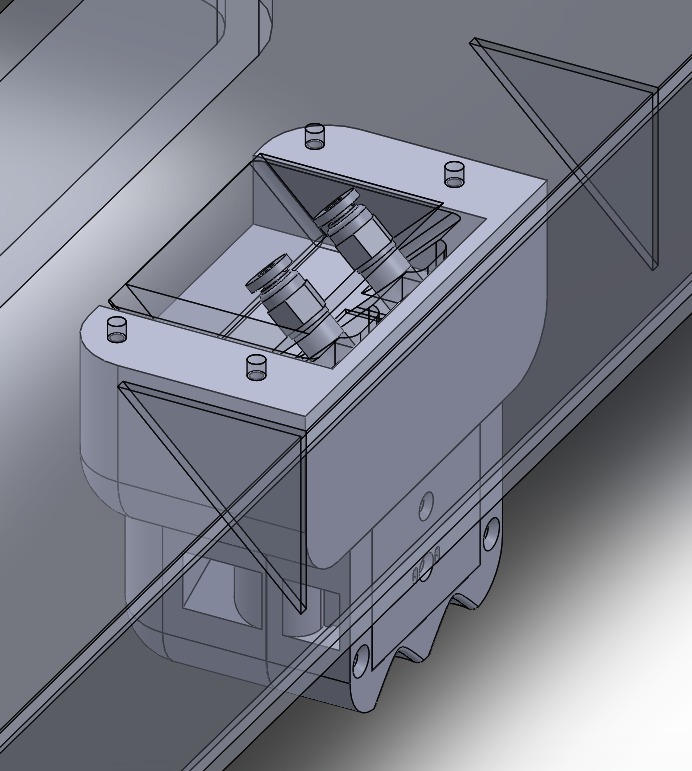
On the updated installation guidelines, the sensor is secured with screws inside the printer and the filament for the right extruder can be loaded into the left sensor input.\r\nWith the new holder, the sensor is fixed with screws and the filament for the right extruder could also be loaded into the right sensor input.\r\n\r\nHow to install the new sensor holder:\r\n- print all parts\r\n- use the drilling template and drill four holes (4mm diameter) and sink them\r\n- attach the main holder to the printer ("PrintingFile_Holder_Main" / 3.5x25mm screws)\r\n- open the original filament run-out sensor\r\n- mount the circuit board and the metal cover on the "PrintingFile_Holder_Sensor" piece\r\n- move the filament sensor into the main part already mounted on the printer\r\n- secure it with two 3.5x45mm screws\r\n- route the sensor cable through the recess on the backside of the sensor holder\r\n- connect the sensor cable to the circuit board\r\n- insert the transparent Bowden tubes (4mm diameter) into the coupling\r\n- lower the Bowden tubes down until they reach the metal cover of the sensor\r\n- done...\r\n\r\nPS.: Exercise caution when handling the sensor to prevent any damage...
With this file you will be able to print Raise3D - N2 Plus - Filament Run-Out Sensor - Holder with your 3D printer. Click on the button and save the file on your computer to work, edit or customize your design. You can also find more 3D designs for printers on Raise3D - N2 Plus - Filament Run-Out Sensor - Holder .