Rakonheli 66 2S brushless Low Profile
thingiverse
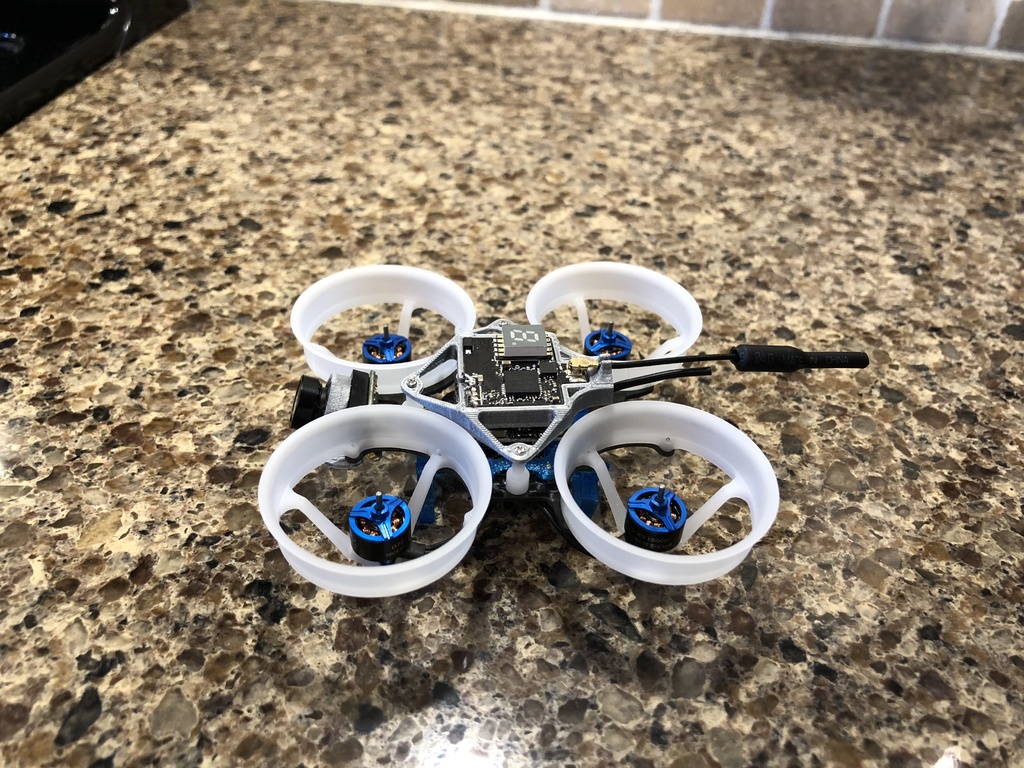
Front camera mount and VTX / Receiver bracket to make a Rakonheli 66 brushless whoop low profile. The parts for this build are very specific, I can't guarantee compatibility with any other part combination. I have extra screws listed in the parts list, I would recommend these so you have enough parts even if you lose a few (they are extremely small). Camera Mount The camera is mounted at a fixed 20 degree angle and is mounted as far back and as high as possible, however there is still a small angle where the bottom of the camera can strike in a crash. There are tabs on the side of the mount that hold the camera level and prevent it from rotating. The lens must be removed from the camera before inserting the housing into the mount, if the mount is too tight I find it works well to insert it from the opposite side and rotate it a few times to loosen everything up. a dab of super glue or hot glue can be added if needed. The mount is attached to the frame where the prop guard is screwed to the carbon fiber frame. these are 3mm long screws and need to be replaced with 4mm long screws for maximum strength. (Extra Screw kit recommended for this reason) VTX / Receiver bracket I measured the parts I had on hand and designed based on those, because circuit boards are not exact from batch to batch some adjusting may be need (a file works well to clean up circuit board edges). I used a bit of super glue to tack down the circuit boards after they were assembled into the bracket. The bracket leaves the top of the ATX03 exposed to crashes, I will update the design to add some protection later. For an even cleaner build, I removed the wires off the ATX03, removed the protective coating off the wires and then re-soldered them to the bottom side of the board. I now have no exposed wires on the top of the quad. As a bonus because the FC and ESC mount is flexible when you squeeze the boards together you can trigger the receiver bind switch so the quad doesn't need to be disassembled. Also the USB port is accessible in the rear without disassembly Couple of tips 1. setup a work area with a towel or something soft and large to work on, the screws disappear as soon as they are dropped. 2. Liquid tape works well in areas where adding heat shrink isn't an option or where weight is a concern. 3. Do a mock up of your electronics on the workbench and test everything out ahead of time. 4. Check your mounting pads on the flight controller and Esc, a bunch of stuff coming out of china has the mounting pads of esc's connected to battery positive. when I built up the stack I smoked the ground wire between the FC and ESC because the mounting pads were connected through the mounting screws and they are opposite polarity. if you find the ESC is connected to battery positive I would use an ohm meter to verify isolation before adding power. 5. Don't use the wires that come on the camera stock, the ATX03 has very nice silicone wires that are long enough to run all of the equipment (camera, receiver and VTX) if everything is planned out. 6. Spend a lot of time on wire management, there is very little space to hide wires so making them as short as possible is a must. 7. Tweezers, Blue-Tak and a good soldering station are worth the investment. 8. The motor wires on the sunnysky motors have a coating and don't take solder very well, spend extra time tinning them to ensure they will solder cleanly to the ESC pads. also keep the wires a little longer then needed, they have a tendency to bread easily and the extra length makes repairs easier. https://youtu.be/_lYm87Gh1Gs Update 1/9/18 I am experiencing some brown outs on the 5V supply when I have all of the FPV gear running. I would hold off on ordering this exact parts list until I have the issue figured out. I will be testing a new flight controller in the next few days. I also added a picture of the receiver on the bottom side of the bracket.
With this file you will be able to print Rakonheli 66 2S brushless Low Profile with your 3D printer. Click on the button and save the file on your computer to work, edit or customize your design. You can also find more 3D designs for printers on Rakonheli 66 2S brushless Low Profile.