RAMPS 1.4 + Pi 2 B Case
thingiverse
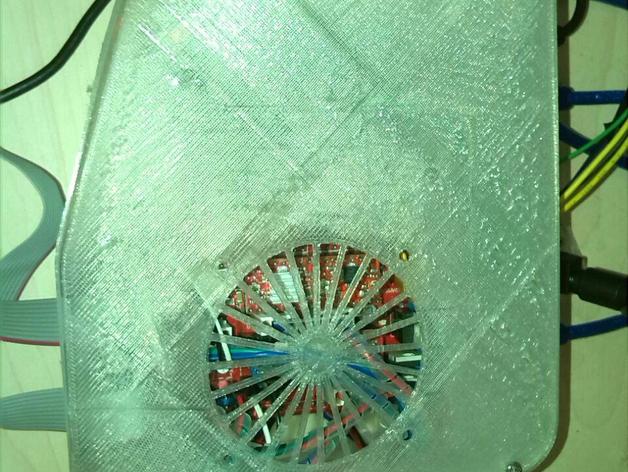
This is a casing I designed to hold both an Arduino Mega + RAMPS as well as a Raspberry Pi 2 B, since my setup uses the Pi as an OctoPrint networked printing server. I created this because right now the electronics were simply placed on the table next to the printer, and I wanted to enclose them somehow to make sure they don't get disturbed or touched. The Casing also includes a mount for a 60x60mm fan in the lid, and fitting air vents in the side, as well as a mount for the LCD display, to keep everything close together! Printer Settings Printer Brand: RepRap Printer: Prusa i3 Rafts: No Supports: No Resolution: 0.3mm layers, 0.4mm nozzle Infill: 20% Notes: Since this is a large part and the printing quality really does not matter, I recommend printing this with the fastest working settings to not have your printer run forever. Also, to get the perimeter walls right, the wall thickness can be adjusted within the .openscad file, so that there is no infill between the two external perimeters, or if a better thickness is wanted for a sturdier part. Post-Printing Step 1: RAMPS and Pi After printing both the casing and the lid, unplug both the RAMPS and the Pi. Using screws, both boards should fit in the casing. Both boards should have their USB ports facing the wall, and the Pi should be fitted in the smaller section. Step 2: Wire it up! Using the various holes in the casing, all cables should be routed through them, and reconnected to the RAMPS board in the correct places. The LCD Display connectors can be wired through the two rectangular holes next to them, USB Cables through the according holes in front of them, power cables in the same way, and all cables for stepper motors, heatbed etc can be routed through the two holes on the back wall. One hole is designed for the "stationary" bits of the 3D printer, meaning the Y-Axis motor, Z-Axis, heatbed and the Y-Endstop. The second hole should be used for the "moving" parts, meaning extruder, X-Axis, Endstops, and printer cooling fan. The USB cable connecting the Pi to the RAMPS had to be placed outside, since otherwise it would make the casing unnecessarily big. Step 3: Add a lid! After all cables are connected, the Lid can be prepared. First, screw the electronics cooling fan in place, wiring the wires through the according holes in the case. Then, simply place the lid on the case and close it by screwing four M3 screws through the holes, and you're done!
With this file you will be able to print RAMPS 1.4 + Pi 2 B Case with your 3D printer. Click on the button and save the file on your computer to work, edit or customize your design. You can also find more 3D designs for printers on RAMPS 1.4 + Pi 2 B Case.