Rapman 3.1 Bearing Blocks, X and Y, for dual and single head machines
thingiverse
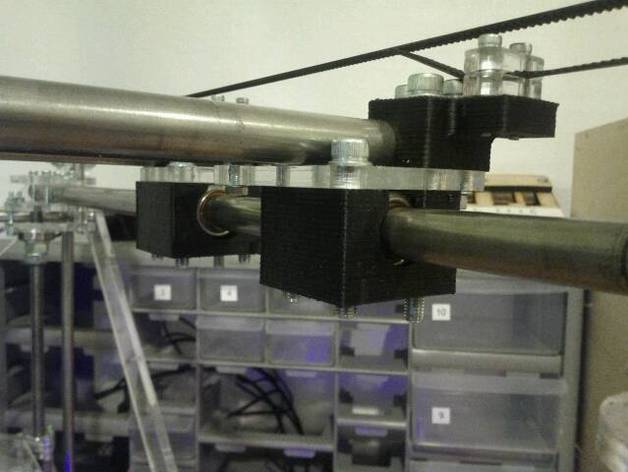
Revamped bearing blocks perfectly secure linear bearings, preventing overtightening issues. With updated orientation, nut rebates feature lofted cuts for print support-free assembly. Interfaces for bearing and bolt holes have been modified to reduce filing needs. Dual head carriage version available. Print with preferred settings; recommended 25% infill or less for shrinkage prevention. Install blocks as per original instructions, retaining top acrylic plates. A new belt holder method is suggested for increased rigidity. Use six M5 x 40mm bolts as belt holders instead of the original 35mm ones; secure with a plate underneath the bearing blocks. Be aware that installing these blocks will increase axes height by 0.5 mm each, raising extruder height by 1 mm. Adjust Z height and limit switch accordingly.
With this file you will be able to print Rapman 3.1 Bearing Blocks, X and Y, for dual and single head machines with your 3D printer. Click on the button and save the file on your computer to work, edit or customize your design. You can also find more 3D designs for printers on Rapman 3.1 Bearing Blocks, X and Y, for dual and single head machines.