Raspberry Active Cooling Fan
thingiverse
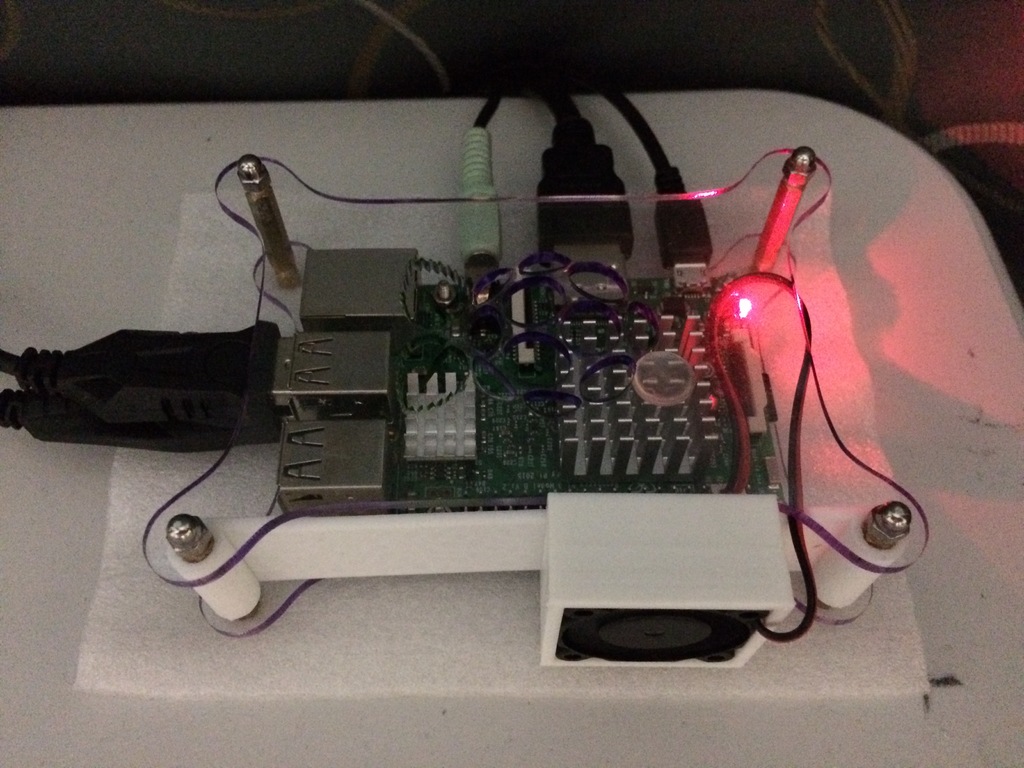
WARNING: Overclocking your Raspberry Pi 3 nullifies all warranties on your Pi. You should only overclock it if you're willing to accept the risks and possible losses. To date, my Pi has been running without issues. If you have this case and want to overclock your Raspberry Pi, a good fan is crucial. Unfortunately, this case doesn't easily support active cooling. My 3D printer came to the rescue. Initially, I created it as a single part in Sketchup, but when I tried to find the best way to orient it for the printer, I decided to split it into two parts. Afterward, I concluded that once printed, I would simply glue the pieces together. To my surprise, the tolerances of the parts allowed me to avoid gluing them altogether. Now, I run my Pi overclocked with the following settings: arm_frequency = 1400 over_voltage = 4 gpu_frequency = 450 Note: These settings may not work for all Pi 3s; customize these settings specific to your Pi. Since my memory doesn't have a heat sink, I'm hesitant to tweak memory frequency. The heat sink for memory didn't work with this case. I might add washers under the Pi to allow enough space for a memory heat sink. Note: The fan wire can be routed in the small semi-circle cutout. The fan should be 30mm x 30mm by 10mm deep and simply pressure-fitted.
With this file you will be able to print Raspberry Active Cooling Fan with your 3D printer. Click on the button and save the file on your computer to work, edit or customize your design. You can also find more 3D designs for printers on Raspberry Active Cooling Fan.