Raspberry and Raspicam mount for Ultimaker 2
thingiverse
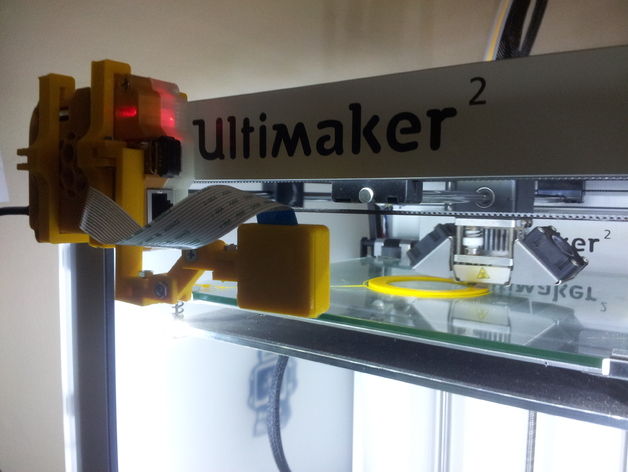
This makes it possible to mount a Raspberry with a Raspicam to the UM2 to take timelapses or to monitor with Octoprint Instructions A mount for a Raspberry case. The one is used is: http://www.thingiverse.com/thing:209100 Print one of each STL to complete (for left version choose Left Hanger, for right version choose Right Hanger) I found it better to be mounted on the left front side of the printer. The mount can be flexed a bit to be attached on the case (it shouldn't break). I used the following settings for all the part: 0.2mm layers, 0.8mm shell thickness, 24% infill. You will need a couple of M3 screws and Nuts (i used 12mm screws). The arm for the camera can be moved in order to find the best position to take timelapses. If you need to created different arms: Screw holes are 3.2mm, height: 3.5mm width: 10mm
With this file you will be able to print Raspberry and Raspicam mount for Ultimaker 2 with your 3D printer. Click on the button and save the file on your computer to work, edit or customize your design. You can also find more 3D designs for printers on Raspberry and Raspicam mount for Ultimaker 2.