Raspberry Pi 2 Stacking System
thingiverse
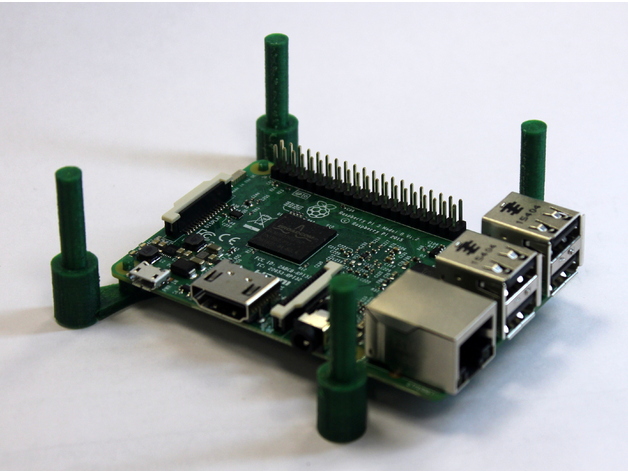
A versatile cradle system for the Raspberry Pi 2 & Raspberry Pi 3. The design cannot be classified as a case, given that it does not include sides or a lid. Assembling post-printing is straightforward; simply stack additional bodies with Pis inside them. To link adjacent cradle bodies, you will need to print two separate links. A friend requested that I print redogre's Pi 2 stacking system, but since the link was integrated into the main file, it would not fit on my Vector 3's build plate. The solution was simple: split the model into two files. RaspberryPiStack_Body_v3.stl is all you need to print to build a tower of Raspberry Pis. This updated body features stronger attachments to its columns and some geometry fixes to eliminate slicer anomalies observed earlier. pi2stack_body_v2.stl is also used for building a tower of Raspberry Pis, featuring an updated body with stronger connections to the columns. pi2stack_link.stl can be used to link adjacent stacks of the body together. Note that the original pi2stack_body.stl file had weak links between the base and the columns, which were prone to breaking. I have created a more solid version; pi2stack_body_v2.stl with strong connections. A larger resolution image of the finished cradle is available on my Flickr, as well as one with a Raspberry Pi 3 mounted in it. Print Settings: Printer: Vector 3 Rafts: Doesn't Matter Supports: No Notes: Do not use supports, as they will block the stacking mount holes. I printed mine at 0.10 mm with green PLA. How I Designed This: Splitting The File Into Separate Parts I took the original design and imported it into Sketchup, deleted the link, and exported a new STL. Then, I repeated this process to export the link to its own file. After printing and finding that the towers broke away, I checked the slice details again. Noticing the lack of connection between the column bases and the cradle, I went back to work. Better Connecting The Columns I switched to X-ray mode in Sketchup and noticed some strange geometry around the towers. Once I deleted some spare lines, a newly exported STL showed a better-looking corner with stronger connections between the column bases and the cradle. Then, all I had to do was repeat this process a few times to correct all four corners. Now, the slicer brings them out as solid. I have attached my SketchUp files: RaspberryPiStacker.skp and RaspberryPiStacker.skb.
With this file you will be able to print Raspberry Pi 2 Stacking System with your 3D printer. Click on the button and save the file on your computer to work, edit or customize your design. You can also find more 3D designs for printers on Raspberry Pi 2 Stacking System.