Raspberry Pi 3/4 Cases - ICE Tower Low Profile
prusaprinters
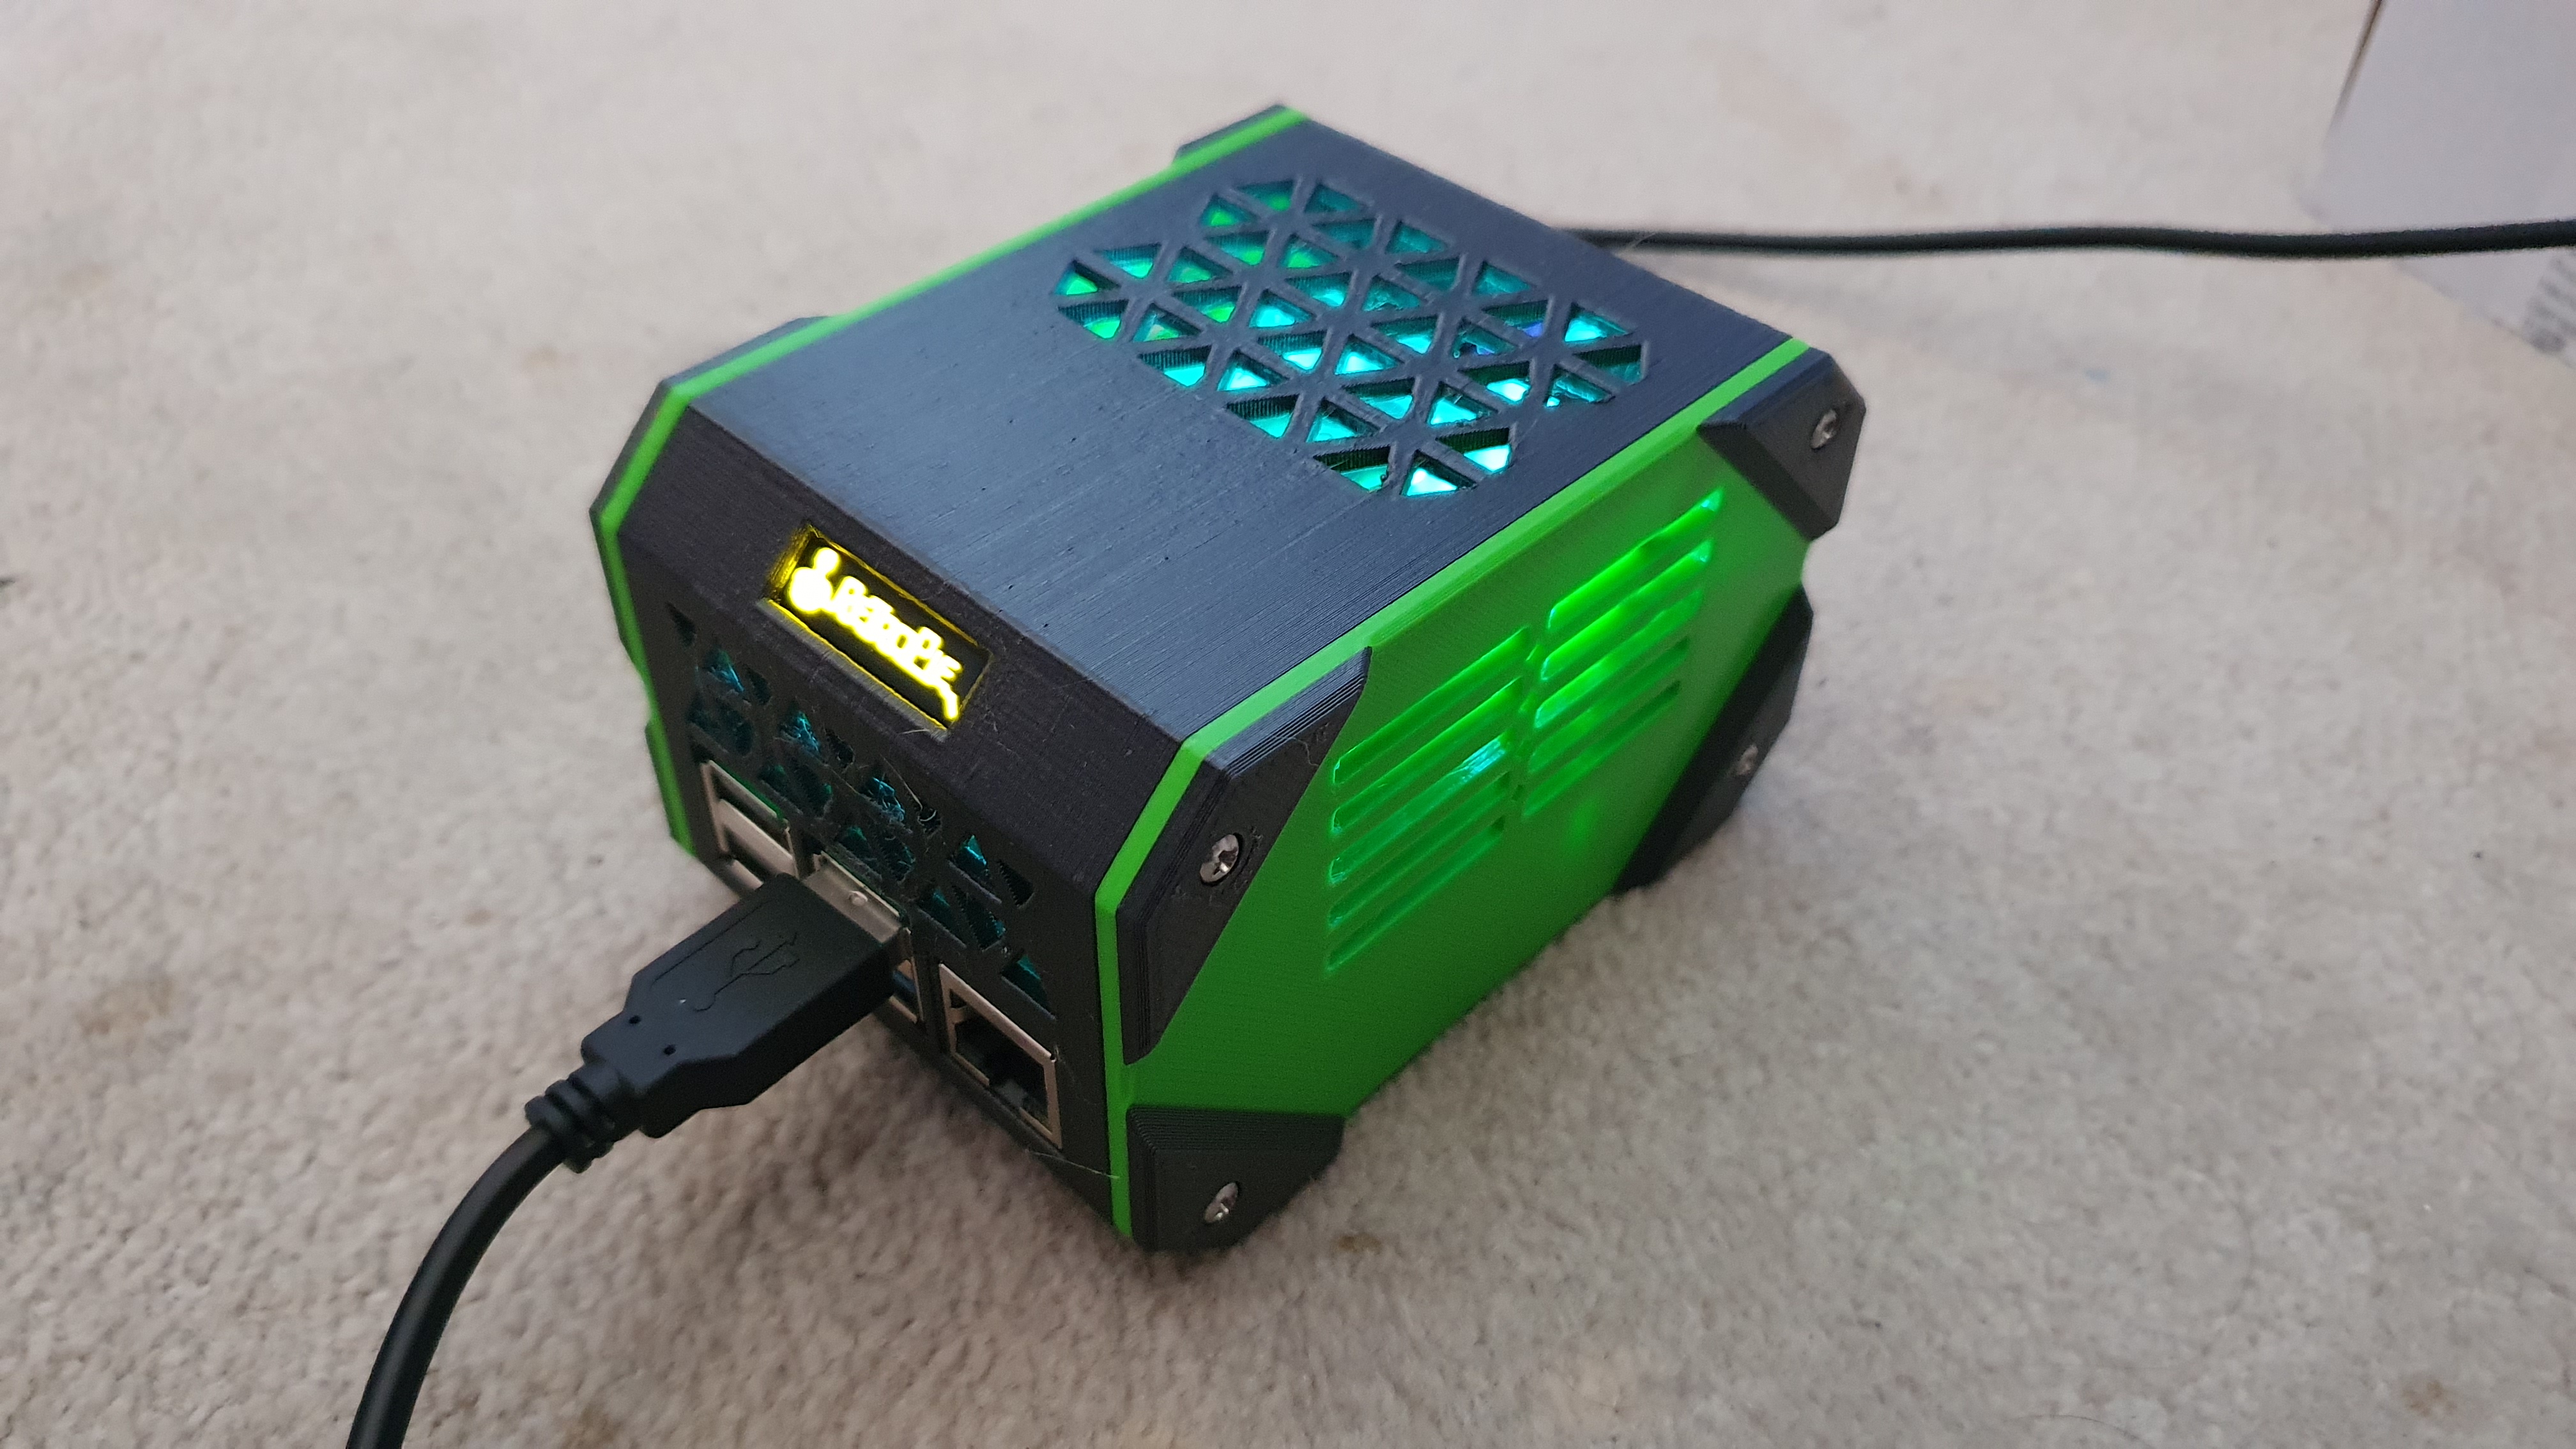
<h5>Edit 6/8/2022</h5><p>Updated to include a case and left side for the Pi3 (probably 2B as well but I don't have one to hand to check). Just print the Pi3 parts as well as the “Tower Right” stl.</p><p>I have also updated all of the 3MF files for both the Pi4 and Pi3 with or without OLED display, including painted on supports. There are now two options for the side panels 3MF files for both version, one as a single colour, the other has a colour change at the point the corners start (see photos).</p><h3>Original:</h3><p>I was looking for a case for my Pi4 where I have the low profile ICE Tower cooler. Most seem to accommodate the larger ICE Tower cooler. This is based on a design I saw (I can't find it now so apologies for not linking!) but has been built from scratch. I wanted to reduce the amount of supports needed for printing, the only support is needed around the SD card slot.</p><p>Designed with plenty of vents around to ensure there is enough air to help keep the Pi cool (hopefully GamersNexus would approve LOL)</p><p>There are two versions on the main body, one plain and another for a small 128x32 OLED screen if you would like status info about the Pi etc.</p><h4>Vitamins Needed</h4><ul><li>Low-Profile ICE Tower Cooler (and fitting kit)</li><li>4no m2.5 (L8mm) F/F Brass Stand-off's</li><li>4no m2.5 screws (L5mm)</li><li>8no D3mm L8mm self tapping plastic screws*</li><li><i>Optional: </i>128x32 OLED display</li></ul><h4>Building</h4><ol><li><i>If using the OLED display, wire it up and glue it into the case front - I just used hot glue on the sides.</i></li><li>Insert the ICE Tower M/F stand-offs into the holes on the Pi and attach to the F/F stand-offs on the other side.</li><li>Secure the cooler onto the stand-offs (remember to remove the protective covers on the thermal pads, because I certainly did and didn't need to dismantle it all to figure out why my Pi wasn't cooling that well. Nope didn't happen, no one can prove that…)</li><li><i>If using the OLED display, connect the wires to the Pi now. Can be done after but a little easier before inserting the Pi.</i></li><li>Slot the Pi into the case (may need a little wiggling to get around the SD card shroud) and secure using the m2.5 screws through the base of the case and into the F/F stand-offs.</li><li>Attach the sides using the 3mm plastic screws*, 4 per side.</li></ol><p> </p><p> </p><p>* These are still metal but for use in plastics, not screws made of plastic :D</p>
With this file you will be able to print Raspberry Pi 3/4 Cases - ICE Tower Low Profile with your 3D printer. Click on the button and save the file on your computer to work, edit or customize your design. You can also find more 3D designs for printers on Raspberry Pi 3/4 Cases - ICE Tower Low Profile.