Raspberry Pi 3B Case with SSD or 2.5" HDD Mounting Rails + Optional 40mm Fan Mount
prusaprinters
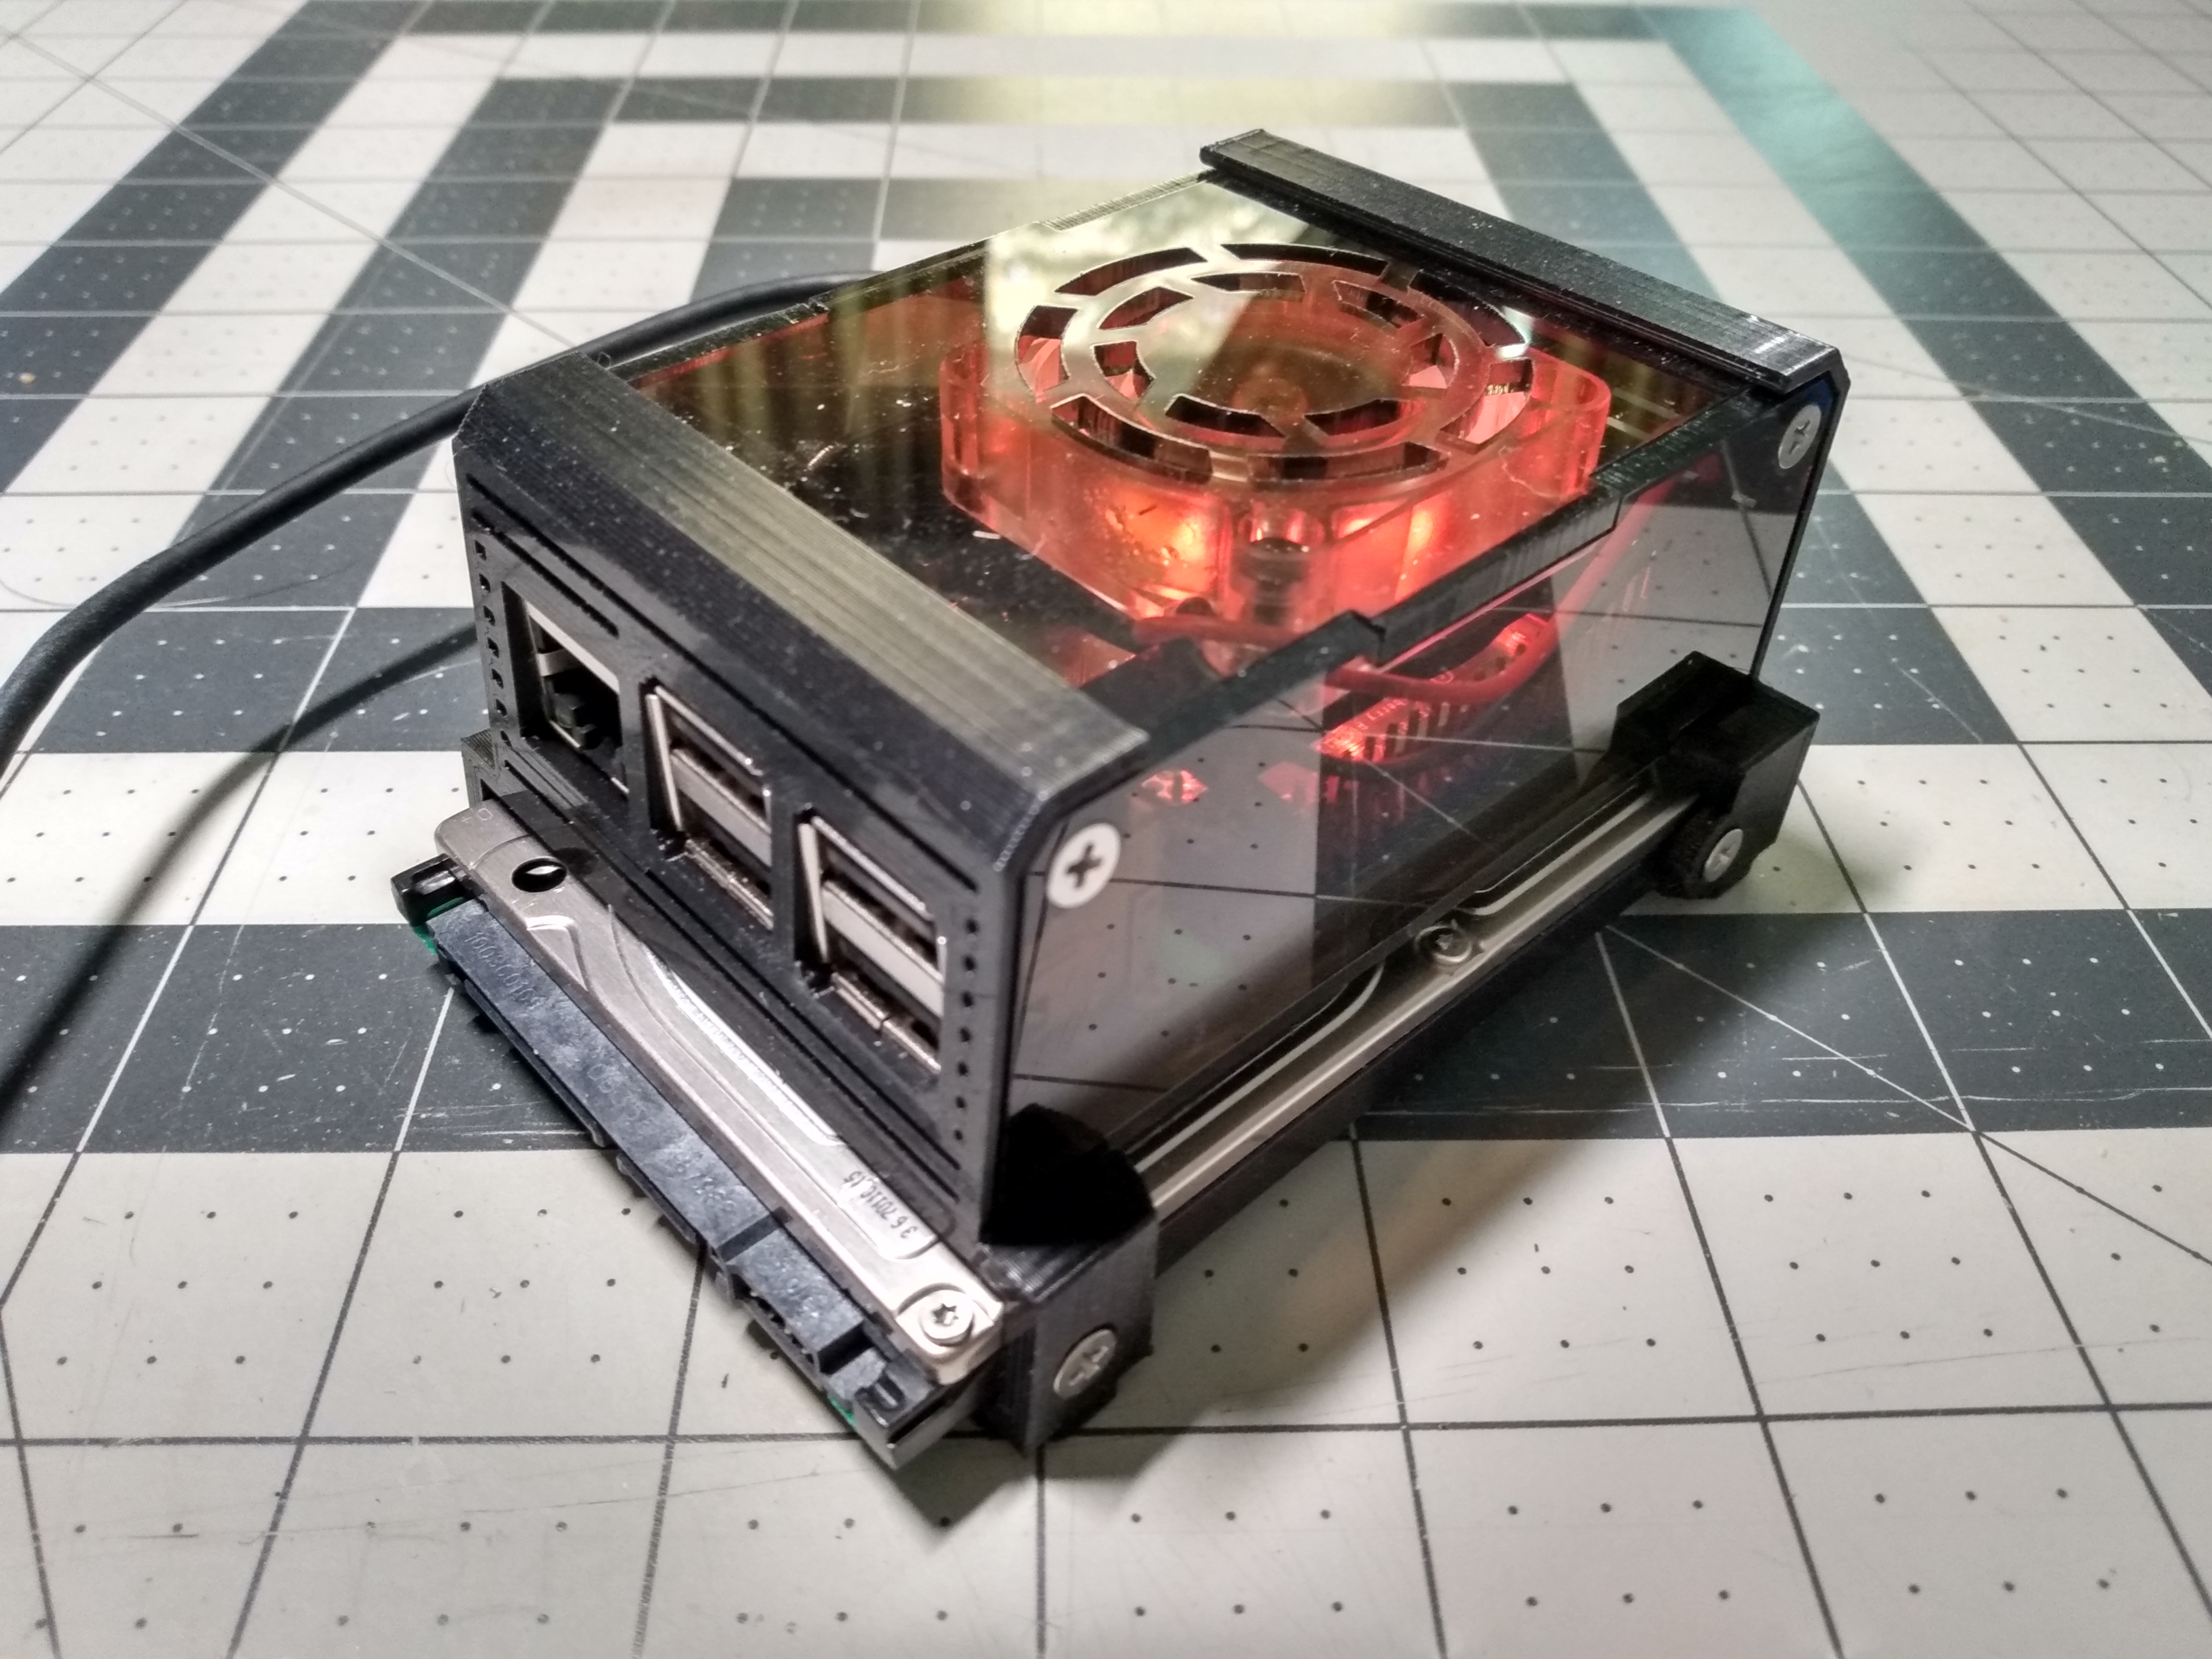
<p>This is a case for a Raspberry Pi 3B or 3B+ which mounts a 2.5" drive that serves as the bottom of the case. </p><figure class="image"><img src="https://media.printables.com/media/prints/269618/rich_content/cf96eb25-6b18-45ad-851a-2810acf7cfff/img_20220901_105951952.jpg#%7B%22uuid%22%3A%2269b4c169-b860-4d79-bff3-1f16bce25768%22%2C%22w%22%3A4160%2C%22h%22%3A3120%7D"></figure><p>It has an optional mount for a 40mm fan, if you need the cooling for whatever reason. There is room below the fan for a heatsink up to 15mm thick.</p><p> </p><figure class="image"><img src="https://media.printables.com/media/prints/269618/rich_content/8df98a5f-9fb3-4f97-a432-c9a241c1eb51/img_20220901_104730779.jpg#%7B%22uuid%22%3A%228ac50ac5-dda8-4986-8451-edeff9456a41%22%2C%22w%22%3A4160%2C%22h%22%3A3120%7D"></figure><p>In the pictures, I have laser cut three of the sides from 3mm thick acrylic, but these parts can be printed instead.</p><p> </p><p>You will need a USB to SATA cable to connect the drive to the Pi. I've seen where Pishop.us has a cable that looks properly short for this application.</p><figure class="image"><img src="https://media.printables.com/media/prints/269618/rich_content/0d012d83-77ea-421a-8282-06f4fea5be03/img_20220901_105809375_hdr.jpg#%7B%22uuid%22%3A%22b2e5d77a-6453-4956-8bb7-7dc6ef3851f9%22%2C%22w%22%3A4160%2C%22h%22%3A3120%7D"></figure><p>The SD Card is accessible through the side of the case.</p><p> </p><p>This project features Sacrificial Layers on the HDMI IO Shield part and the SD side part. These make a cleaner surface above the support that these parts require. But they will need to be cut out with an X-Acto knife.</p><p> </p><p>The case is assembled with eight M3 x 6mm or M3 x 8mm screws.</p><p> </p><figure class="image"><img src="https://media.printables.com/media/prints/269618/rich_content/bded3a11-c6ec-46a0-b451-13a485085e31/img_20220901_105133954.jpg#%7B%22uuid%22%3A%22d3e4058a-fb4d-4f23-bda2-80e040e9ca15%22%2C%22w%22%3A4160%2C%22h%22%3A3120%7D"></figure><p>The optional fan mount is attached to the Pi with M2.5 x 6mm screws.</p><p> </p><p>And you'll need appropriate length M3 screws to attach the fan to the mount. I find that M3 x 12 works well for these Geeekpi color changing LED fans.</p><p> </p><p>As with all of my projects, I HIGHLY recommend tapping the screw holes with appropriate taps. This can be down by hand with a simple had tap such as Amazon # B077HTXVR1 . Unfortunately the M2.5 taps are usually not included in this little set and will need to be bought separately, but if you're doing 3D printed projects with Raspberry Pi, you'll really appreciate having an M2.5 tap - as the screw holes in the Raspberry Pi PCB are sized for M2.5 and are too small for M3 screws.</p><p> </p><figure class="image"><img src="https://media.printables.com/media/prints/269618/rich_content/cd8b7df7-6fd0-4064-a6bc-a5d5363d4291/img_20220901_105108208.jpg#%7B%22uuid%22%3A%22e1bae92a-ce8a-427c-9f9a-68ee04c3be52%22%2C%22w%22%3A4160%2C%22h%22%3A3120%7D"></figure><p> </p><p>To begin assembly, attach the USB and SD sides to the GPIO side , but do not tighten the screws completely.</p><p> </p><figure class="image"><img src="https://media.printables.com/media/prints/269618/rich_content/6459c03a-83cb-449c-b3e4-c7c5a8694e2f/img_20220901_105155632.jpg#%7B%22uuid%22%3A%22b9332ac2-00c8-43ae-8f53-3cfcd2b4674a%22%2C%22w%22%3A4160%2C%22h%22%3A3120%7D"></figure><p> </p><figure class="image"><img src="https://media.printables.com/media/prints/269618/rich_content/45eb752a-04dd-4fba-aad4-5fd91d1975f5/img_20220901_105227639.jpg#%7B%22uuid%22%3A%224dd521f9-f26d-45e5-aa6e-e45a7ec9b98e%22%2C%22w%22%3A4160%2C%22h%22%3A3120%7D"></figure><p>Place the Pi (and fan assembly if you're using a fan) inside and tighten the screws.</p><p> </p><figure class="image"><img src="https://media.printables.com/media/prints/269618/rich_content/71aae160-471a-4fc2-a71b-0426dff6b12d/img_20220901_105243175.jpg#%7B%22uuid%22%3A%22e06699ca-3c28-4394-b0f5-080f6fb345d6%22%2C%22w%22%3A4160%2C%22h%22%3A3120%7D"></figure><p>You should see the edge of the Pi PCB through this slot above the SD card slot.</p><p> </p><figure class="image"><img src="https://media.printables.com/media/prints/269618/rich_content/b813811b-0ef2-46d4-8dce-c65f27fe2f45/img_20220901_105420444.jpg#%7B%22uuid%22%3A%2275dac0cd-716d-4e98-ac96-bf52615f482b%22%2C%22w%22%3A4160%2C%22h%22%3A3120%7D"></figure><p>You can now insert the SSD/HDD into the rails and attach with M3 screws.</p><p> </p><figure class="image"><img src="https://media.printables.com/media/prints/269618/rich_content/125b35a1-b64f-477e-aa02-53c8329db7c0/img_20220901_105447525.jpg#%7B%22uuid%22%3A%2212c0265f-ab17-4fe4-a7c0-87cec861371b%22%2C%22w%22%3A4160%2C%22h%22%3A3120%7D"></figure><p>Slide the top panel into place.</p><p>The HDMI IO shield can either be placed over the ports like this.</p><figure class="image"><img src="https://media.printables.com/media/prints/269618/rich_content/de0b8f43-c670-4100-b0c1-62b3e13cea8e/img_20220901_105515360.jpg#%7B%22uuid%22%3A%22d2a52f9c-677d-456a-a847-f2f30ad8f210%22%2C%22w%22%3A4160%2C%22h%22%3A3120%7D"></figure><p>Or it can be placed into the HDMI side panel.</p><figure class="image"><img src="https://media.printables.com/media/prints/269618/rich_content/bf0eb78e-8088-4fd7-8c6a-9b4964f6d498/img_20220901_105557476.jpg#%7B%22uuid%22%3A%22bc8412a1-66d2-4d2c-83e4-12530858b2dd%22%2C%22w%22%3A4160%2C%22h%22%3A3120%7D"></figure><p>And then the side can be mounted onto the case.</p><figure class="image"><img src="https://media.printables.com/media/prints/269618/rich_content/6d24d5d1-c081-4774-af62-2ab02387209d/img_20220901_105741347_hdr.jpg#%7B%22uuid%22%3A%2271497ecd-6130-41ca-9ac4-18db0045b411%22%2C%22w%22%3A4160%2C%22h%22%3A3120%7D"></figure><p>There are small protrusions on the rails, which retain the bottom of the HDMI and GPIO panels.</p><p> </p><figure class="image"><img src="https://media.printables.com/media/prints/269618/rich_content/8bd2a6c4-8d2b-46ac-a3b6-9de9c11be0a6/img_20220901_110213750.jpg#%7B%22uuid%22%3A%22dbf16239-aaa3-4a9e-a504-3149f228dea9%22%2C%22w%22%3A4160%2C%22h%22%3A3120%7D"></figure><p>There are provisions on the bottom of the rails for rubber feet.</p><p> </p><figure class="image"><img src="https://media.printables.com/media/prints/269618/rich_content/ffea807f-46c6-424a-9f98-679bef9db006/img_20220901_110248460.jpg#%7B%22uuid%22%3A%2274b1b942-fa3b-495a-800c-de4a4d432095%22%2C%22w%22%3A4160%2C%22h%22%3A3120%7D"></figure><p>I used Amazon # B073W1B3G1 for these rubber feet.</p>
With this file you will be able to print Raspberry Pi 3B Case with SSD or 2.5" HDD Mounting Rails + Optional 40mm Fan Mount with your 3D printer. Click on the button and save the file on your computer to work, edit or customize your design. You can also find more 3D designs for printers on Raspberry Pi 3B Case with SSD or 2.5" HDD Mounting Rails + Optional 40mm Fan Mount.