Raspberry Pi 4 Case with 4010 Fan
thingiverse
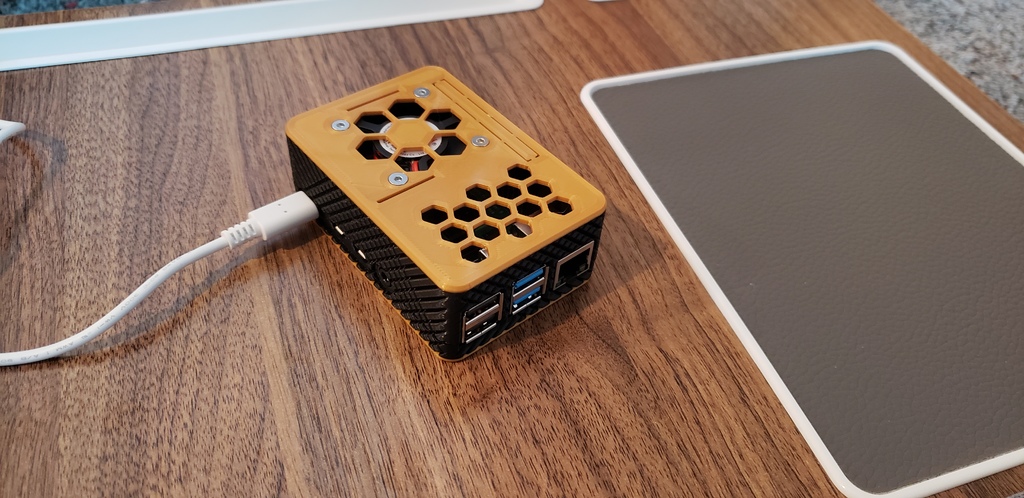
I couldn't find a good case for the Raspberry Pi 4 that had all the features I wanted, so I decided to make my own. Here's what makes mine unique: 1. Held together with screws. Snap-fit cases are great if your printer is _REALLY_ well tuned, but if it's not perfect the case isn't going to fit properly. 2. Space for a 4010 fan inside the case _with heat sinks_. Lots of cases out there just take a regular Pi case and add mounting screws, which means you have to mount it outside the case or it won't fit. 3. All screw holes are countersunk. 4. Access for all ports and connections, including the GPIO pins (you need to cut the cover away, it's designed for this purpose) and display and camera ribbons. 5. Looks cool (IMO), but doesn't look like a model. It's not meant to be a spaceship or a helmet with a computer hidden inside, it's just a case for your Raspberry Pi. The design was inspired by [this case by Harryb1991](https://www.thingiverse.com/thing:3735600), but I built it in Fusion 360 entirely from scratch. #Printing It will print fine without support, but if you tell your slicer to add supports with an overhang angle of at least 45 degrees, then you'll get a tiny bit of support around the SD card slot, which will make the cutout just a little bit neater. This may not be needed, but it adds so little time and material that you might as well. I recommend printing a little slower than you usually do. The knurling pattern can be a bit of a strain on the printer. #Post Printing: You will need: 1. 4 M3 countersink screws, between 10-14mm long. Yes, I know that the Raspberry Pi is built to be mounted on M2.5 screws, but I had a lot of M3 screws on hand and no M2.5s. **YOU WILL NEED TO DRILL OUT THE MOUNTING HOLES ON YOUR PI TO USE THIS CASE**. I'll try to upload a version built for M2.5s at some point in the future. But I've included the STEP and F3D files so all you need to do is shrink the holes on the Case Top part to make M2.5s work. 2. 5V 4010 Axial fan. I used [these](https://smile.amazon.com/gp/product/B07PQVL6JY), which have the benefit of a recessed slot for M3 nuts, as well as coming with those nuts and screws. But any 4010 fan will work fine. Just make sure it's 5V. You'll plug it into pins 4 and 6 as shown [here](https://miro.medium.com/max/4128/0*VsaGvGskvJa20hZa.png). Make sure red goes to 5V and black goes to GND.
With this file you will be able to print Raspberry Pi 4 Case with 4010 Fan with your 3D printer. Click on the button and save the file on your computer to work, edit or customize your design. You can also find more 3D designs for printers on Raspberry Pi 4 Case with 4010 Fan.