Raspberry Pi 4 Model B Retro Pie Handheld /// RetroCelt
thingiverse
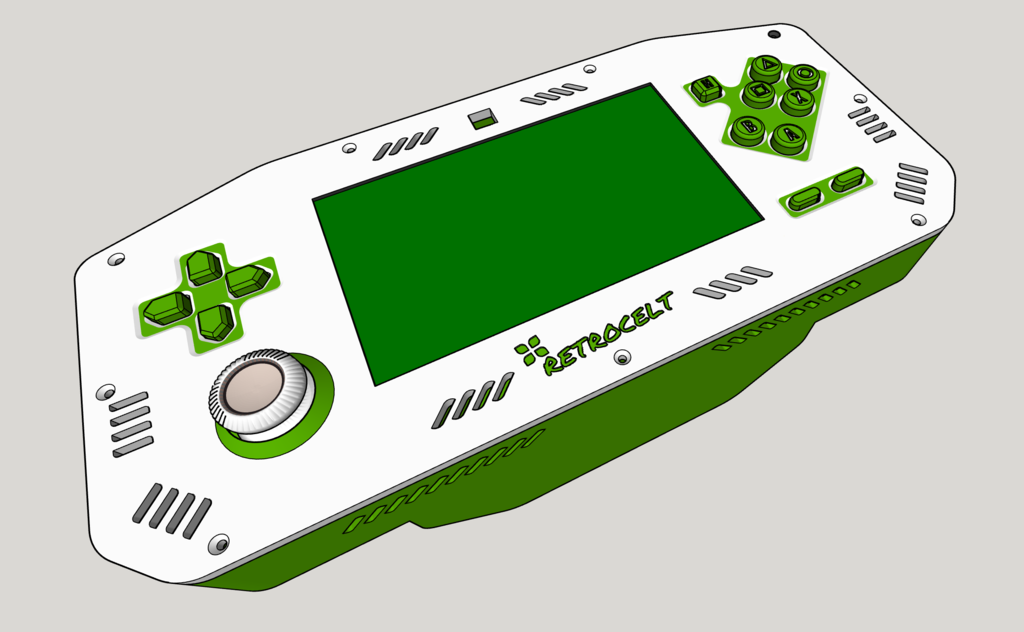
Printing ======= I printed buttons at .2mm The case at .6mm everything else at .4mm The photo is a remix I made in different colours, looks great in all colours. Green and white and black and yellow are my two favs, you could add a third colour but you would need to edit the files. You will need a printer with a build plate size of minimum 230mm and about 500 - 600g of filament. Scale all the parts to 10% as a designed this at 10x scale. Summary & Assembly ================= This is the parts for a 3d printed handheld console that works with the raspberry pi 4 model b. You print the parts. Install RetroPie on an SD card. You use dupont connectors and solder to connect the gamepad buttons. You use the MCP3008 Analog to Digital Converter in order to use a thumbstick. You connect all buttons to 2 seperate common ground wires (this keeps it more organised). Solder the MCP3008 according to the datasheet and connect to your analog thumbstick, and also to the corresponding GPIO pins. Guide: https://learn.adafruit.com/raspberry-pi-analog-to-digital-converters/mcp3008 Connect the duponts now to the RPI GPIO. Use the PiSugar S Plus as a battery pack and solder 5 cut wires with dupont on the other end to the pogo pads of the battery hat. Reverse the battery for it to fit. using stand offs to fit within the case. Super glue the screen posts to the underside of the screen. Add the RPI Model B to the screen with the stand offs. Solder 3 wires to the pads on pisugar shield, the pads are marked "on" "off" and "ctrl" connect these wires to a push switch for power. Use the button cap for the power switch. The power switch i used can be found in a set and listed below (the blue switch). Add the Pi Sugar battery and battery board on top again with stand offs. Add the buttons to the case (with tape so they don't fall out) Put everything inside the case and close the lid. Use 7 small screws to seal the case. All buttons are super glued in place. You clip 2 legs off and solder the wires with dupont and common ground. Solder away from 3d printed parts, when happy with connections super glue in place. Use super glue sparingly. The MCP3008 microcontroller you can superglue it to the inside of the case also or remix the print to contain a place for it. For the triggers you need to cut some protoboard, solder the buttons in place 2 buttons per side and then slot into case. When final assembling put the trigger buttons in first then slot the protoboard with your soldered buttons. When putting on the face plate tape all the buttons in place to make assembly easy. This can be a 2 colour print just make sure to add layer stops under extensions > post processing for cura. RetroPie . Software configuration ========== Add inputs.py to the home direction e.g. ~/ edit rc.local to run inputs.py at startup. Follow this guide to add controller mappings to PPSSPP: https://retropie.org.uk/forum/topic/15577/ppsspp-controller-setup-guide-for-when-nothing-else-works Edit autoconfig for N64 emulators because for some reason when configured for mupen-plus-next it wont be added to GLide which you will use for many games as the performance in better. Go into other emulators and configure mappings and optimise the settings to your liking. This handheld has 6 face buttons, with everything else. The 6 face buttons makes some consoles more playable because without 6 you need to use a right analog stick or find some other way. When ready configure gamepad buttons with emulationstation, if setup correctly the gamepad will be shown as python-uinput. When configured in emulationstation you will need modify per emulator to match what you prefer. Whilst I planned to use B A buttons strictly for 2 button consoles I was unable to get this to work fully in software, however consoles like n64 which used 6 buttons it was as planned. For 2 buttons you use the X and O button so not any big problem really. Parts ===== https://www.amazon.co.uk/gp/product/B09QRPNDHB Battery https://www.amazon.co.uk/gp/product/B07Q1BXV7T/ buttons https://www.amazon.co.uk/gp/product/B011NA0IKC MCP3008 https://www.amazon.co.uk/gp/product/B01N59MK0U analog https://www.amazon.co.uk/gp/product/B083JT9F9B screen https://www.amazon.co.uk/gp/product/B01N67ICEC mixed buttons (i only used the on / off toggle (blue switch)) from this set. Raspberry Pi 4 Model B
With this file you will be able to print Raspberry Pi 4 Model B Retro Pie Handheld /// RetroCelt with your 3D printer. Click on the button and save the file on your computer to work, edit or customize your design. You can also find more 3D designs for printers on Raspberry Pi 4 Model B Retro Pie Handheld /// RetroCelt.