Raspberry Pi 400 - HyperPixel 4.0 mount
thingiverse
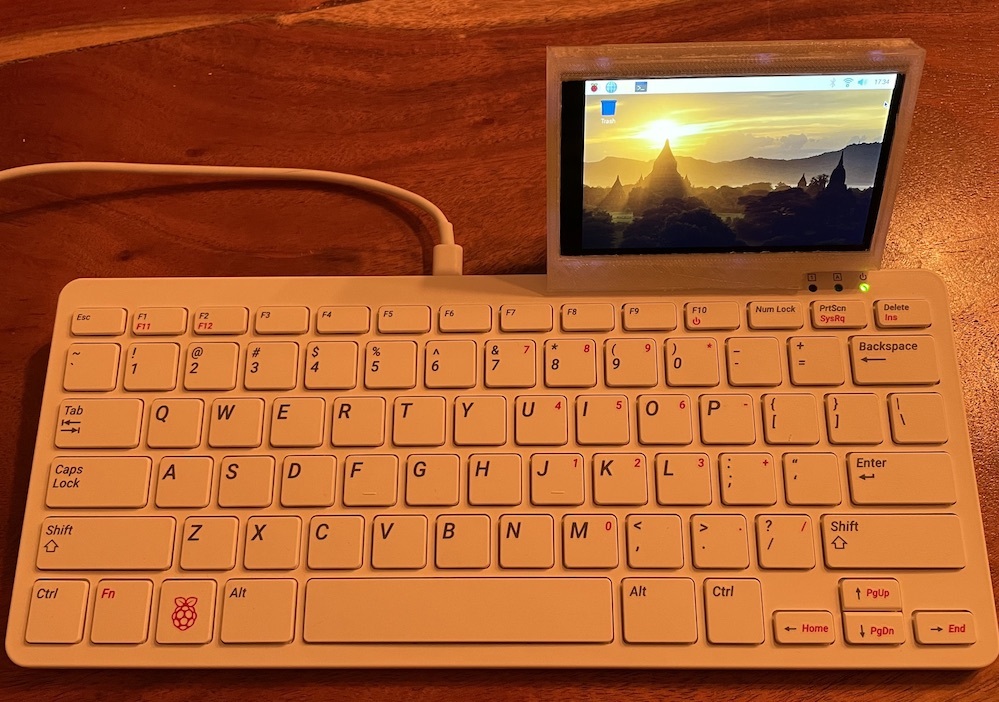
This is an enclosure for the HyperPixel 4.0 that can mount on the Raspberry Pi 400. Use the included headers with the HyperPixel to get more height on the female headers, then use a 10cm female to male ribbon cable to connect it. Make sure you check the alignment of the pins correctly as the HyperPixel has no guiding connector. In my setup the female connector on the Raspberry side and the male connector on the display are both facing downward. Double check this with your cable before powering it on to prevent damaging the Pi or the display. Also make sure you fully remove all supports after printing to get a good fit on the Pi. Especially underneath the screen. I used [this screen](https://www.kiwi-electronics.nl/pim-369) and [this cable](https://www.kiwi-electronics.nl/40-pin-regenboog-gpio-verlengkabel-male-female-10cm)
With this file you will be able to print Raspberry Pi 400 - HyperPixel 4.0 mount with your 3D printer. Click on the button and save the file on your computer to work, edit or customize your design. You can also find more 3D designs for printers on Raspberry Pi 400 - HyperPixel 4.0 mount.