Raspberry Pi 4B case with RPi camera 2 arm
prusaprinters
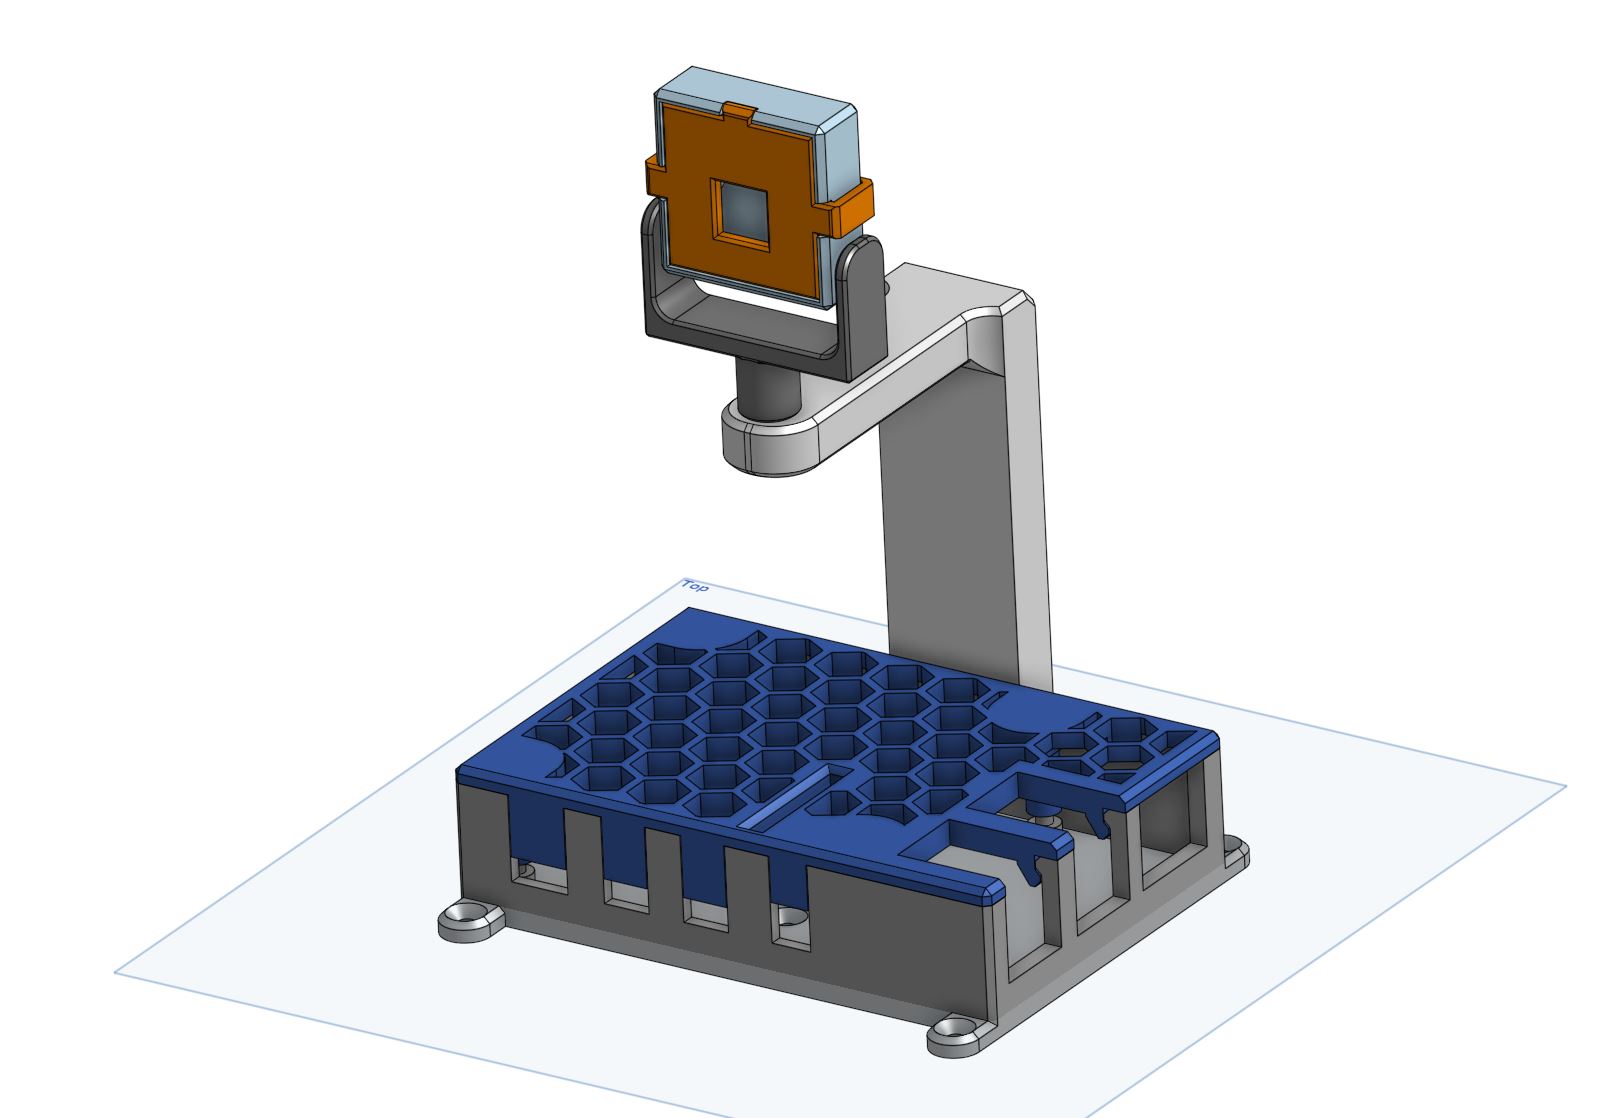
<p>Case is designed around <a href="https://rpishop.cz/4-model-b/5195-sada-s-raspberry-pi-4b-2gb-pro-octoprint.html">this</a> RPi starter kit, which contains only basic 15cm long camera cable. Case is designed to contain included passive cooler 35x35x6mm, without use of a fan or GPIO pins(although you can probably still use them through ventilation holes).</p><p>For assembly you'll need:</p><ul><li>1x M5x16 screw</li><li>1x M4x12 screw and 1x M4 nyloc nut</li></ul><p>Assembly:</p><ol><li>Secure “cam swivel” to thinner part of the “camera arm” using M5 screw(it should cut it's own threads), then secure “camera arm” to the “bottom case” with M4 screw and nut</li><li>Insert Raspberry Pi <strong>without</strong> SD card into the “bottom case”, it should fit on the standoffs</li><li>Install camera cable into Pi, pull camera cable through “top case” and close the case(it might take some fiddling, but should be quite snug fit). You should now be okay to insert SD card without putting any strain on it.</li><li>Pull camera cable through bottom hole in “cam housing”, connect it to the camera module and seat it on the standoffs. Close “cam housing” with “cam cover”(it shouldn't be hard, but be careful with the thin legs)</li><li>Finally insert camera cover into the “cam swivel”</li></ol>
With this file you will be able to print Raspberry Pi 4B case with RPi camera 2 arm with your 3D printer. Click on the button and save the file on your computer to work, edit or customize your design. You can also find more 3D designs for printers on Raspberry Pi 4B case with RPi camera 2 arm.