Raspberry Pi BMO Robot
thingiverse
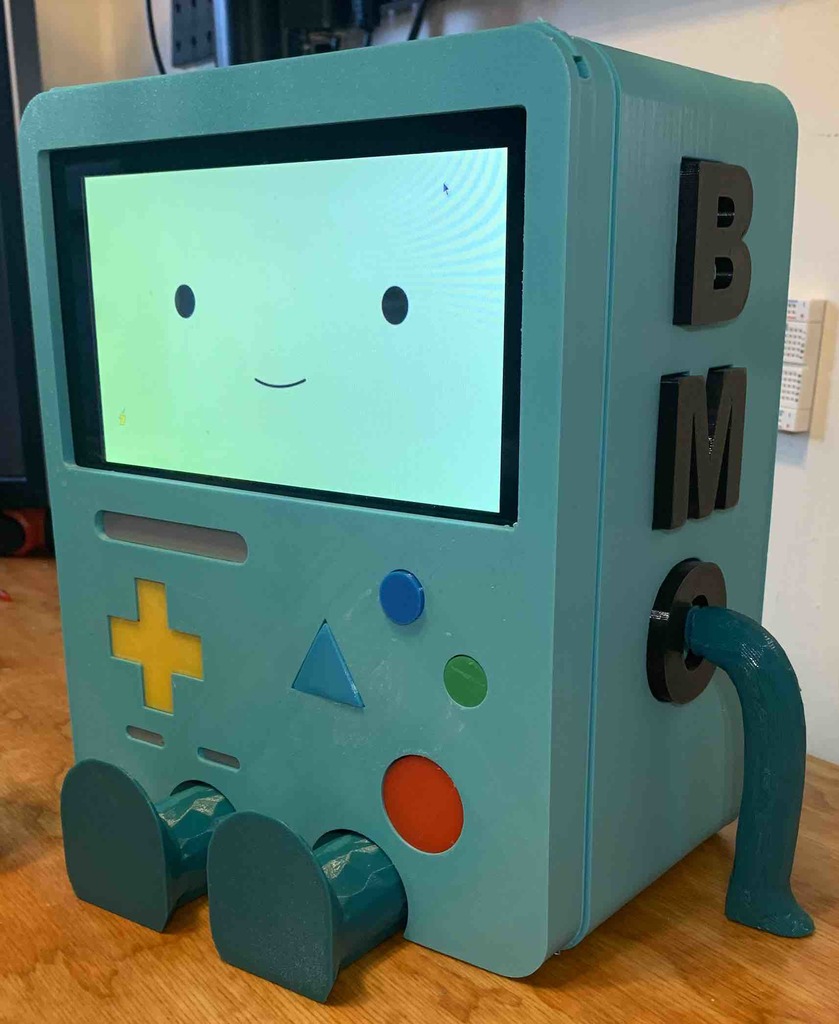
<h3>I have a little YouTube series documenting how I set it up. It should give you an idea, but keep in mind it was intended more to be entertaining than instructive.</h3> <p><a href=https://www.youtube.com/playlist?list=PLHcXUO0tVZqc_A_hYahgxZOrVOI6vnqMH>https://www.youtube.com/playlist?list=PLHcXUO0tVZqc_A_hYahgxZOrVOI6vnqMH</a></p> <h3>I learned a few things while designing the previous version of this BMO.</h3> - I did not account for thread tolerance.<br> - I did not account for speakers<br> - The screen I used was garbage<br> - The measurements were not very... mathematical.<br> <h3>I decided to make better one with the official 7" display from Raspberry Pi.</h3> <a href=https://www.amazon.com/dp/B0153R2A9I/ref=cm_sw_em_r_mt_dp_N96F2MPQCM1RKRW3N739>https://www.amazon.com/dp/B0153R2A9I/ref=cm_sw_em_r_mt_dp_N96F2MPQCM1RKRW3N739</a> <h3>I used ABS for the body because I was concerned about heat generated by the Pi, but since the chassis and faceplate are such large prints, warping was an issue. I used an adhesive and the force was so strong that it contracted and brought the print bed with it. If I were to print another one, I would likely try PLA+ or some other material that offers heat resistance but is less prone to warping than ABS.</h3>
With this file you will be able to print Raspberry Pi BMO Robot with your 3D printer. Click on the button and save the file on your computer to work, edit or customize your design. You can also find more 3D designs for printers on Raspberry Pi BMO Robot.