Raspberry Pi Camera Telescope Mount
thingiverse
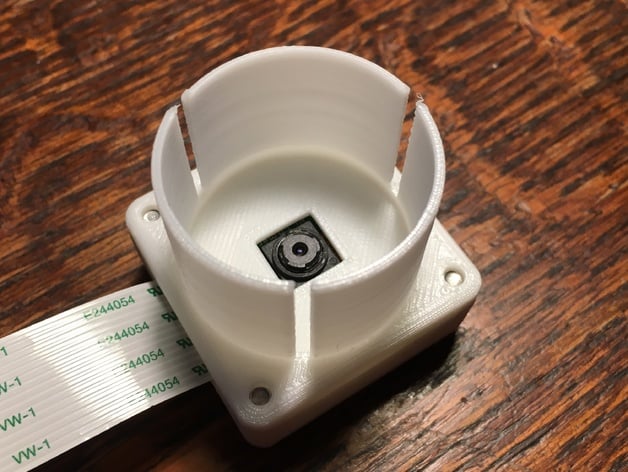
This mount enables a Raspberry Pi camera (v1 or v2) to be used in a telescope for astrophotography. The eyepiece fits any 1.25" focuser. To use the Pi Camera for astrophotography, remove the lens that covers the sensor with long nosed pliers, carefully gripping the circular part and rotating. You must grip the circular part, not the square part. Two files are provided: one for the eyepiece that goes into the focuser and another for a cap that sits over the top. You will also need: * 4 M3x12 Cap Head Bolts * 4 M2x4 Cap Head Bolts You may want to use a longer data cable, available online, depending on how far away from your Pi you have the camera. My camera is attached to the body of the telescope. Print Settings: Printer Brand: RepRap Printer: Fisher 1 Rafts: No Supports: No Resolution: 0.1 - 0.2 Infill: 15% rectilinear Notes: I printed well with a 200C setting for all layers and 0.2mm resolution, but you can go finer. Post-Printing Assembly: Once printed, assembly is simple. Attach the camera PCB to the cap using M2 bolts, assuming you have removed the lens from the camera to enable photography. The data cable should lie towards the edge with the cut-out. Ensure the camera is pointing up. Line up the eyepiece with the camera and secure them together with 4 M3 bolts. Ensure the bolt heads are on the cap side as pictured. That's all there is to it.
With this file you will be able to print Raspberry Pi Camera Telescope Mount with your 3D printer. Click on the button and save the file on your computer to work, edit or customize your design. You can also find more 3D designs for printers on Raspberry Pi Camera Telescope Mount.