Raspberry Pi Desktop Retropie Arcade & 7" Screen
thingiverse
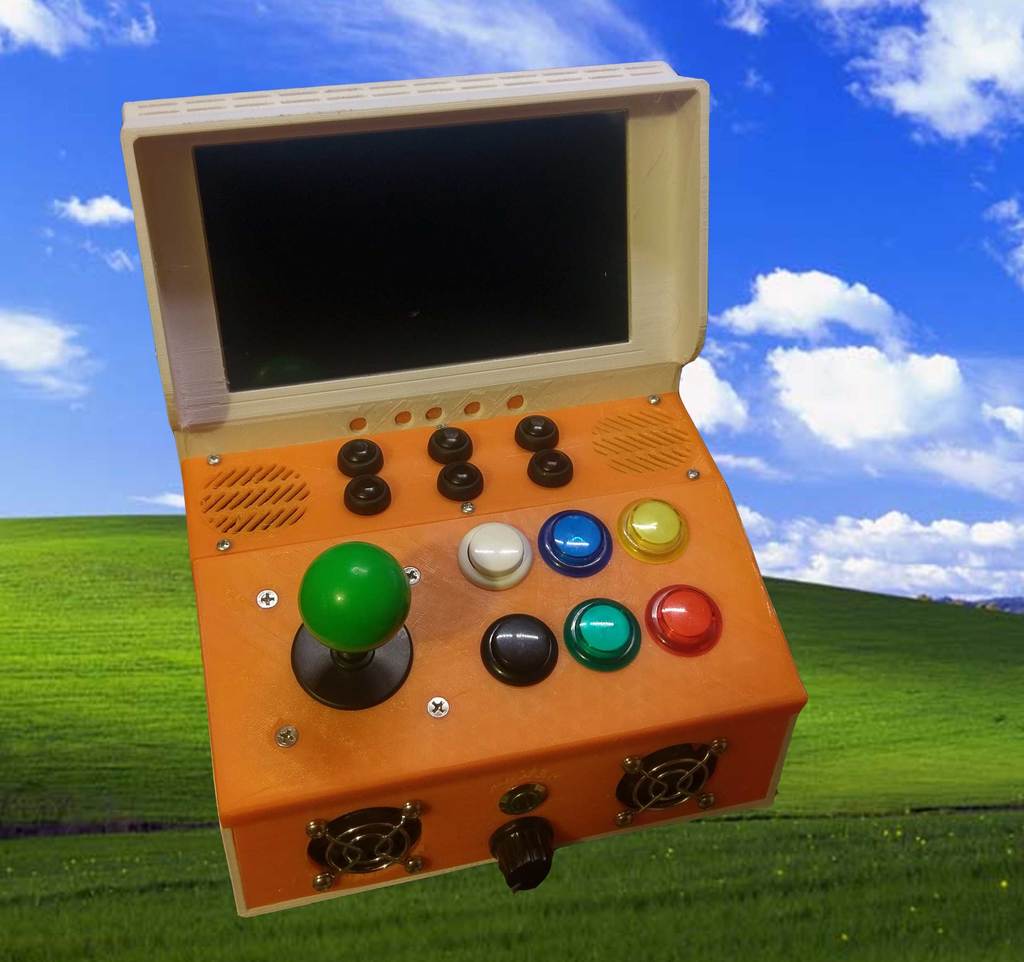
This is a desktop arcade measuring 200mm wide and about 180mm deep. It's designed to use arcade parts and a raspberry pi 3 or compatible board. You can access the SD card along the right side. Check out some action here: https://youtu.be/QICjMc53SiY #Instructions First, mount the raspberry pi, buttons, and speakers in the panels. Once that's done, you can install the USB header and power supply. I drilled holes to mount the power supply and USB button controller in the case. Due to the numerous options available for these components, there are no pre-drilled holes or bosses included. Once the parts are installed, snap the screen into the bezel and mount the circuit boards. I found the USB Power cord too large on mine, so I soldered the power wires right to the back of the plug on the board to save space. Install Retropie on your SD card, add ROMs, and you're good to go! See Retropie's website for details: https://retropie.org.uk/ #Parts List - [Raspberry Pi 3 B+](https://www.amazon.com/gp/product/B07BDR5PDW) - [USB Game Encoder](https://www.amazon.com/Droya-Arcade-Encoder-Joystick-Fighting/dp/B07BJ8KNHW) - [24mm Arcade buttons](https://www.amazon.com/gp/product/B01N5JRU2R) - [Dual USB Panel Mount](https://www.amazon.com/gp/product/B01FS4UB4M) - [Hook-up wire](https://www.amazon.com/gp/product/B07DCV7BDD) - [32GB SD Card](https://www.amazon.com/Samsung-MicroSD-Adapter-MB-ME32GA-AM/dp/B06XWN9Q99) - [7 in non-touch screen](https://www.amazon.com/gp/product/B01L6YXZLY) - [IEC power inlet with switch](https://www.amazon.com/HONGYETAJA-Module-Switch-Certification-Socket/dp/B06XKBRT9M) - [Short HDMI Cable](https://www.amazon.com/MMNNE-2Pack-inch-Cable-High-Speed/dp/B071498QBV) - [A decent 5v 5amp power supply](https://www.amazon.com/) - [6 button center panel for MAME style games](https://www.amazon.com/gp/product/B0119FH5Z2) #Thank you! #Updates - 12/12/18 Worked on it all day and uploaded the progress. At this point, it's 90% complete. All listed parts have been ordered, and printing will begin this weekend once I can confirm the screen layout. - 12/15/18 Got most of the parts in today and decided to change the design to make assembly easier. The whole front panel now is attached to the button panel making access much easier. Unit still goes together on the main body with just 6 screws. All files updated! - Update 2! It's now in line to be printed. I have all the parts, and the STLs have been edited. I added a 6 button center panel for MAME style games. The extra 3 buttons give you coin, player 1, player 2 for true arcade style gaming using small push buttons like https://www.amazon.com/gp/product/B0119FH5Z2 - 12/16/18 Printed some of the parts and making minor tweaks. Changed the speaker surround size and made it taller for easy gluing. I am building mine with MAME buttons so I can attach the MODE of the USB arcade controller to one of them. Edited the mount for the audio amp and volume knob. - 12/23/18 Updated all files! Machine is built and working great. Made some slight design changes to make assembly easier. - 12/27/18 All files updated and ready to go. Test prints and first unit came out perfect. - 3/12/19 Updated parts list and instructions.
With this file you will be able to print Raspberry Pi Desktop Retropie Arcade & 7" Screen with your 3D printer. Click on the button and save the file on your computer to work, edit or customize your design. You can also find more 3D designs for printers on Raspberry Pi Desktop Retropie Arcade & 7" Screen.