Raspberry Pi Mini Tower (4B)
thingiverse
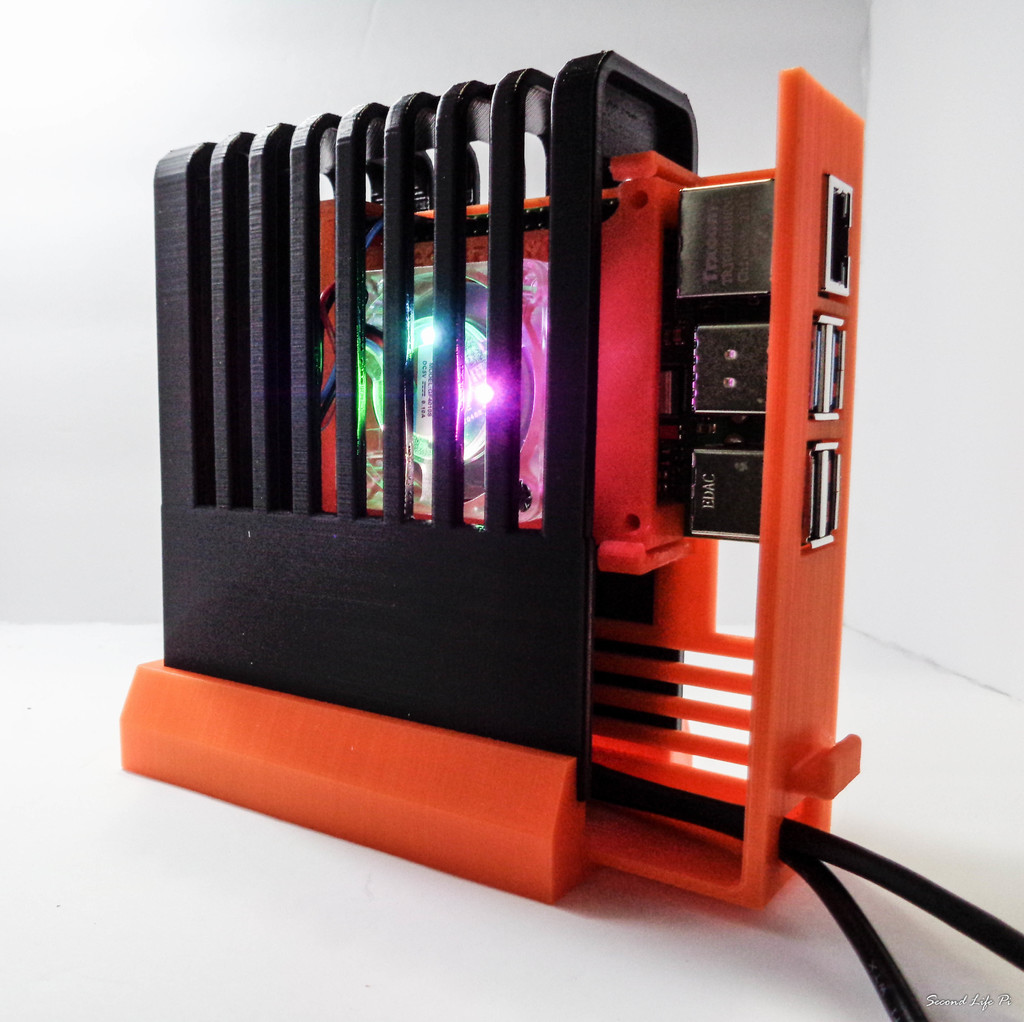
Introducing the "Raspberry π Mini Tower" – a 3D-printed enclosure inspired by the desire to have a compact vertical housing for the Raspberry Pi 4. This mini tower case combines functionality, convenience, and an easy assembly process using tabs, clips, and slip fittings, providing an optimal solution for Raspberry π enthusiasts. Design: The Raspberry π Mini Tower showcases a sleek and modern design, characterized by clean lines and a compact form factor. The primary goal of this design is to provide a vertical placement for the Raspberry π board, allowing for efficient space utilization while maintaining an appealing aesthetic appearance. Vertical Placement: The standout feature of the Raspberry π Mini Tower is its vertical orientation, enabling easy access to all essential ports and connectors. By positioning the Raspberry π board vertically, the case offers a clear view of the board, making it convenient to interact with the GPIO pins and other interfaces. Rear Cable Management: Efficient cable management is a top priority for the Raspberry π Mini Tower. All necessary cables, including USB connectors, network CAT5, HDMI, and power cables, are neatly routed through the back of the case. This design choice ensures a clutter-free workspace while providing a seamless and organized setup. Tab, Clip, and Slip Fittings: The Raspberry π Mini Tower prioritizes user-friendliness during the assembly process. The 3D-printed components feature well-designed interlocking tabs, clips, and slip fittings that securely hold the case together. These fittings simplify the installation of the Raspberry π board and facilitate effortless cable connections. In summary, the Raspberry π Mini Tower combines a vertical placement for the Raspberry π board, efficient rear cable management, and an easy assembly process using tabs, clips, and slip fittings. With its sleek design, customization options, and commitment to user convenience, this 3D-printed enclosure is an ideal choice for housing your Raspberry π 4, providing both protection and a stylish addition to your workspace. The model contains 5 parts ... 1. Frame Bottom - This mounts to the bottom of the Raspberry pi board by inserting the pins through the mounting holes in the board. Print with pins facing up. 2. Frame Top with 30mm Fan - This will set on top of the Raspberry Pi board, the legs of the frame mate with the pins of the bottom frame "sandwiching" the board in-between. Print with legs up. 3. Board mount - The Raspberry Pi with frame inserts into the board mount from the back and the board is gentle fitted into the header access openings. Print with the biggest area on the bed. I do have a board mount for the Raspberry Pi 3 model. 4. Tower Bottom - this is the base of the tower. The Tower top will fit into the recessed area on the top of the bottom. Tabs located in the front and sides of the bottom will line up with the slots in the tower top. Print with the front on the bed (opposite of opening) 5. Tower Top - This is the biggest part of the Mini Tower, this will be the longest print at 12 hours (on detail) and will print with the top on the printer bed. I didn't need any supports, rafts and used the standard 15% in-fill.
With this file you will be able to print Raspberry Pi Mini Tower (4B) with your 3D printer. Click on the button and save the file on your computer to work, edit or customize your design. You can also find more 3D designs for printers on Raspberry Pi Mini Tower (4B).