Raspberry Pi Stacking Tower
thingiverse
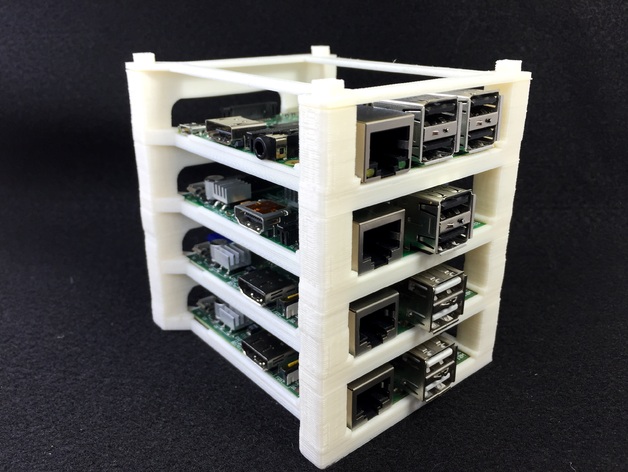
This is a compact yet secure method for stacking your Raspberry Pi's vertically. This design works universally with the original B, the 2 B, and likely the B+ (I don't have a B+ to test). The primary goals were something fast, minimal, and strong enough to keep the Pi in place even when cable tension wants to pull it loose. To set up: Print one "sled" for each Pi. Print one "pi topper" (not required, but adds a touch of neatness). Remove the SD card from each Pi. Insert the Pi with the SD card slot facing the rear (the rear has a larger wall and is missing a bottom support). Carefully push each corner of the Pi down past the notches. This may require some gentle flexing of the printed part but ABS didn't demand much effort. Reinsert the SD card. When stacking the sleds, align the supports and holes and push into place. This holds securely by friction but has worked great for me so far. Place the topper on top. Regret the placement of the components as you try to plug the cables back in. Enjoy! Yes, the last picture is upside down just to show that each Pi is safely secure.
With this file you will be able to print Raspberry Pi Stacking Tower with your 3D printer. Click on the button and save the file on your computer to work, edit or customize your design. You can also find more 3D designs for printers on Raspberry Pi Stacking Tower.