Raspberry Pi Telescope Cam
thingiverse
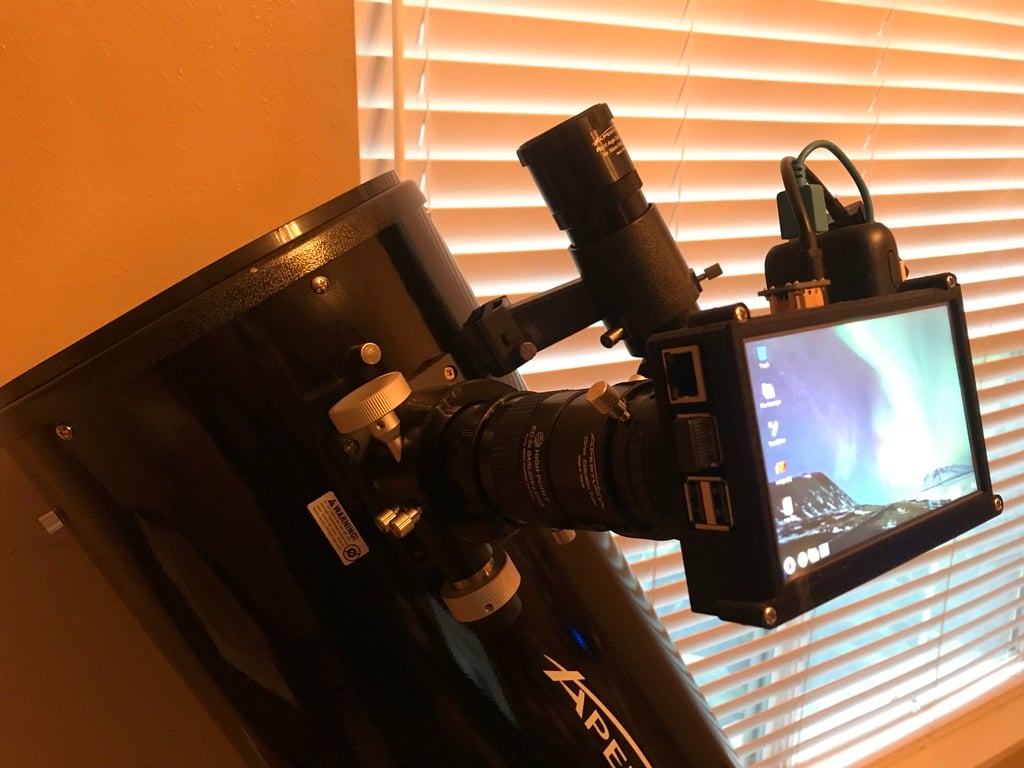
This is a personal project of mine. Fitting the Nikon T adapter and the Pi Cam V2 may require manual handling. I used several items in this project, including a 5-inch TFT touchscreen that connects via HDMI port, a battery pack from Walmart, a Raspberry Pi 3 B+, a Pi Cam V2, a Nikon T adapter for telescope attachment, four M3 bolts, and a reflector telescope with a 254mm primary mirror and a focal length of 1250mm. The Nikon T adapter allows me to use any 1.25-inch Plössl eyepiece or filter. When I have time, I'll try to post links for everything used in this project. I included mounting holes to secure the Pi Cam with four bolts, but pressing it into place worked for me. If you want to secure it, that option is available. Fifty percent infill was my choice of setting, as anything less made it rather flimsy. I printed the files exactly as they appeared in the file preview. The case required a lot of supports, but that's the only orientation I was happy with. I also deleted supports for the stylus slot in Cura. You may want to consider doing that as well. I've included STEP files in case you need to make changes to suit your parts better.
With this file you will be able to print Raspberry Pi Telescope Cam with your 3D printer. Click on the button and save the file on your computer to work, edit or customize your design. You can also find more 3D designs for printers on Raspberry Pi Telescope Cam.