Raspberry Pi Vertical Case Optimized for shorter printing time, fewer fasteners
thingiverse
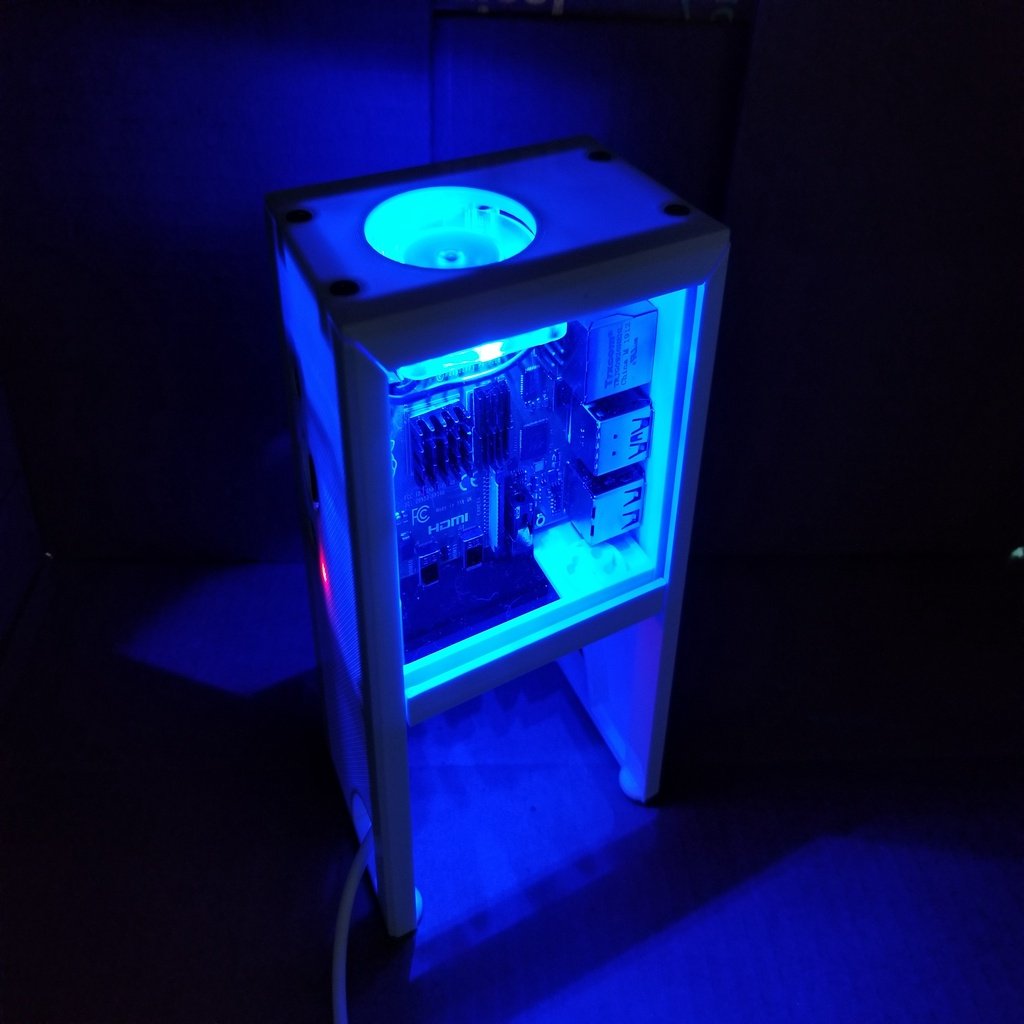
This is a further iteration of my Raspberry Pi Mini Desktop Vertical Case with 40mm Fan. The original design can be found here: https://www.thingiverse.com/thing:3921288. Currently, this version fits the Pi 4 only, but a Pi3 version may be added if requested. Compared to the previous version, this one is fully compatible in almost every way, but has some key differences that make it a shorter print and use fewer screws and nuts, though it sacrifices some of the vault-like strength of the original design. The main change is the elimination of one support structure, which eliminates 8 screws and 8 nuts and reduces total print time by about 90 minutes (using Ender 3 default Cura print settings). All outer faces are thinned from 1mm to .8mm in thickness, reducing it from 5 layers to 4 layers at .2mm layer height. This reduces the print time by about an hour in total. Additionally, the structural part that remains has had a redundant cross brace removed and three of the sides narrowed 2-3mm, which was done more for visual purposes when using clear acrylic sides but also has the benefit of reducing print time by a few minutes. The screws that hold the lid on now screw into plastic bosses on the sides instead of captive nuts, reducing fastener count by 4 more. The downside is that it's not as strong as the previous version, particularly the sides can be spread apart on the forward-facing side near the bottom, resulting in a slightly wider panel gap than the original version. One big plus to losing the secondary support structure inside is that when using clear acrylic side panels, the entire top of the Pi is visible - if you're into that sort of thing. Otherwise, everything said about the previous version remains valid. The strain relief and blanking plate featured on the other version still work, but since nothing changed, they weren't re-uploaded. They can be taken from the other listing and used if desired. There's a YouTube video showing this case and the changes made: https://youtu.be/URz4usRlADI. In the old version, there is a part called FACEshimADJUSTED that is a shim 1mm thick to fit in the same slot as whatever material you use for the face (wood, acrylic, etc). You can scale it in Z axis for whatever thickness you need to make up. It also works well as a guide for marking your material for cutting. The blue acrylic faces used are 3mm and 6mm thick. The 3mm thick acrylic could use a 3mm thick shim, so scale it up 300% in Z axis. The 6mm thick is a good fit on its own. Acrylic can be cut with a jigsaw using a metal cutting blade (24 teeth per inch), which leaves a fairly smooth cut and is easy to follow a straight line. The rails that the face slots into are 6mm deep, and it's suggested to err on the side of too small by 1mm-2mm rather than too big (cut inside the line instead of outside the line) if using FACEshimADJUSTED as your guide. Below is a link to the two acrylic panels used for this project: https://www.amazon.com/gp/product/B006FLYG1W/ref=ppx_yo_dt_b_asin_title_o06_s00?ie=UTF8&psc=1, and https://www.amazon.com/gp/product/B07KMYN5V9/ref=ppx_yo_dt_b_asin_title_o06_s01?ie=UTF8&psc=1.
With this file you will be able to print Raspberry Pi Vertical Case Optimized for shorter printing time, fewer fasteners with your 3D printer. Click on the button and save the file on your computer to work, edit or customize your design. You can also find more 3D designs for printers on Raspberry Pi Vertical Case Optimized for shorter printing time, fewer fasteners.