raspberry pi workbench
thingiverse
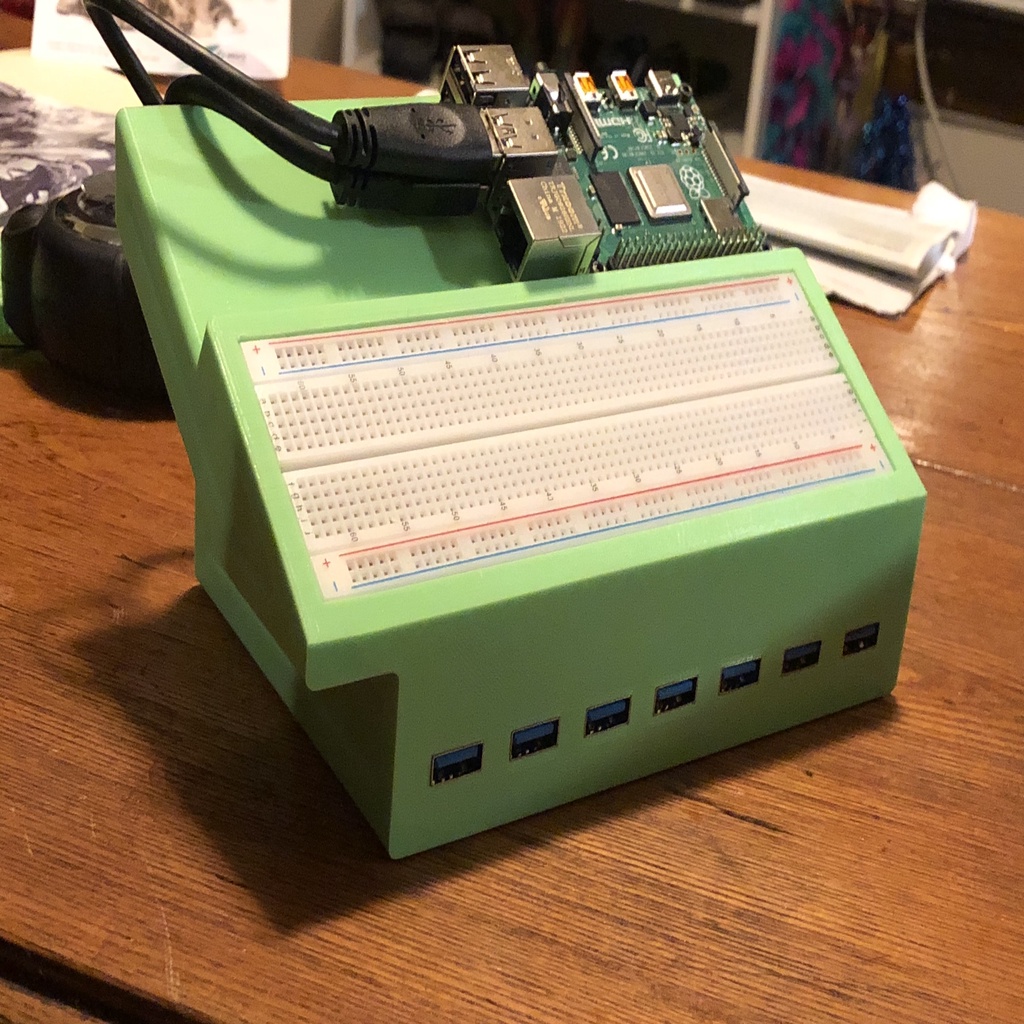
This is a custom workbench I designed specifically for a family member's electronics learning journey. Every component is strategically placed for easy access and assembly, resulting in a clutter-free workspace. Now, you can have one compact box that contains your entire electronics curriculum. Seven ports are conveniently located at the front, making it simple to connect sensors, keyboards, receivers, and drives. GPIO connectors are positioned on the upper side, keeping them out of the way while still being easily accessible. If you're working with a Rock64 or other single-board computer (SBC) with limited ports, attaching both the USB hub and external SSD to the board might be challenging. To address this issue, I've included a hidden channel on the left side that allows you to slide in the adapter with the cord facing forward. This channel is precisely designed to reach the first USB port. Cooling isn't a concern as the Rock64 runs cool, and the Raspberry Pi 4 is exposed and capable of self-cooling. Heavy USB plugs are securely seated, eliminating the risk of snagging or straining connectors. A hole for a DC jack is provided in the rear if you want to connect everything to a single plug using a soldering iron. When disassembling the USB hub, be sure to keep the rubber feet from the case as they can still provide sufficient stickiness after removal. You can use these feet to secure your workbench on the desk, keeping it stable and in place. I'm currently working on variations of this design to cater to different educational needs. If this workbench doesn't meet your requirements, please check back here later for updates on new designs that might better suit your class or junior electronics enthusiast's needs.
With this file you will be able to print raspberry pi workbench with your 3D printer. Click on the button and save the file on your computer to work, edit or customize your design. You can also find more 3D designs for printers on raspberry pi workbench.