Raspberry Pi Zero Console Case
thingiverse
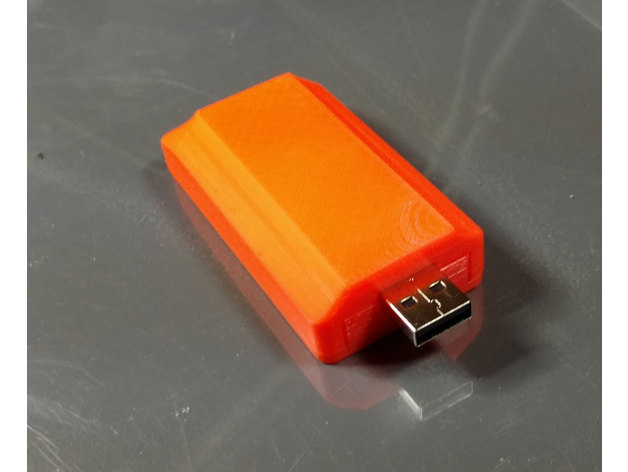
V2 - this version proved so popular that I decided to upgrade to V2. Changes for V2: 1) Height was reduced slightly while maintaining a perfect fit, resulting in a sleeker design. 2) The USB sub-board holder has been greatly improved, allowing wires to be run more efficiently and held securely. However, it now requires a bit more force to snap it into place. 3) A better fit for the front seams has been achieved. 4) The SD card back hole is now positioned perfectly, making it easier to use a tweezer to remove it. This case is specifically designed for a Raspberry Pi Zero with an Adafruit Console cable. It's completely self-contained, requiring only a USB plug to operate as a functioning Raspberry Pi Zero with SSH shell. A raspberry pi zero and an Adafruit Console cable (or similar) are necessary components. The cable must be disassembled, which is simple. The housing separates easily between the layers with a fingernail. Once the console cable circuit board is exposed, cut it to about 4-5 inches long and carefully pull the wires out of the rubber cable cover. Then solder the wires into the pi-zero holes and press everything into place. The pi-zero should fit snugly under a small amount of pressure (snapping in), while the console circuit board snaps easily into its designated area. The USB connector fits perfectly, holding the console circuit board securely. Finally, snap the two pieces of the box together and plug it into a USB port on your computer. A hole is provided for removing or replacing the SD card, but none are available for any other connectors. This design intentionally resembles a USB stick.
With this file you will be able to print Raspberry Pi Zero Console Case with your 3D printer. Click on the button and save the file on your computer to work, edit or customize your design. You can also find more 3D designs for printers on Raspberry Pi Zero Console Case.