Raspberry Pi Zero NES Case
thingiverse
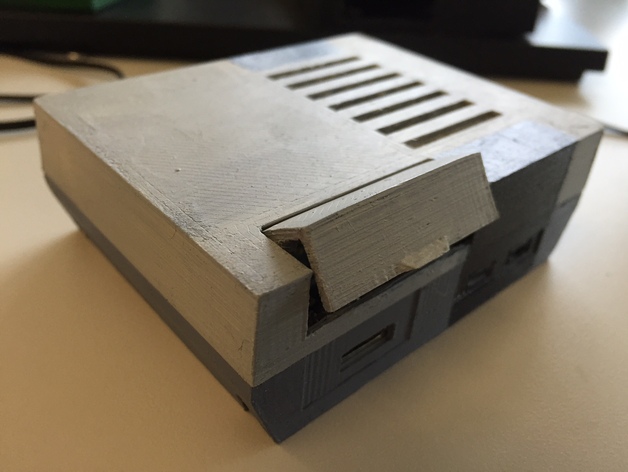
This is my NES case for a Raspberry Pi Zero. I've been refining this design for some time now! Hope you like it! Print Settings Printer Brand: Robo 3D Printer: R1 ABS + PLA Model Rafts: No Supports: No Notes: The top has a rather large bridge to cover where the lid goes, so you might need to use supports. Mine printed without much of an issue. I printed mine at 1 micron resolution with 33% infill, but I don't think it matters... Assembly What You'll Need: 4x - #2X1/4" wood screws to secure the Raspberry Pi Zero to the bottom half of the case. 4x - #4X1/2 wood screws to attach the bottom of the case to the top. A couple small lengths of 1.75mm filament for the hinges on the lid For The Original Version With The Switch: A computer power switch (I salvaged mine from an old computer, but you can also get them online like this one on Amazon) Some super glue to secure the switch and glue filament to lid. Instructions: First attach the lid to the top half of the case by sliding a piece of filament through the hinges on the lid and top of case. Use a small amount of super glue to attach the filament to the lid only (be very careful not to glue the hinges together... I recommend just placing some glue at the very end of the piece of filament in the middle of the lid. If you use the reset button, there are several tutorials on the web on how to attach a reset button to your raspberry pi. You need to either solder pins to the "run" section of the board, or just solder the reset button's wires directly to the board. (I soldered pins to my board so I could easily remove the switch if necessary..) The reset switch will sit in a pocket in the bottom of the case and the reset switch latch should have a small bit of super glue on either side of the latch and placed on the top of the switch to secure it into place. The button should have the right tolerance to be pressed onto the switch and stay on without glue. The board should be screwed down to the bottom side of the print with the #2 screws, and the two halves should be screwed together using the #4 screws.
With this file you will be able to print Raspberry Pi Zero NES Case with your 3D printer. Click on the button and save the file on your computer to work, edit or customize your design. You can also find more 3D designs for printers on Raspberry Pi Zero NES Case.